How to expand the fonts in WordPress
With WordPress you can create your own blog relatively comfortably and quickly. And even more so, the popular open source software has evolved into a solid content management system (CMS) in recent years that is finding more and more followers.
But of course, with the proliferation, the demands of users on such software grow.
The number of available fonts, and above all their customization options are a bit meager in our view, and so surely some people here wish for a little more choice.
The solution is as usual in WordPress in the appropriate plugin.

1. Install Easy Google fonts
1. Install Easy Google fonts
First we install the plugin Easy Google Fonts.
You can do this either in our description via the interface in WordPress, or you can download the plugin separately here and then install it externally.
Go to the backend of your page in the left menu bar to the point: Plugins – Install
See picture: (click to enlarge)
Here you have the option of either uploading plugins that can not be found via the search directly from your hard disk, or simply using the search function to simply search for the plugin.
Simply enter: Easy Google Fonts in the search field, and the desired plug-in will appear in the selection, where you can then simply install it via the corresponding button and finally activate it.
See picture: (click to enlarge)
First we install the plugin Easy Google Fonts.
You can do this either in our description via the interface in WordPress, or you can download the plugin separately here and then install it externally.
Go to the backend of your page in the left menu bar to the point: Plugins – Install
See picture:
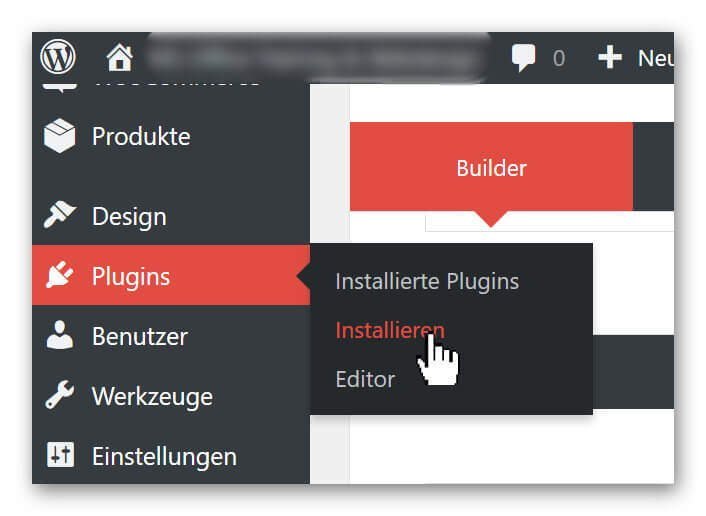
Here you have the option of either uploading plugins that can not be found via the search directly from your hard disk, or simply using the search function to simply search for the plugin.
Simply enter: Easy Google Fonts in the search field, and the desired plug-in will appear in the selection, where you can then simply install it via the corresponding button and finally activate it.
See picture:

2. Set Font Control Name
2. Set Font Control Name
Since you have the possibility to create several font groups with Easy Google fonts, we first have to define a group and name it after the installation.
To do this, go to the back of your page again in the menu bar on the left: Settings – Google Fonts
See picture: (click to enlarge)
And assign a name under the tab: Edit Font Controls of the font group.
See picture: (click to enlarge)
Now we have created the basis to edit our font group freely.
Since you have the possibility to create several font groups with Easy Google fonts, we first have to define a group and name it after the installation.
To do this, go to the back of your page again in the menu bar on the left: Settings – Google Fonts
See picture:
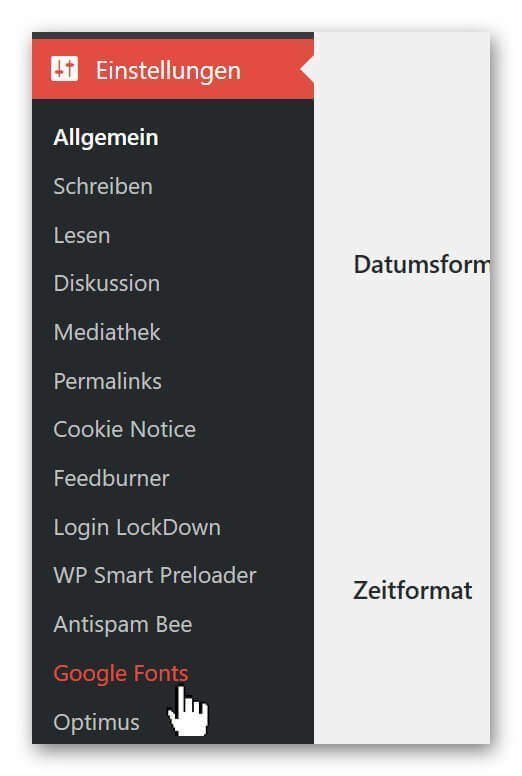
And assign a name under the tab: Edit Font Controls of the font group.
See picture:

3. Edit and assign fonts
3. Edit and assign fonts
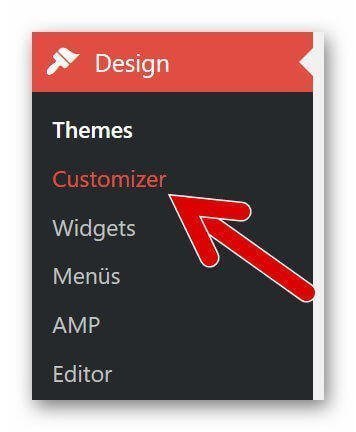
In order to be able to assign and edit our fonts to the individual types of headings (H1 – H6) as well as to the paragraphs, we have to select again in the backend of our page in the left menu bar under: Design – Customizer.
See picture: (click to enlarge)
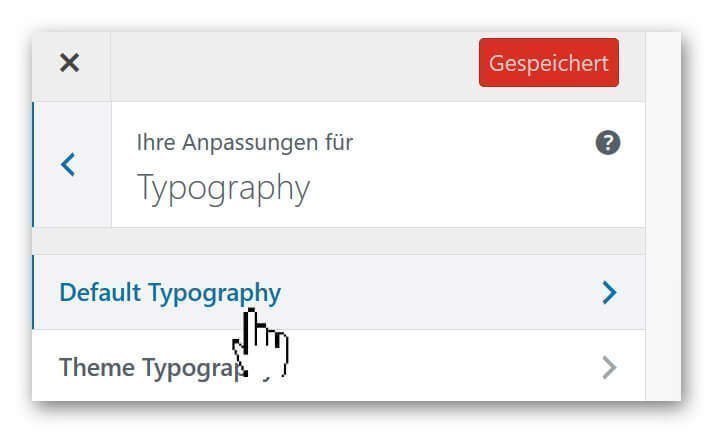
There you go under: Typography on Default Typography
See picture (click to enlarge)
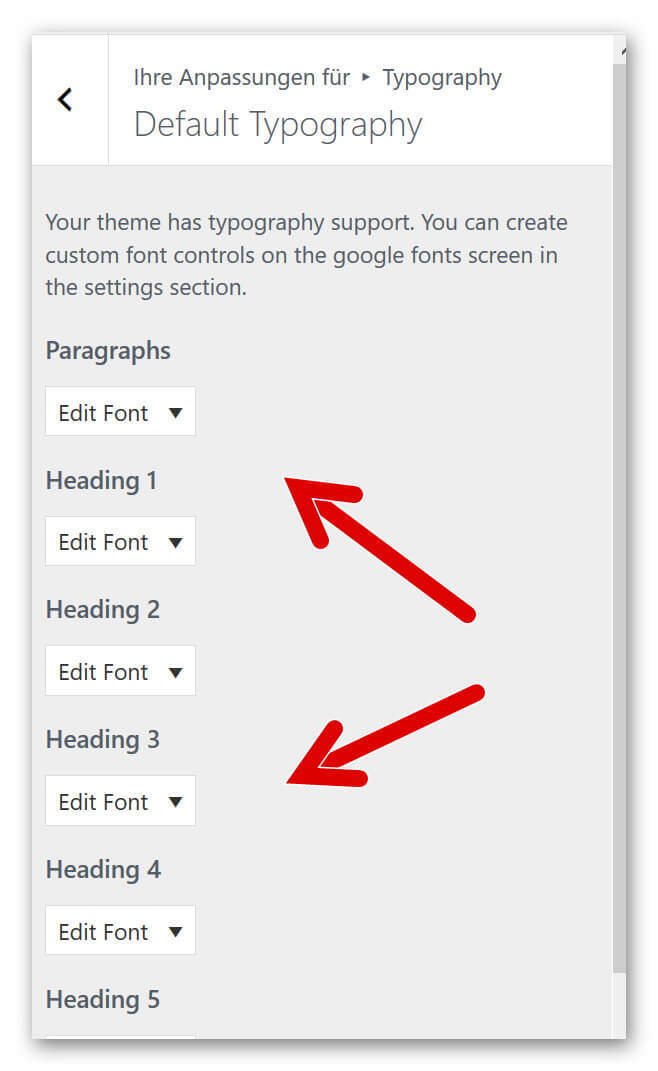
and then you are right in the settings area of Easy Google Fonts where all available header types and other fonts are displayed.
See picture (click to enlarge)
In order to be able to assign and edit our fonts to the individual types of headings (H1 – H6) as well as to the paragraphs, we have to select again in the backend of our page in the left menu bar under: Design – Customizer.
See picture:
There you go under: Typography on Default Typography
See picture:

and then you are right in the settings area of Easy Google Fonts where all available header types and other fonts are displayed.
See picture:
4. Adjust size, colors and distances
4. Adjust size, colors and distances
There are hardly any options that you will miss with this really fantastic plugin.
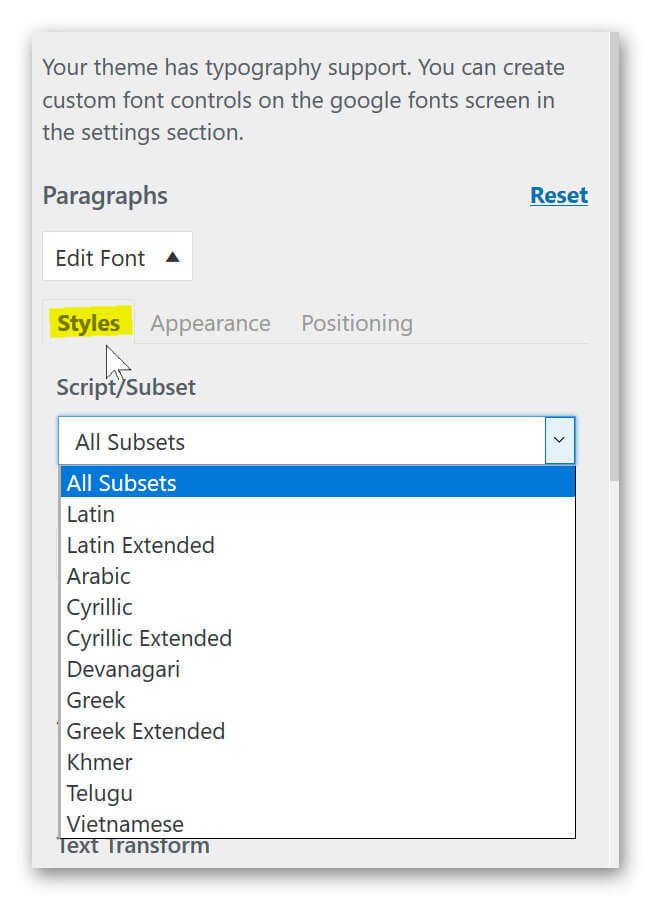
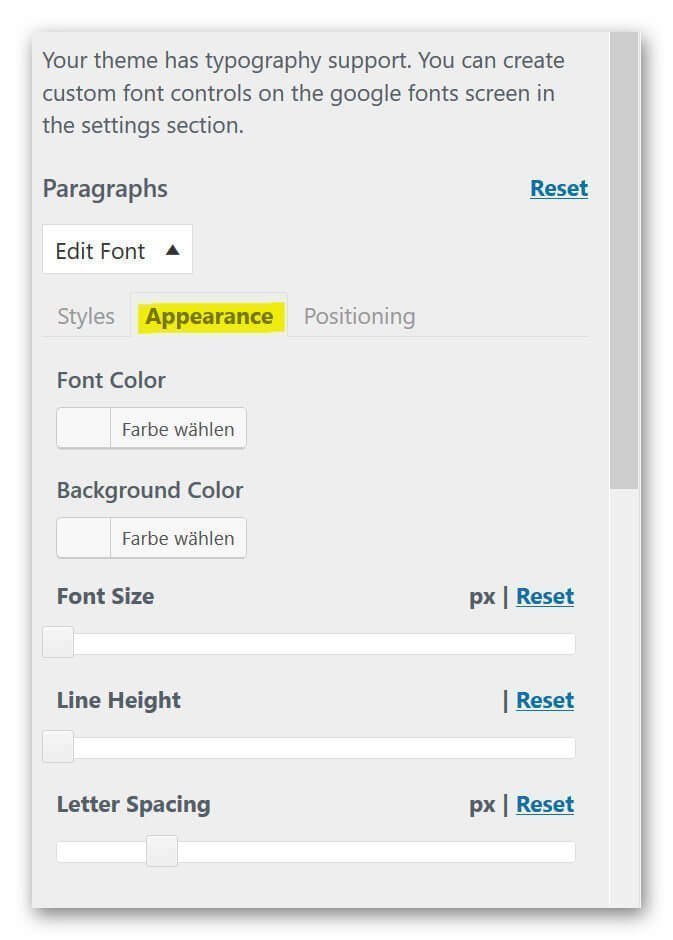
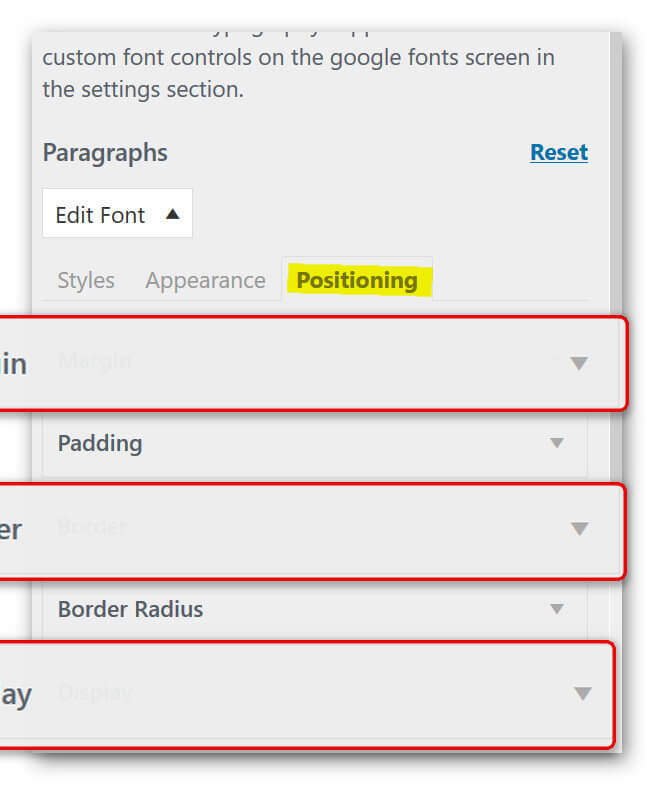
Not only do we have the ability to customize the font (for example, Times New Roman, Antic Slab, etc.), but we can also set the color, spacing, height, positioning, and more for each type of font.
See picture: (click to enlarge)
Popular Posts:
Integrate and use ChatGPT in Excel – is that possible?
ChatGPT is more than just a simple chatbot. Learn how it can revolutionize how you work with Excel by translating formulas, creating VBA macros, and even promising future integration with Office.
Create Out of Office Notice in Outlook
To create an Out of Office message in Microsoft Outlook - Office 365, and start relaxing on vacation
The best backup solutions for your data
Keep your data safe and secure! Discover our best backup solutions for your valuable information now. Because safety is the be-all and end-all - and we have the perfect tips.
Internet Addiction – A serious look at a growing problem
Internet addiction is just as serious an illness as alcohol or drug addiction. Just that this is a mental illness. In this article we want to go into the phenomenon in more detail and provide assistance.
Main keyboard shortcuts in Windows 10/11
Entdecken Sie die wichtigsten Shortcuts in Windows 11, um Ihre Produktivität zu steigern. Von allgemeinen Befehlen bis hin zu spezifischen Fenster-Management- und System-Shortcuts, lernen Sie, wie Sie mit diesen Tastenkombinationen effizienter arbeiten können.
Encrypt USB stick – These options are available
Protecting sensitive data is essential. Encrypting USB sticks provides an extra layer of security. Whether it's built-in software, operating system features, third-party software, or hardware encryption, there are numerous options.

