Header and footer in Word – First page different in Word
Would you like to create your own letter template or scientific work in Word? Then you really can’t avoid headers and footers in Word or a dynamic table of contents. Because these building blocks not only create structure in your Word document, but also give the whole thing a more professional look.
In this short tutorial we would like to describe how you can insert and design headers in Word and footers in Word. We will also not ignore the possibility of using the header or footer of the first page differently in Word. For example, if you want to create a business letter template in Word, your logo does not have to be in the header on every page, but is usually only on the first page.
Header and footer in Word – First page different in Word
Would you like to create your own letter template or scientific work in Word? Then you really can’t avoid headers and footers in Word or a dynamic table of contents. Because these building blocks not only create structure in your Word document, but also give the whole thing a more professional look.

In this short tutorial we would like to describe how you can insert and design headers in Word and footers in Word. We will also not ignore the possibility of using the header or footer of the first page differently in Word. For example, if you want to create a business letter template in Word, your logo does not have to be in the header on every page, but is usually only on the first page.
Insert Header in Word
Insert Header in Word
A header is an area at the top of each page of your document that contains information such as the document’s title, author, page number, or other relevant information. With Word, you can easily create a header that appears on every page of your document.
Here are the steps to create a header in Word:
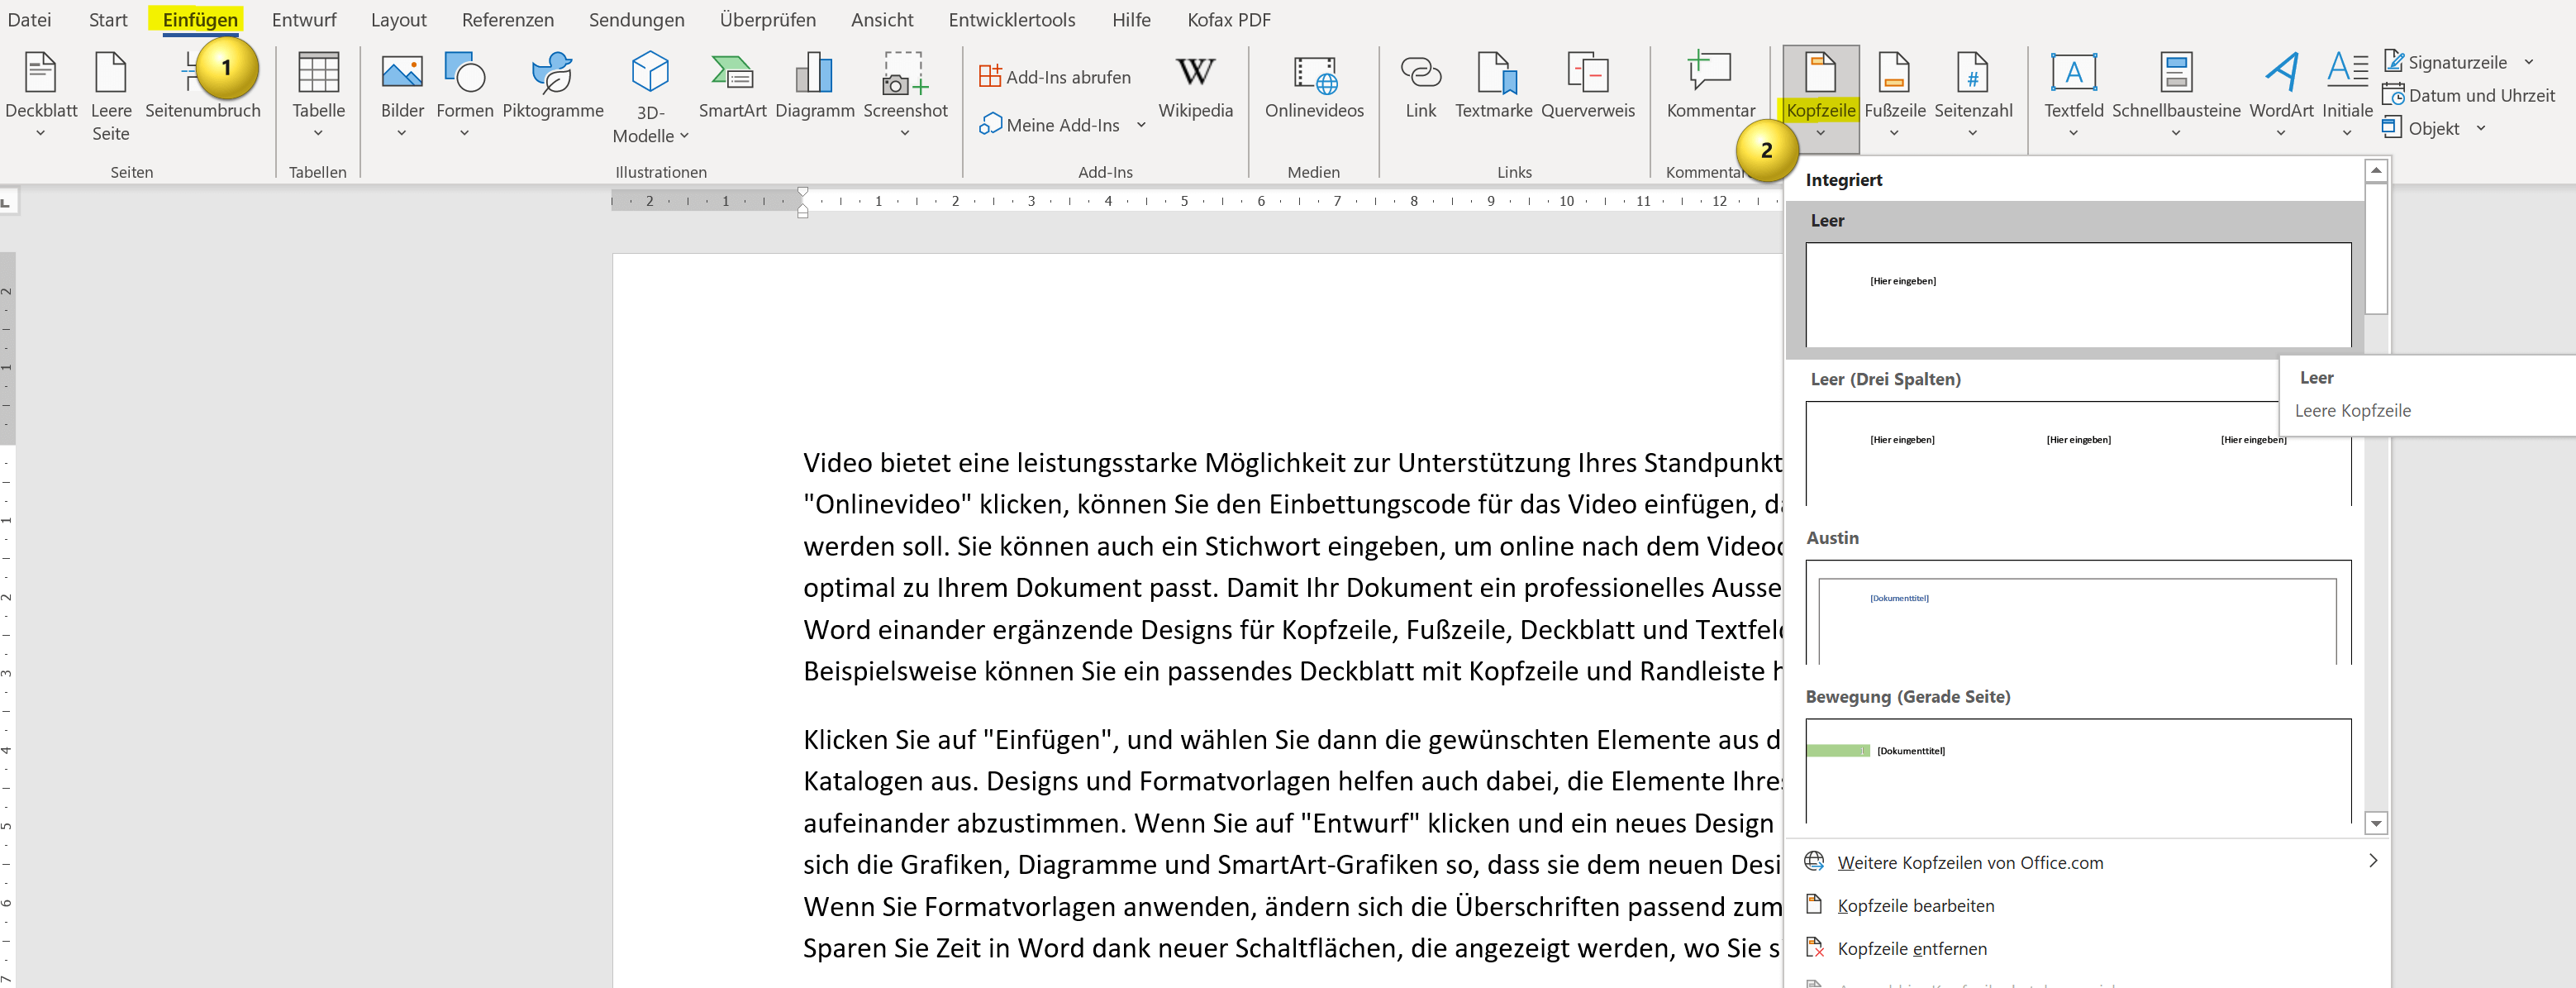
- Click on the “Insert” tab at the top of the menu bar.
- Click the Header button in the Header & Footer area. A list of pre-designed header layouts will appear.
- Select one of the default headers that matches your document type. You can also click “Edit Header” to create your own header.
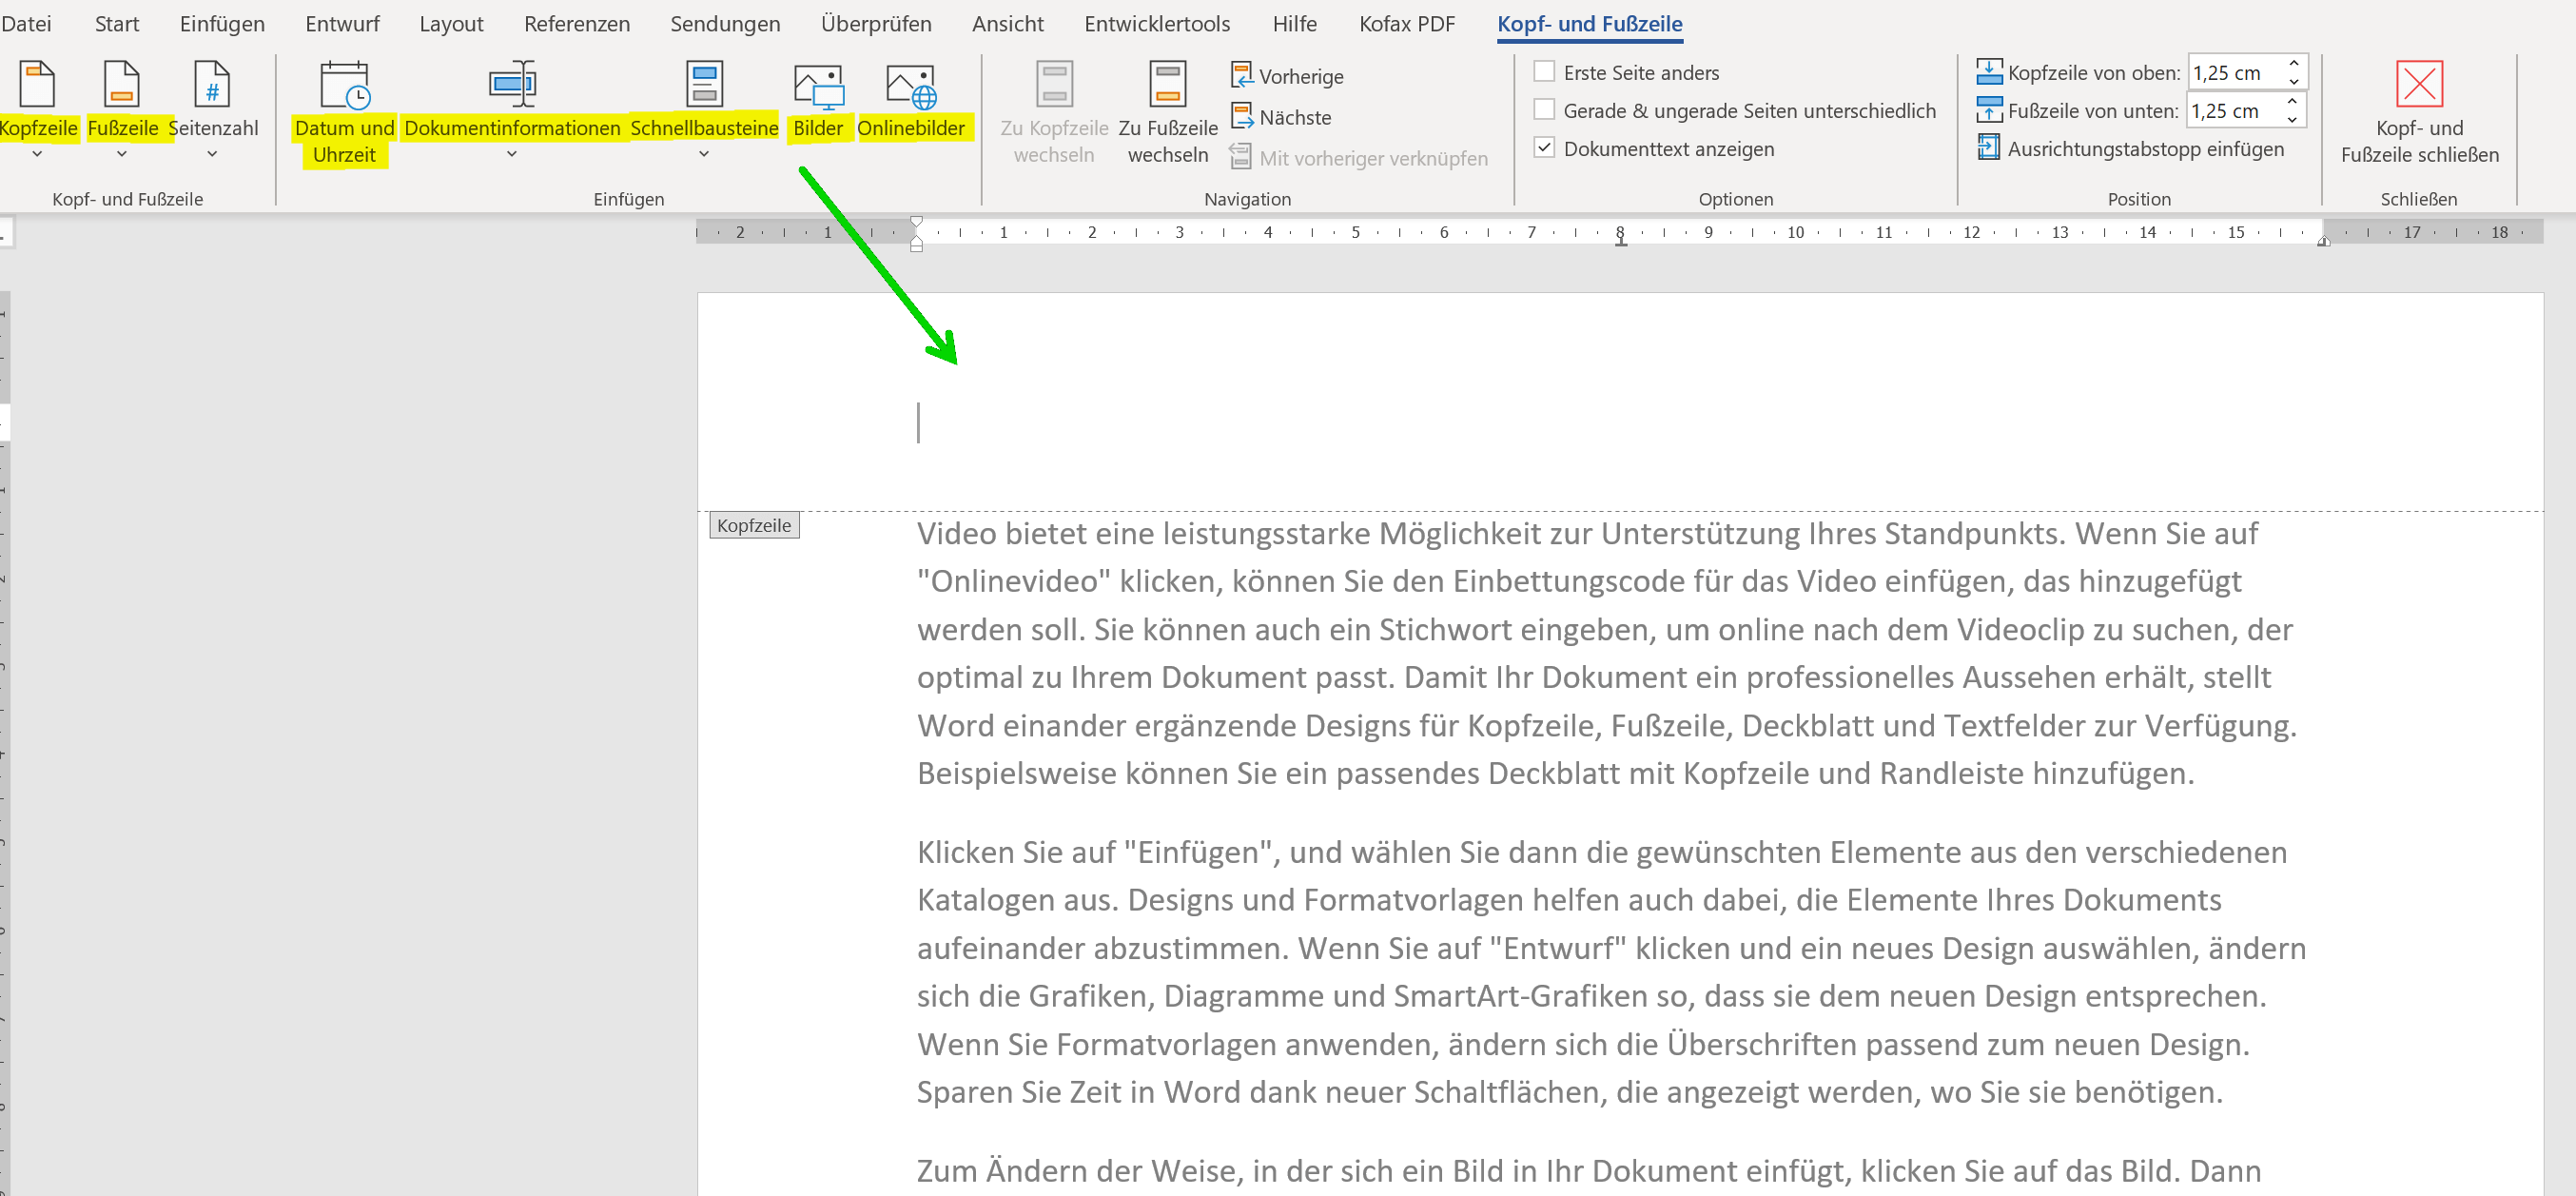
- If you selected “Edit Header“, the Header area will appear where you can enter your text. You can format the text, insert images and add other elements.
- When you’re done, click “Close” on the header toolbar to return to normal view.
Your header will now appear on every page of your document. You can edit or delete the header at any time by clicking Header again and selecting Edit Header or Remove Header.
Tip: By the way, you can get to the header in Word even faster if you simply double-click in the upper area of your Word document.
see fig. (click to enlarge)
Das sind die wichtigsten grundlegenden Schritte, um eine Kopfzeile in Word zu erstellen, und individuell anzupassen. Wir denken, das Ihnen das sicherlich weiterhilft.
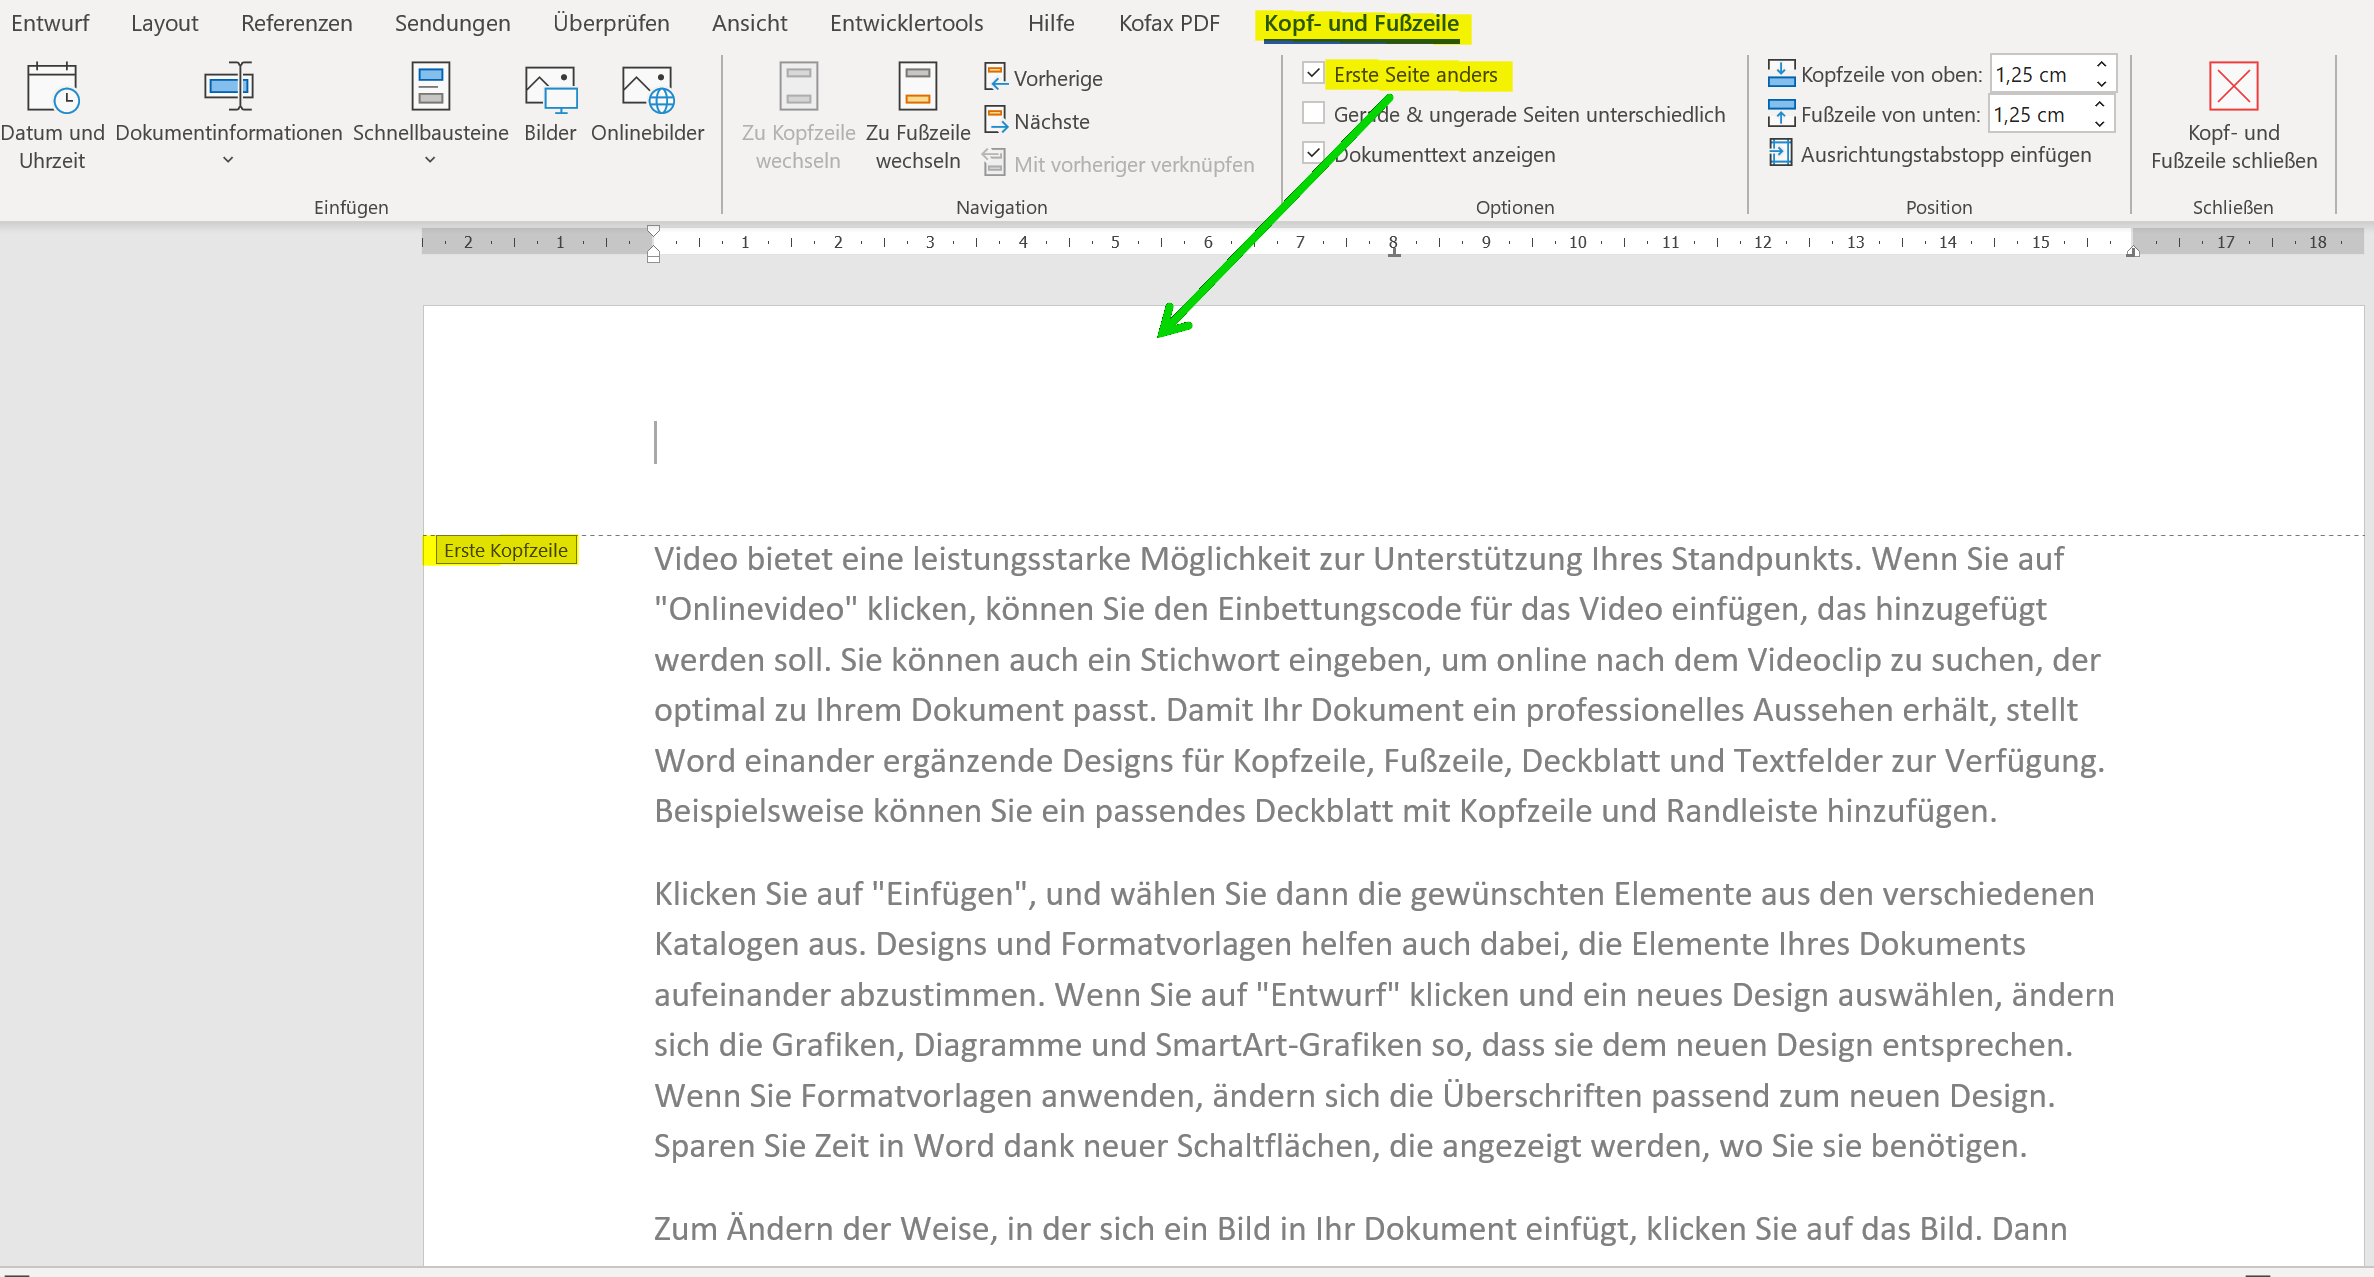
If you want your header to be different on each page of your document (e.g. different on the first page than on the following pages), there are two options:
- “Different first page“: With this, the header on the first page is designed differently than on the following pages. To enable this option, click Header, then click Header and Footer Options. Then select “Different first page“.
- “Different Even and Odd Pages“: This makes the header on even pages different than on odd pages. To enable this option, click Header, then click Header and Footer Options. Then select “Different even and odd sides“.
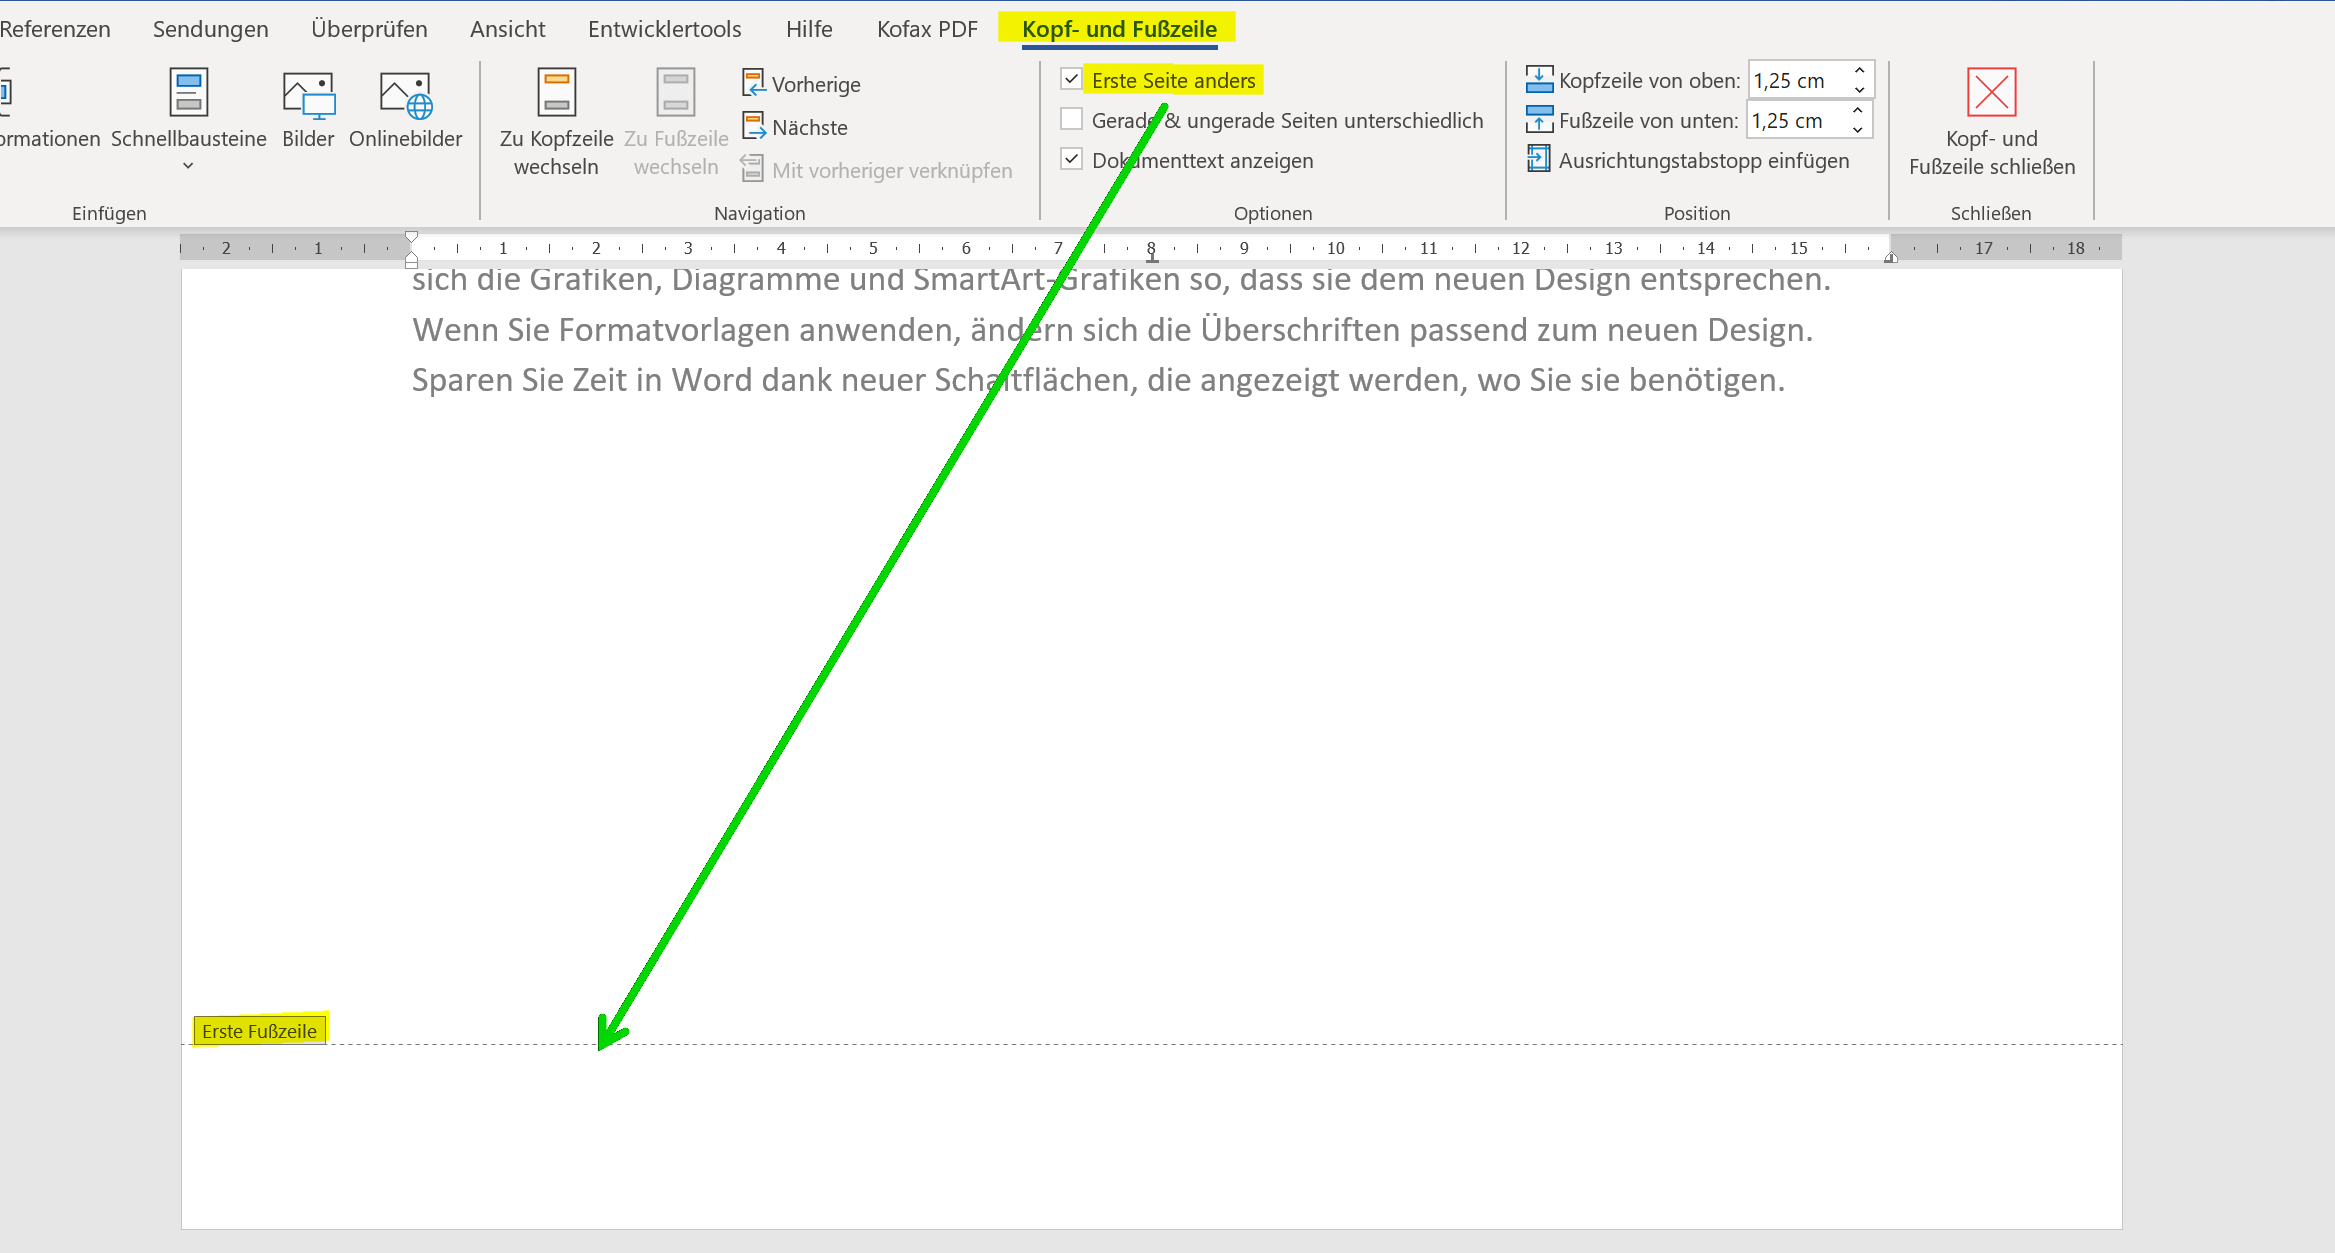
Tip: The footer works just like the header in Word. The shortest way is to simply double-click in the lower area of a page. And the option to design the first page in Word differently is also available here.
see fig. (click to enlarge)
These are the top basic steps to create and customize a header in Word. We think this will definitely help you.
Popular Posts:
What to do if the Windows license expires?
What exactly happens when the Windows license expires soon? Do I have to buy a new license? And how can the message be switched off so that it never appears again?
The most important tips for Excel
These 10 tips for Microsoft Excel 2016/2019 with questions that many users ask every day are guaranteed to help you and save a lot of time.
More fonts in Word through Google Fonts
You can find out how to expand the font selection in Word with just a few steps and above all free in our article.
Data protection settings in Windows 10
With Windows 10, Microsoft's operating system has not only become better, but also more curious. Read which data protection settings are important.
Move pages and insert new ones in word
You probably also know the situation that you are sitting on a very long document, and in the middle of it falls on the actually between page 2 and page 3 still a page in between must.
The Sreference and the Wreference in Excel
Microsoft Excel: How to get S-reference and W-reference purposefully data out of a source.


