Create email templates in Outlook
Anyone who often writes emails with the same content will eventually get annoyed by writing the same text passages over and over again. Just as you can work with multiple signatures in Outlook to speed up and standardize these processes, you can of course also create and save e-mail templates and e-mail forms in Outlook and call them up as needed.
In our short tutorial we would like to describe how you can create and save your own e-mail templates for a wide variety of application scenarios without much effort.
1. Create, save and open simple email templates
Creating standard e-mail templates in Outlook is basically very easy.
- First compose your e-mail as you would like to use it later as a template.
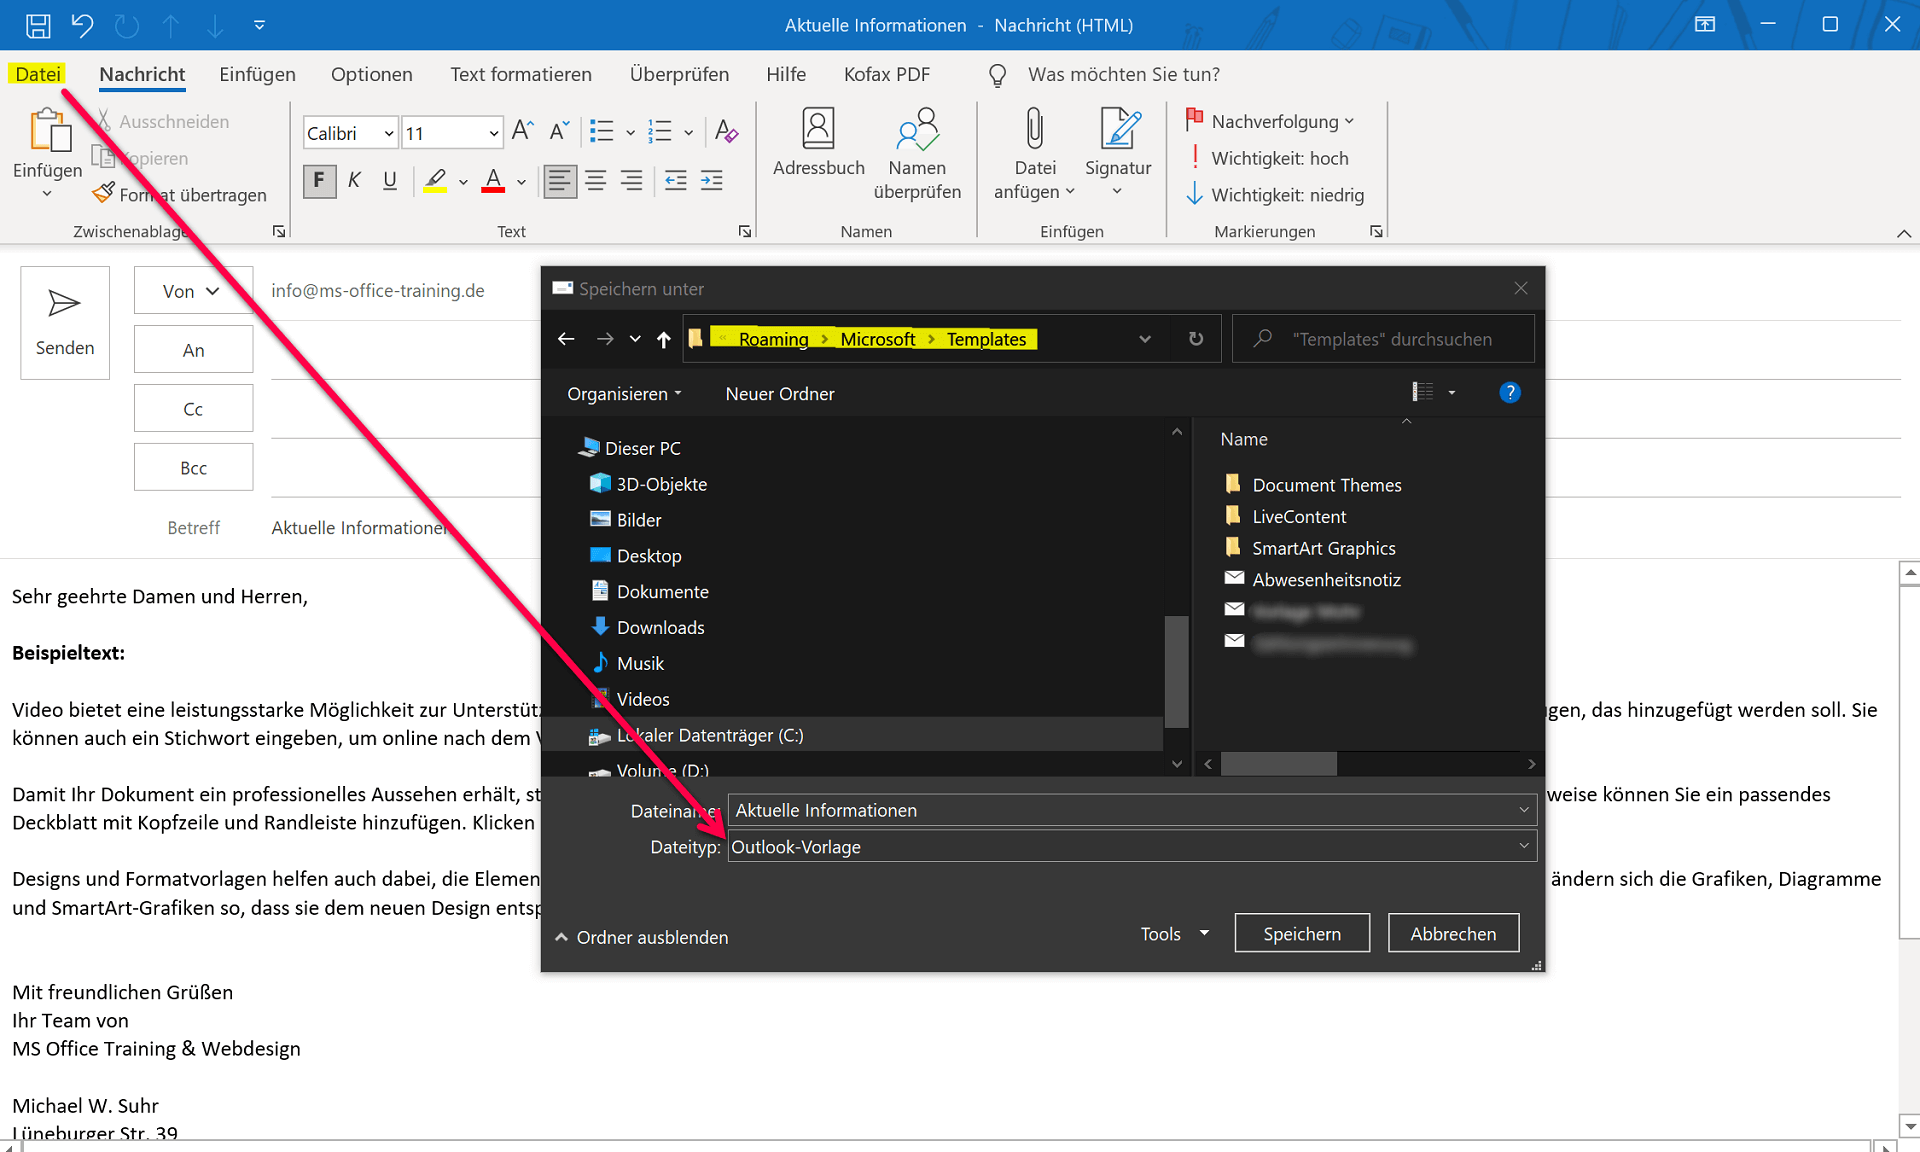
- Then go to the menu: File – Save as
- Select the file format: Outlook template and save your template
As soon as you select the Outlook template file format, you will be directed to the default storage location. All the templates you have created are saved there. The default location for email templates in Outlook is: C:\Users\YOURNAME\AppData\Roaming\Microsoft\Templates
See fig. (click to enlarge)
You can also make templates a little more professional, for example by copying the content of a letter template created in Word with form fields and pasting it into your Outlook template. The form fields remain completely intact, and your mail then creates the impression of a real letter.
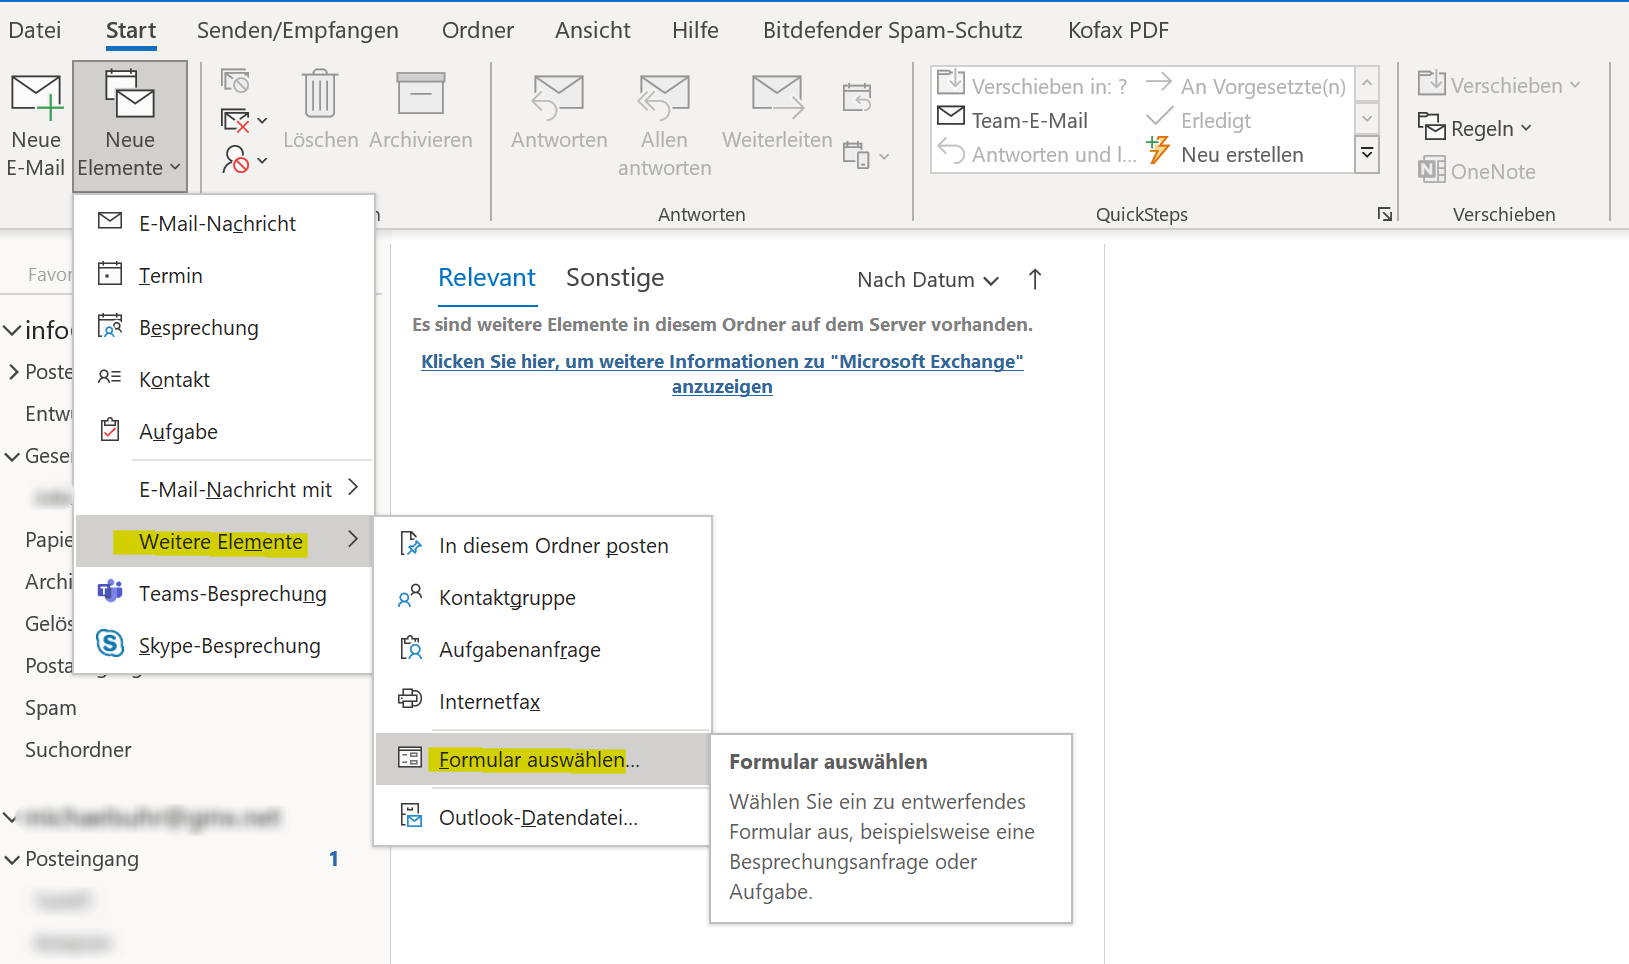
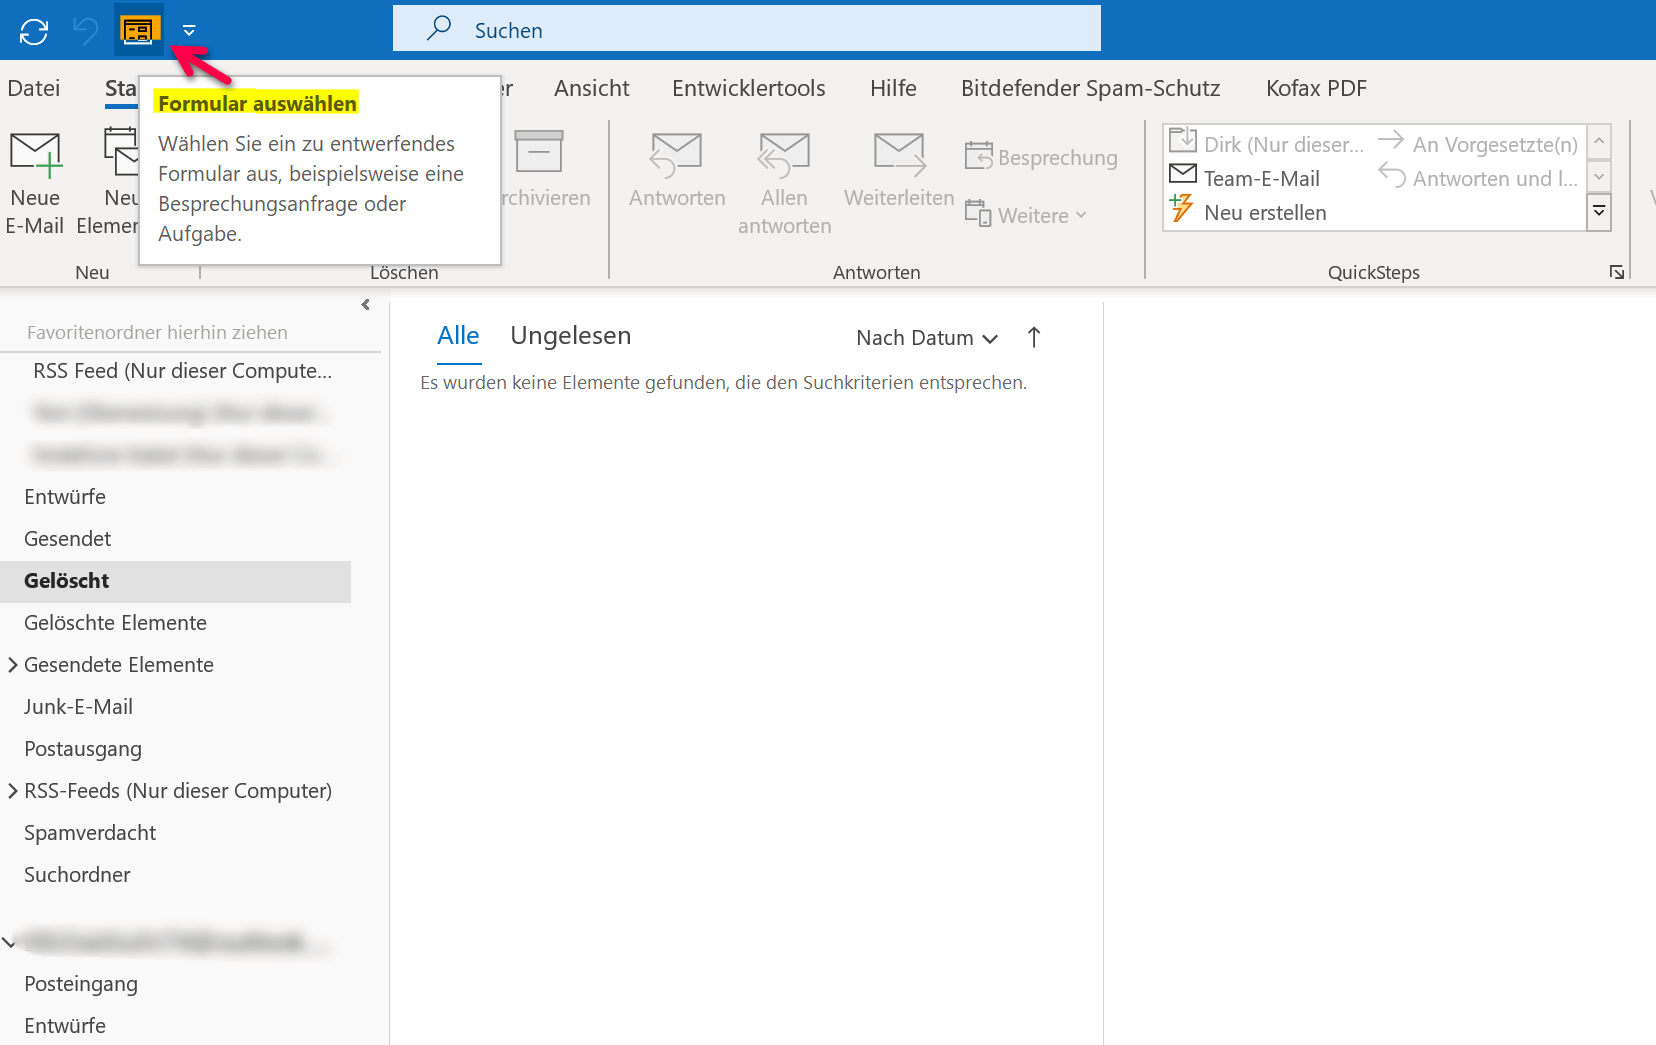
In the picture below we have chosen the content of our business letter template and simply saved it as an Outlook template. Once you have created a template, open it in Outlook as follows:
Start tab – New items – Other items – Select form
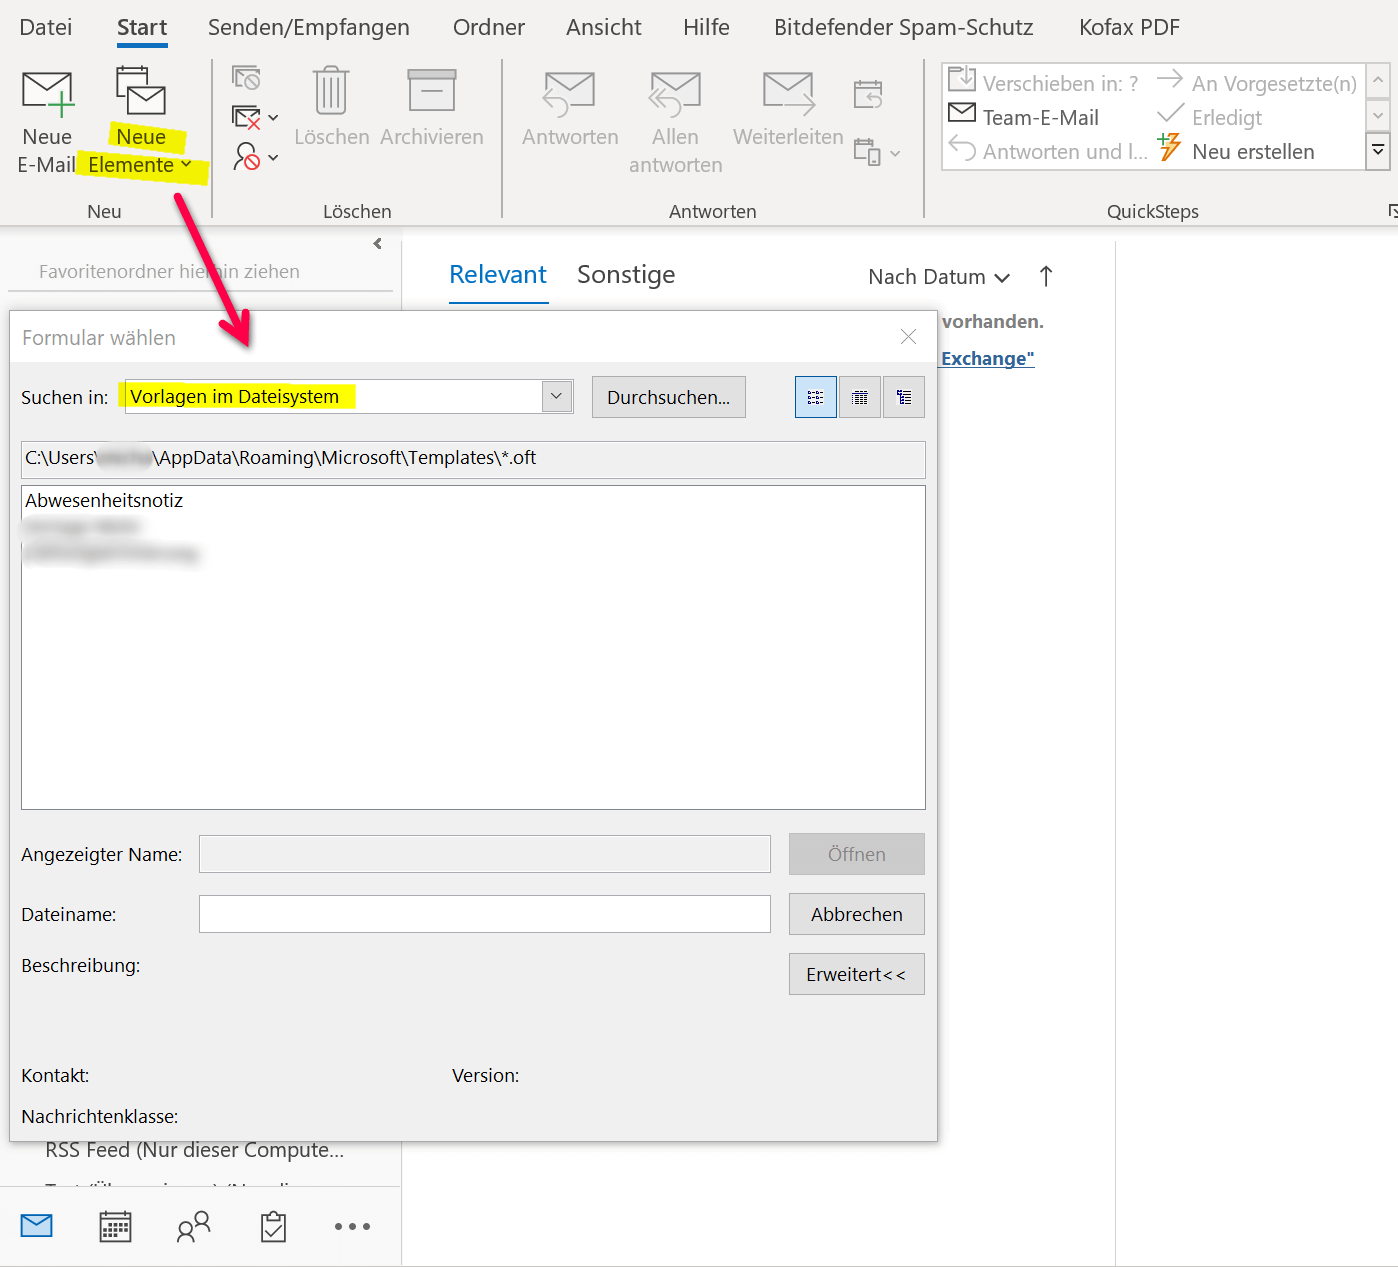
In the next dialog box, select: Templates in the file system. This is where your templates are stored.
See fig. (click to enlarge)

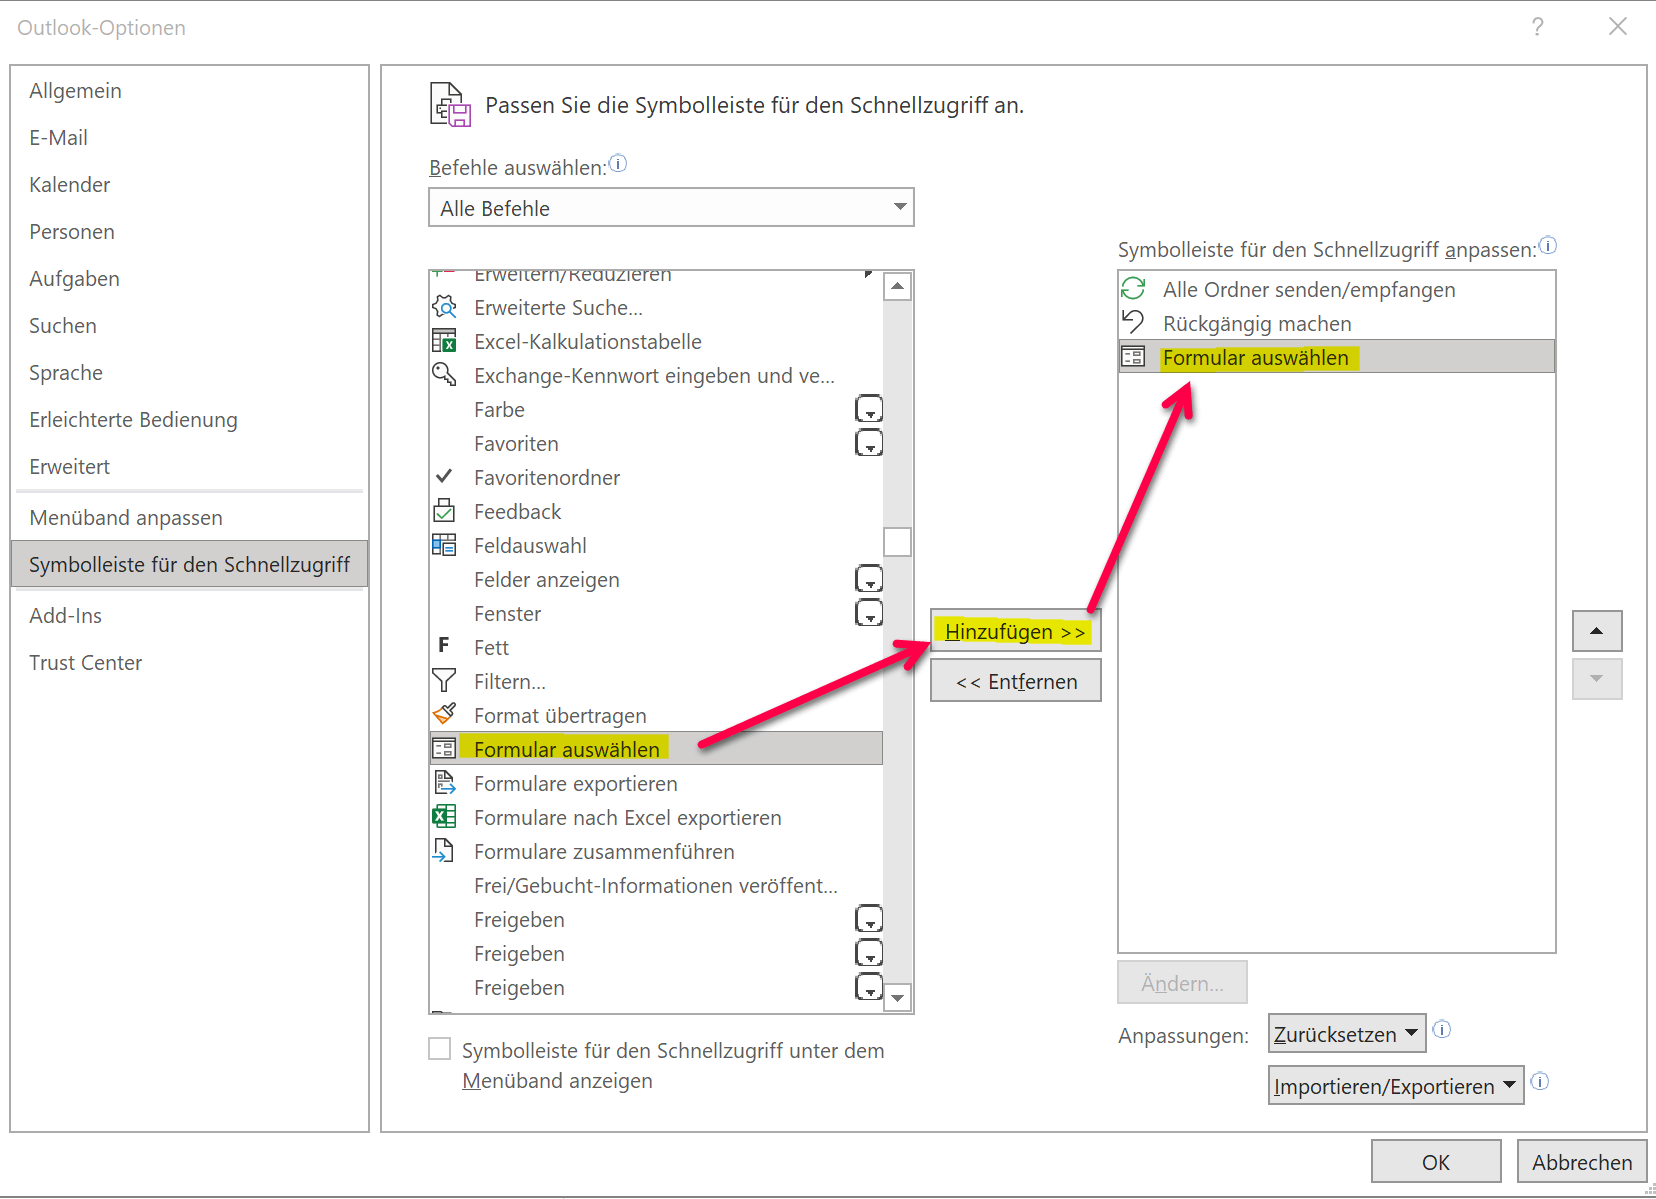
You can also make access to the templates you have created a little easier by customizing your quick launch bar in Outlook.
To do this, go to the File – Options – Quick Access Toolbar tab, select the Select form item and add it to your quick launch bar.
See fig. (click to enlarge)
As you have seen, the whole thing is actually not that difficult and can make daily work with frequently recurring e-mails much easier.
1. Create, save and open simple email templates
Creating standard e-mail templates in Outlook is basically very easy.
- First compose your e-mail as you would like to use it later as a template.
- Then go to the menu: File – Save as
- Select the file format: Outlook template and save your template
As soon as you select the Outlook template file format, you will be directed to the default storage location. All the templates you have created are saved there. The default location for email templates in Outlook is: C:\Users\YOURNAME\AppData\Roaming\Microsoft\Templates
See fig. (click to enlarge)
You can also make templates a little more professional, for example by copying the content of a letter template created in Word with form fields and pasting it into your Outlook template. The form fields remain completely intact, and your mail then creates the impression of a real letter.
In the picture below we have chosen the content of our business letter template and simply saved it as an Outlook template. Once you have created a template, open it in Outlook as follows:
Start tab – New items – Other items – Select form
In the next dialog box, select: Templates in the file system. This is where your templates are stored.
See fig. (click to enlarge)
You can also make access to the templates you have created a little easier by customizing your quick launch bar in Outlook.
To do this, go to the File – Options – Quick Access Toolbar tab, select the Select form item and add it to your quick launch bar.
See fig. (click to enlarge)
As you have seen, the whole thing is actually not that difficult and can make daily work with frequently recurring e-mails much easier.
Popular Posts:

The best backup solutions for your data
Keep your data safe and secure! Discover our best backup solutions for your valuable information now. Because safety is the be-all and end-all - and we have the perfect tips.

Internet Addiction – A serious look at a growing problem
Internet addiction is just as serious an illness as alcohol or drug addiction. Just that this is a mental illness. In this article we want to go into the phenomenon in more detail and provide assistance.

Main keyboard shortcuts in Windows 10/11
Entdecken Sie die wichtigsten Shortcuts in Windows 11, um Ihre Produktivität zu steigern. Von allgemeinen Befehlen bis hin zu spezifischen Fenster-Management- und System-Shortcuts, lernen Sie, wie Sie mit diesen Tastenkombinationen effizienter arbeiten können.

Encrypt USB stick – These options are available
Protecting sensitive data is essential. Encrypting USB sticks provides an extra layer of security. Whether it's built-in software, operating system features, third-party software, or hardware encryption, there are numerous options.

With the webcam to your dream job: Preparation for the video job interview!
Streamline your video interview with our tips on technique, setting, dress, body language and preparation. It's not quite success from the sofa, but this is where you can prove your professionalism.

IT security: The deceptive appearance of digital security
In a digitized world, IT security is an important factor. But technology alone is not enough. A holistic strategy is needed that also takes into account the human component.
Offers 2024: Word & Excel Templates


Popular Posts:
The best backup solutions for your data
Keep your data safe and secure! Discover our best backup solutions for your valuable information now. Because safety is the be-all and end-all - and we have the perfect tips.
Internet Addiction – A serious look at a growing problem
Internet addiction is just as serious an illness as alcohol or drug addiction. Just that this is a mental illness. In this article we want to go into the phenomenon in more detail and provide assistance.
Main keyboard shortcuts in Windows 10/11
Entdecken Sie die wichtigsten Shortcuts in Windows 11, um Ihre Produktivität zu steigern. Von allgemeinen Befehlen bis hin zu spezifischen Fenster-Management- und System-Shortcuts, lernen Sie, wie Sie mit diesen Tastenkombinationen effizienter arbeiten können.
Encrypt USB stick – These options are available
Protecting sensitive data is essential. Encrypting USB sticks provides an extra layer of security. Whether it's built-in software, operating system features, third-party software, or hardware encryption, there are numerous options.
With the webcam to your dream job: Preparation for the video job interview!
Streamline your video interview with our tips on technique, setting, dress, body language and preparation. It's not quite success from the sofa, but this is where you can prove your professionalism.
IT security: The deceptive appearance of digital security
In a digitized world, IT security is an important factor. But technology alone is not enough. A holistic strategy is needed that also takes into account the human component.
Offers 2024: Word & Excel Templates