How to expand the fonts in WordPress
With WordPress you can create your own blog relatively comfortably and quickly. And even more so, the popular open source software has evolved into a solid content management system (CMS) in recent years that is finding more and more followers.
But of course, with the proliferation, the demands of users on such software grow.
The number of available fonts, and above all their customization options are a bit meager in our view, and so surely some people here wish for a little more choice.
The solution is as usual in WordPress in the appropriate plugin.
1. Install Easy Google fonts
1. Install Easy Google fonts
First we install the plugin Easy Google Fonts.
You can do this either in our description via the interface in WordPress, or you can download the plugin separately here and then install it externally.
Go to the backend of your page in the left menu bar to the point: Plugins – Install
See picture: (click to enlarge)
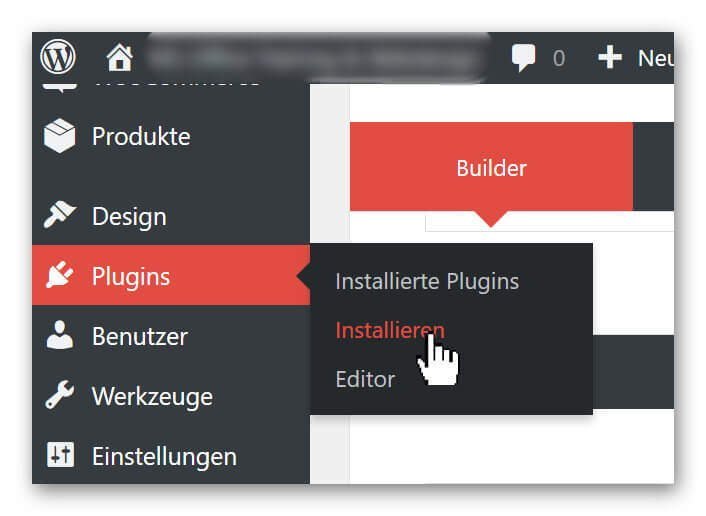
Here you have the option of either uploading plugins that can not be found via the search directly from your hard disk, or simply using the search function to simply search for the plugin.
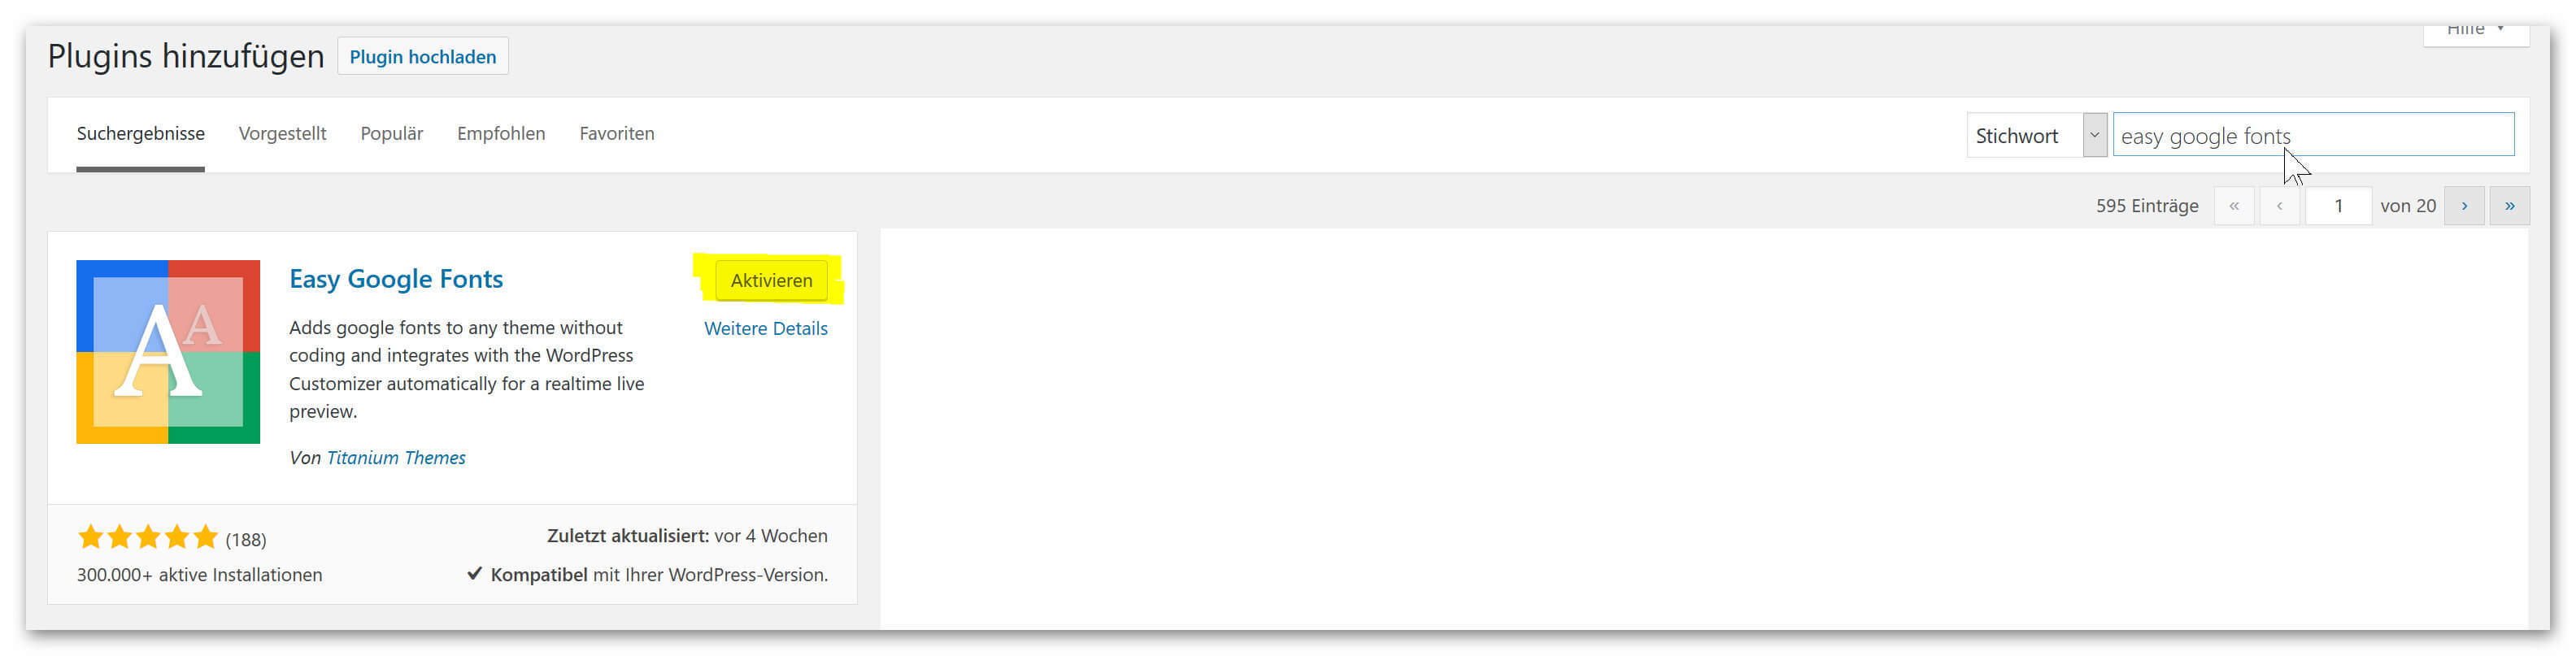
Simply enter: Easy Google Fonts in the search field, and the desired plug-in will appear in the selection, where you can then simply install it via the corresponding button and finally activate it.
See picture: (click to enlarge)

First we install the plugin Easy Google Fonts.
You can do this either in our description via the interface in WordPress, or you can download the plugin separately here and then install it externally.
Go to the backend of your page in the left menu bar to the point: Plugins – Install
See picture:

Here you have the option of either uploading plugins that can not be found via the search directly from your hard disk, or simply using the search function to simply search for the plugin.
Simply enter: Easy Google Fonts in the search field, and the desired plug-in will appear in the selection, where you can then simply install it via the corresponding button and finally activate it.
See picture:

2. Set Font Control Name
2. Set Font Control Name
Since you have the possibility to create several font groups with Easy Google fonts, we first have to define a group and name it after the installation.
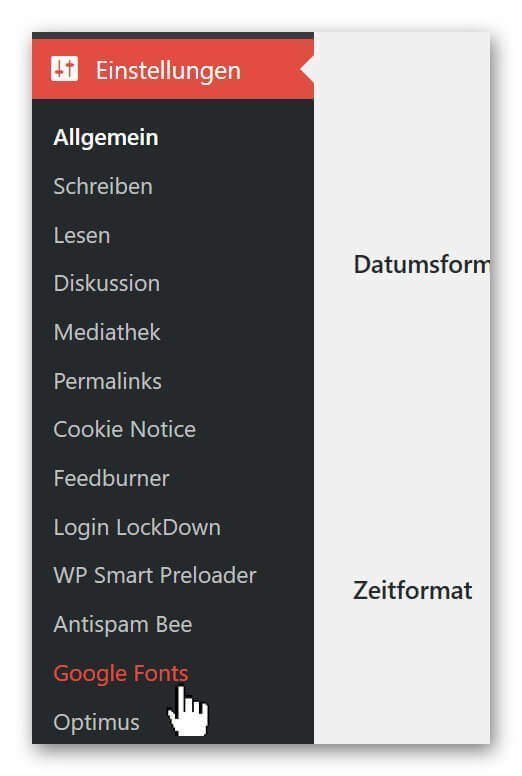
To do this, go to the back of your page again in the menu bar on the left: Settings – Google Fonts
See picture: (click to enlarge)
And assign a name under the tab: Edit Font Controls of the font group.
See picture: (click to enlarge)

Now we have created the basis to edit our font group freely.
Since you have the possibility to create several font groups with Easy Google fonts, we first have to define a group and name it after the installation.
To do this, go to the back of your page again in the menu bar on the left: Settings – Google Fonts
See picture:
And assign a name under the tab: Edit Font Controls of the font group.
See picture:

3. Edit and assign fonts
3. Edit and assign fonts
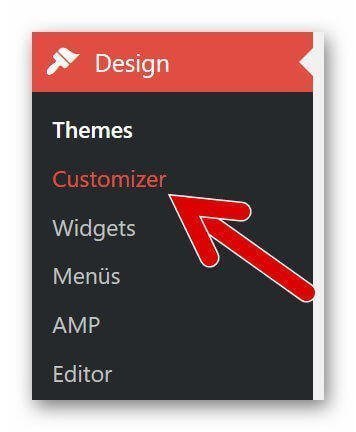
In order to be able to assign and edit our fonts to the individual types of headings (H1 – H6) as well as to the paragraphs, we have to select again in the backend of our page in the left menu bar under: Design – Customizer.
See picture: (click to enlarge)
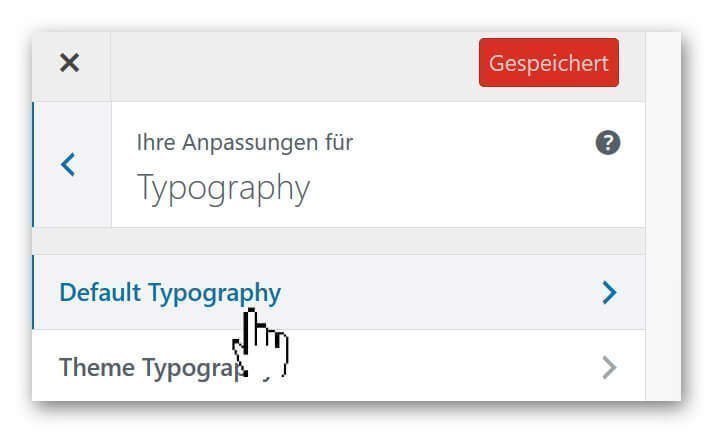
There you go under: Typography on Default Typography
See picture (click to enlarge)

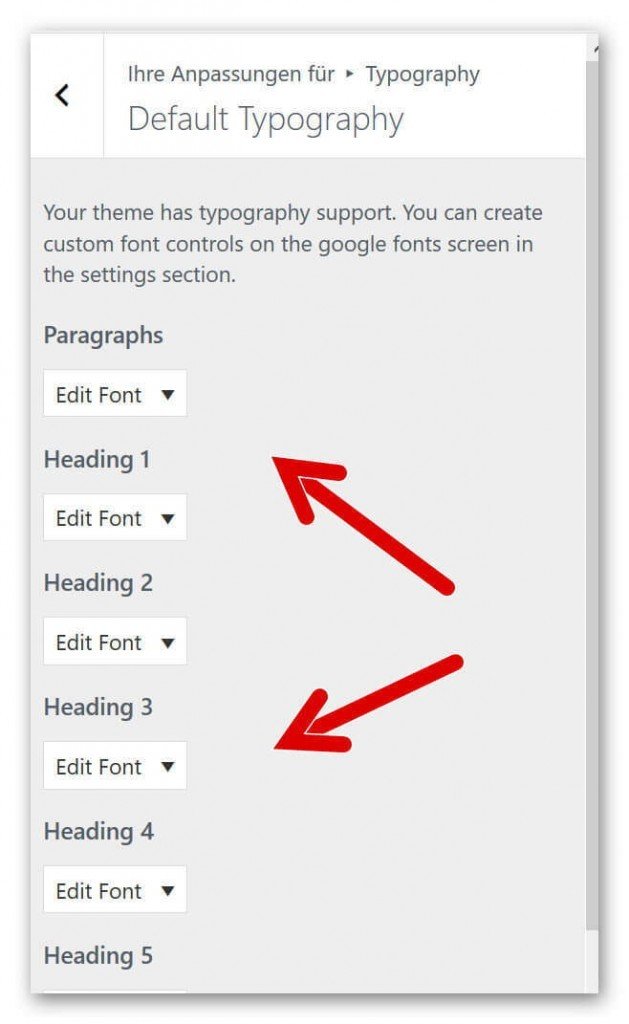
and then you are right in the settings area of Easy Google Fonts where all available header types and other fonts are displayed.
See picture (click to enlarge)
In order to be able to assign and edit our fonts to the individual types of headings (H1 – H6) as well as to the paragraphs, we have to select again in the backend of our page in the left menu bar under: Design – Customizer.
See picture:
There you go under: Typography on Default Typography
See picture:


and then you are right in the settings area of Easy Google Fonts where all available header types and other fonts are displayed.
See picture:

4. Adjust size, colors and distances
4. Adjust size, colors and distances
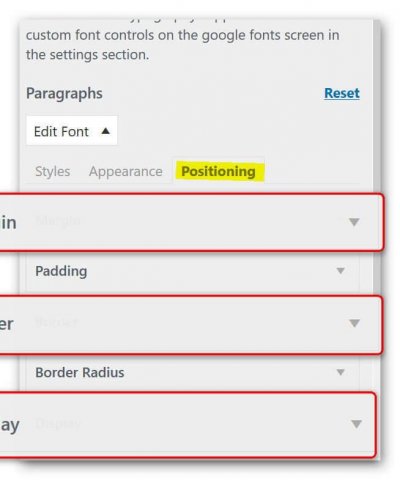
There are hardly any options that you will miss with this really fantastic plugin.
Not only do we have the ability to customize the font (for example, Times New Roman, Antic Slab, etc.), but we can also set the color, spacing, height, positioning, and more for each type of font.
See picture: (click to enlarge)
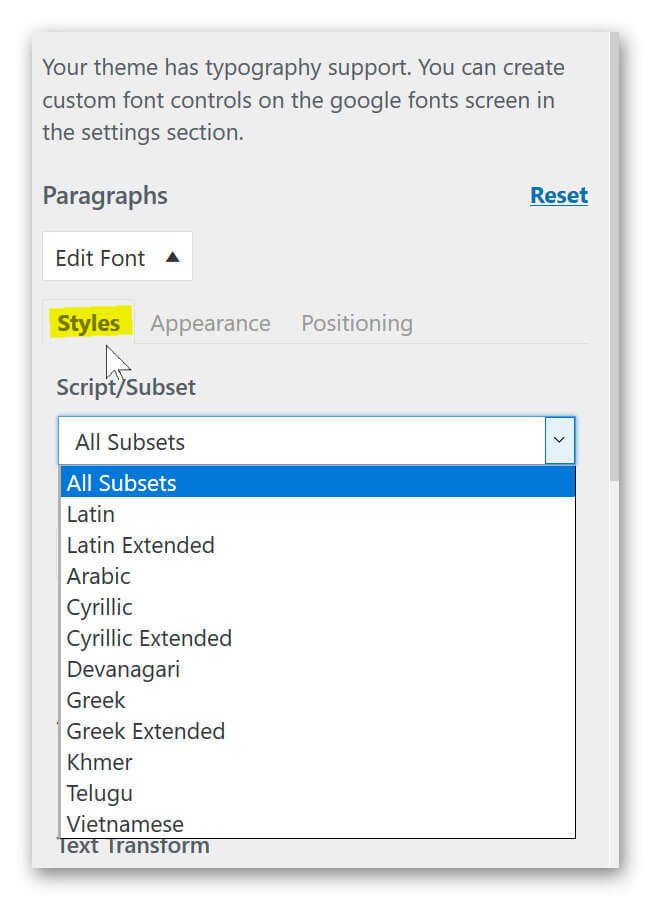
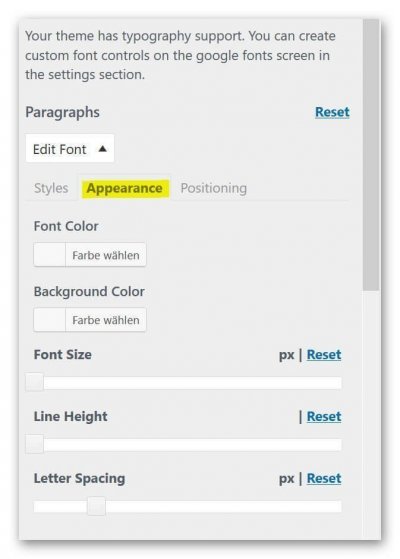
There are hardly any options that you will miss with this really fantastic plugin.
Not only do we have the ability to customize the font (for example, Times New Roman, Antic Slab, etc.), but we can also set the color, spacing, height, positioning, and more for each type of font.
See picture:


Popular Posts:

Wi-Fi 7 vs. Wi-Fi 6: A quantum leap for your home network?
Wi-Fi 7 is here! Learn all about its advantages over Wi-Fi 6: extreme speed, minimal latency, and MLO. We'll explain who should upgrade now and what you can do with your ISP router. Your guide to the Wi-Fi of the future.

Microsoft 365 Copilot in practice: Your guide to the new everyday work routine
What can Microsoft 365 Copilot really do? 🤖 We'll show you in a practical way how the AI assistant revolutionizes your daily work in Word, Excel & Teams. From a blank page to a finished presentation in minutes! The ultimate practical guide for the new workday. #Copilot #Microsoft365 #AI

EU chat control: The battle between protection and privacy
The EU's chat control measures aim to scan private messages on WhatsApp and similar platforms. Critics see this as mass surveillance. Following massive resistance, including from Germany, the crucial vote in the EU Council has been postponed again. The fight for digital privacy continues.

Safe at Home: The Ultimate Guide to Your PC and Your Wi-Fi
Is your home Wi-Fi really secure? 🏠 From router passwords to phishing protection – our ultimate security guide will make life difficult for hackers. Secure your PC and home network now with our simple and easy-to-understand tips! #Cybersecurity #HomeNetwork

Integrate and use ChatGPT in Excel – is that possible?
ChatGPT is more than just a simple chatbot. Learn how it can revolutionize how you work with Excel by translating formulas, creating VBA macros, and even promising future integration with Office.

Create Out of Office Notice in Outlook
To create an Out of Office message in Microsoft Outlook - Office 365, and start relaxing on vacation
Offers 2024: Word & Excel Templates


Popular Posts:
Wi-Fi 7 vs. Wi-Fi 6: A quantum leap for your home network?
Wi-Fi 7 is here! Learn all about its advantages over Wi-Fi 6: extreme speed, minimal latency, and MLO. We'll explain who should upgrade now and what you can do with your ISP router. Your guide to the Wi-Fi of the future.
Microsoft 365 Copilot in practice: Your guide to the new everyday work routine
What can Microsoft 365 Copilot really do? 🤖 We'll show you in a practical way how the AI assistant revolutionizes your daily work in Word, Excel & Teams. From a blank page to a finished presentation in minutes! The ultimate practical guide for the new workday. #Copilot #Microsoft365 #AI
EU chat control: The battle between protection and privacy
The EU's chat control measures aim to scan private messages on WhatsApp and similar platforms. Critics see this as mass surveillance. Following massive resistance, including from Germany, the crucial vote in the EU Council has been postponed again. The fight for digital privacy continues.
Safe at Home: The Ultimate Guide to Your PC and Your Wi-Fi
Is your home Wi-Fi really secure? 🏠 From router passwords to phishing protection – our ultimate security guide will make life difficult for hackers. Secure your PC and home network now with our simple and easy-to-understand tips! #Cybersecurity #HomeNetwork
Integrate and use ChatGPT in Excel – is that possible?
ChatGPT is more than just a simple chatbot. Learn how it can revolutionize how you work with Excel by translating formulas, creating VBA macros, and even promising future integration with Office.
Create Out of Office Notice in Outlook
To create an Out of Office message in Microsoft Outlook - Office 365, and start relaxing on vacation
Offers 2024: Word & Excel Templates