Create email templates in Outlook
Anyone who often writes emails with the same content will eventually get annoyed by writing the same text passages over and over again. Just as you can work with multiple signatures in Outlook to speed up and standardize these processes, you can of course also create and save e-mail templates and e-mail forms in Outlook and call them up as needed.
In our short tutorial we would like to describe how you can create and save your own e-mail templates for a wide variety of application scenarios without much effort.
1. Create, save and open simple email templates
Creating standard e-mail templates in Outlook is basically very easy.
- First compose your e-mail as you would like to use it later as a template.
- Then go to the menu: File – Save as
- Select the file format: Outlook template and save your template
As soon as you select the Outlook template file format, you will be directed to the default storage location. All the templates you have created are saved there. The default location for email templates in Outlook is: C:\Users\YOURNAME\AppData\Roaming\Microsoft\Templates
See fig. (click to enlarge)
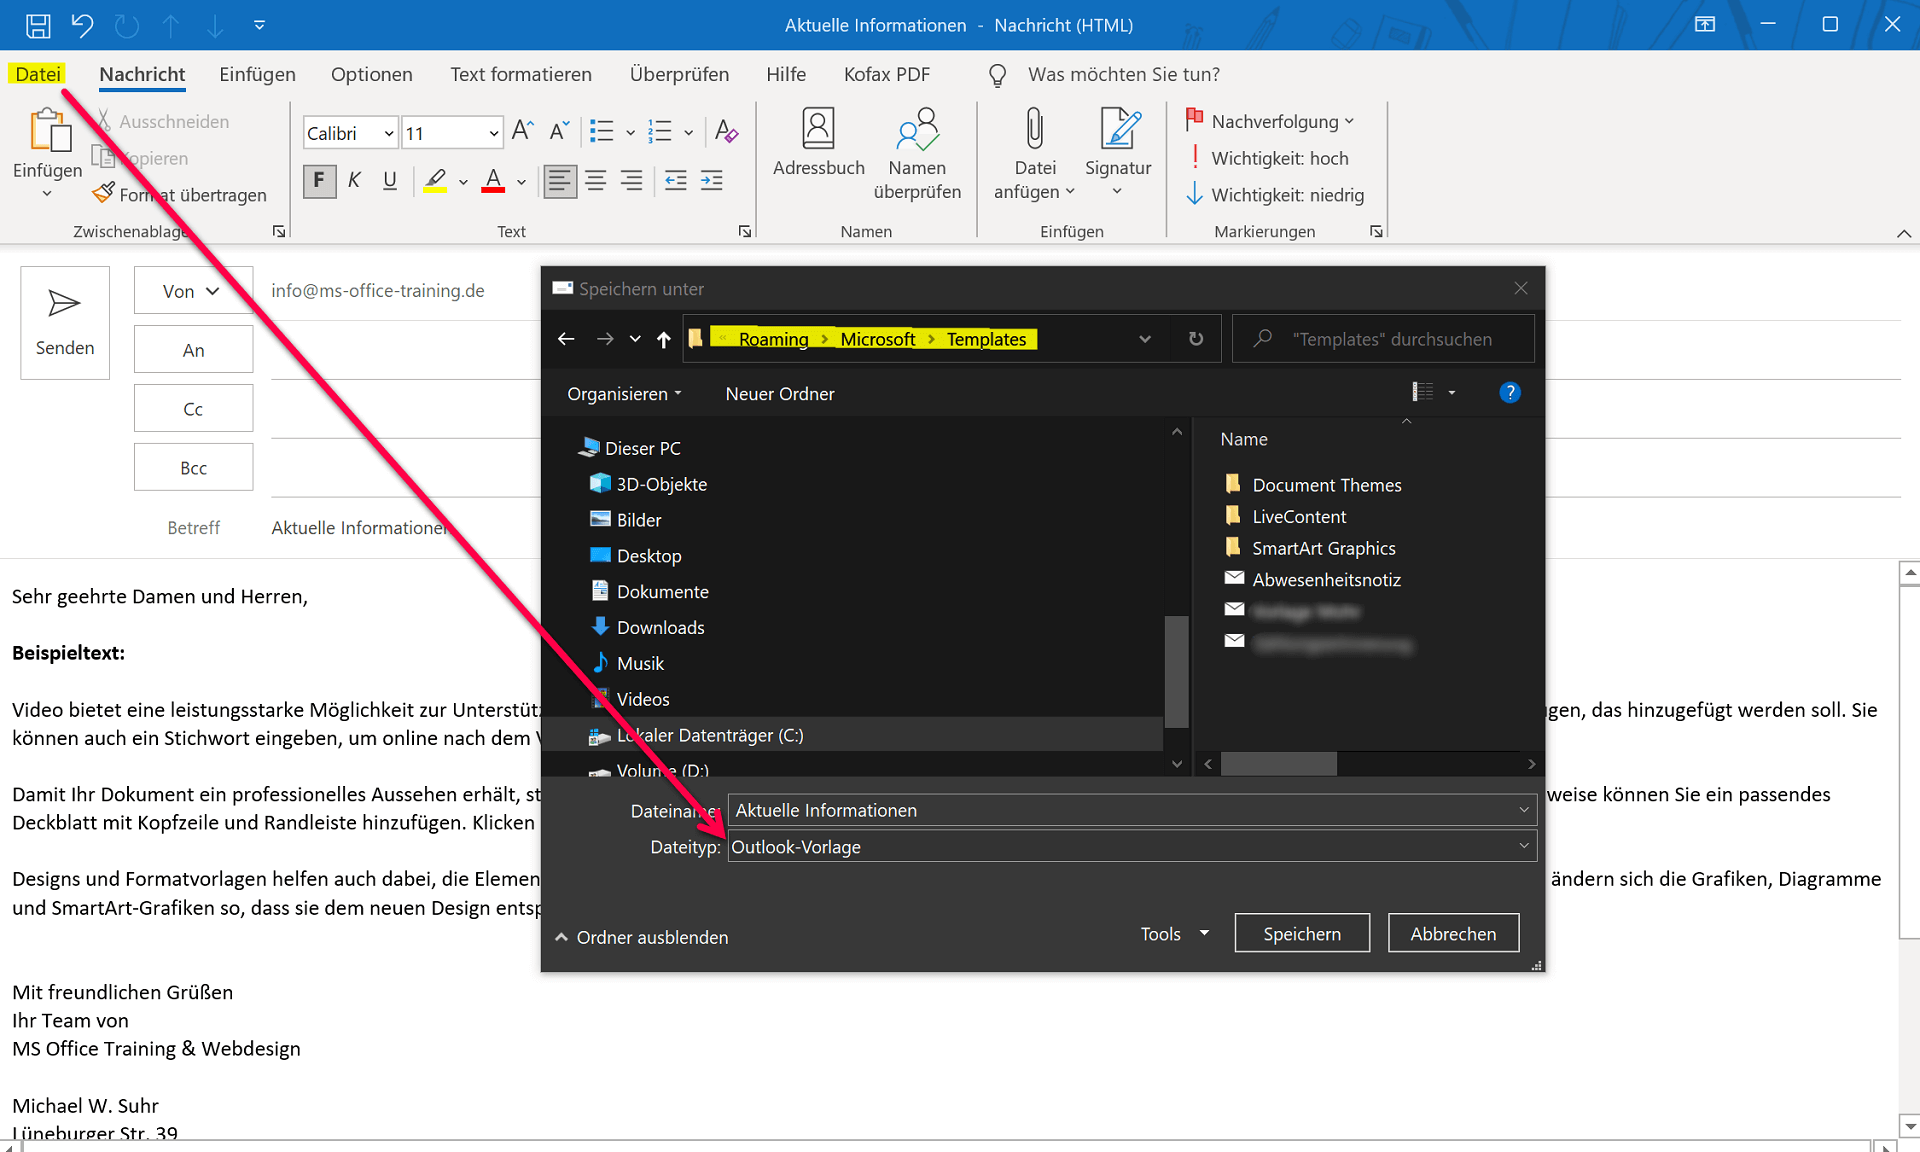
You can also make templates a little more professional, for example by copying the content of a letter template created in Word with form fields and pasting it into your Outlook template. The form fields remain completely intact, and your mail then creates the impression of a real letter.
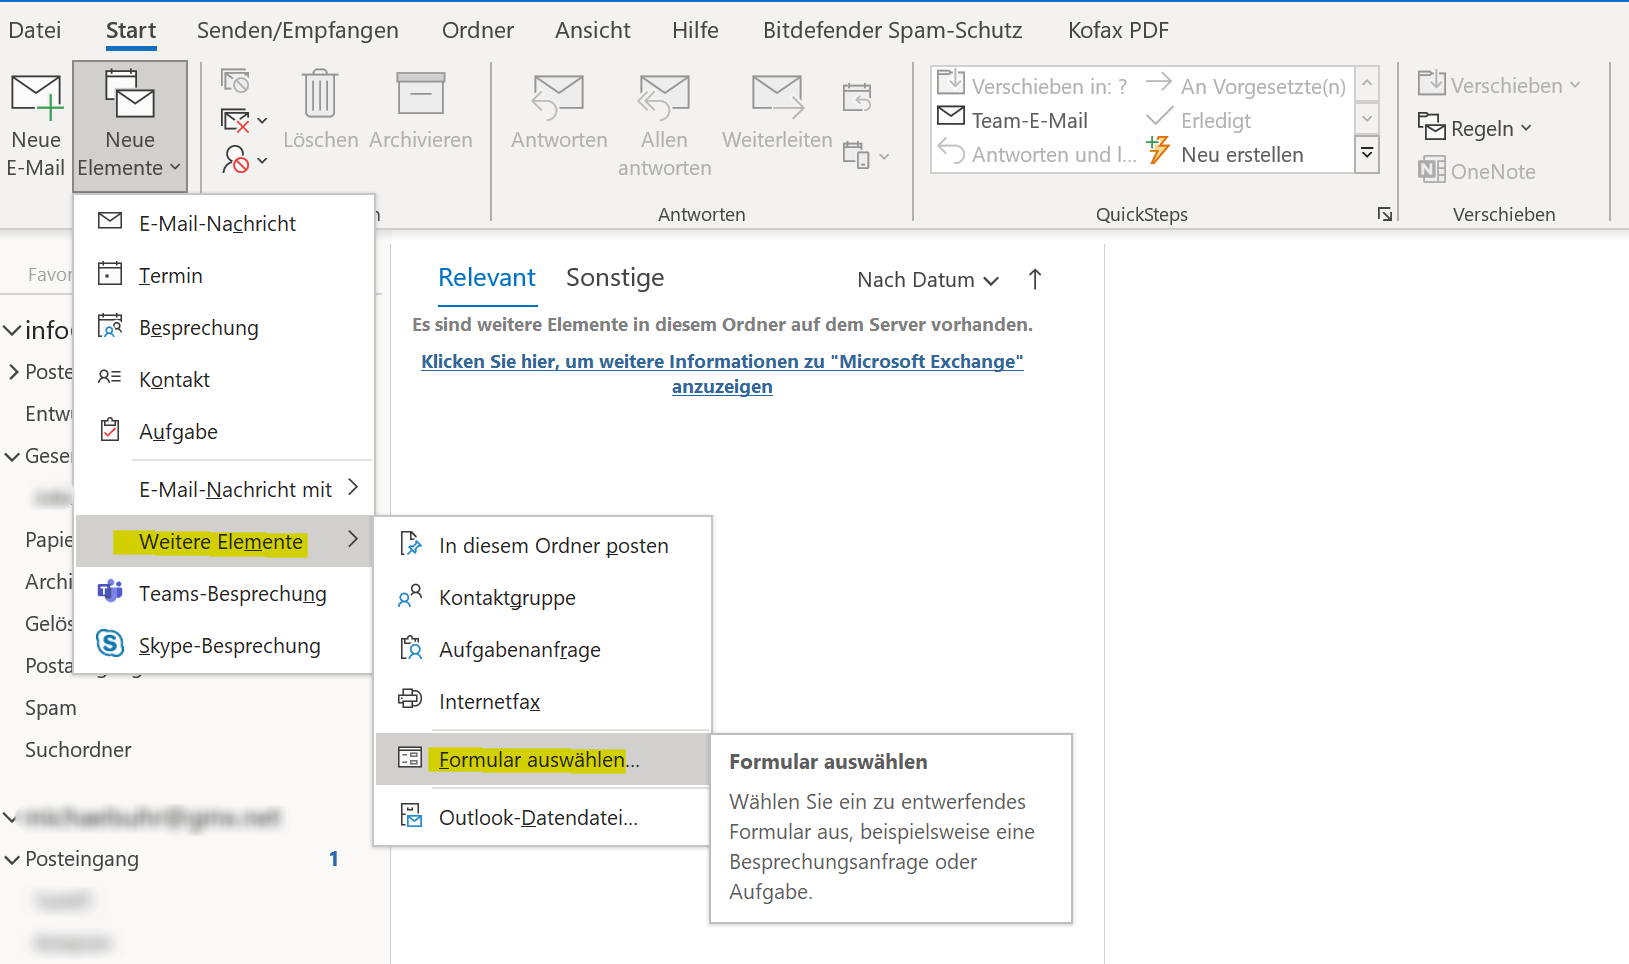
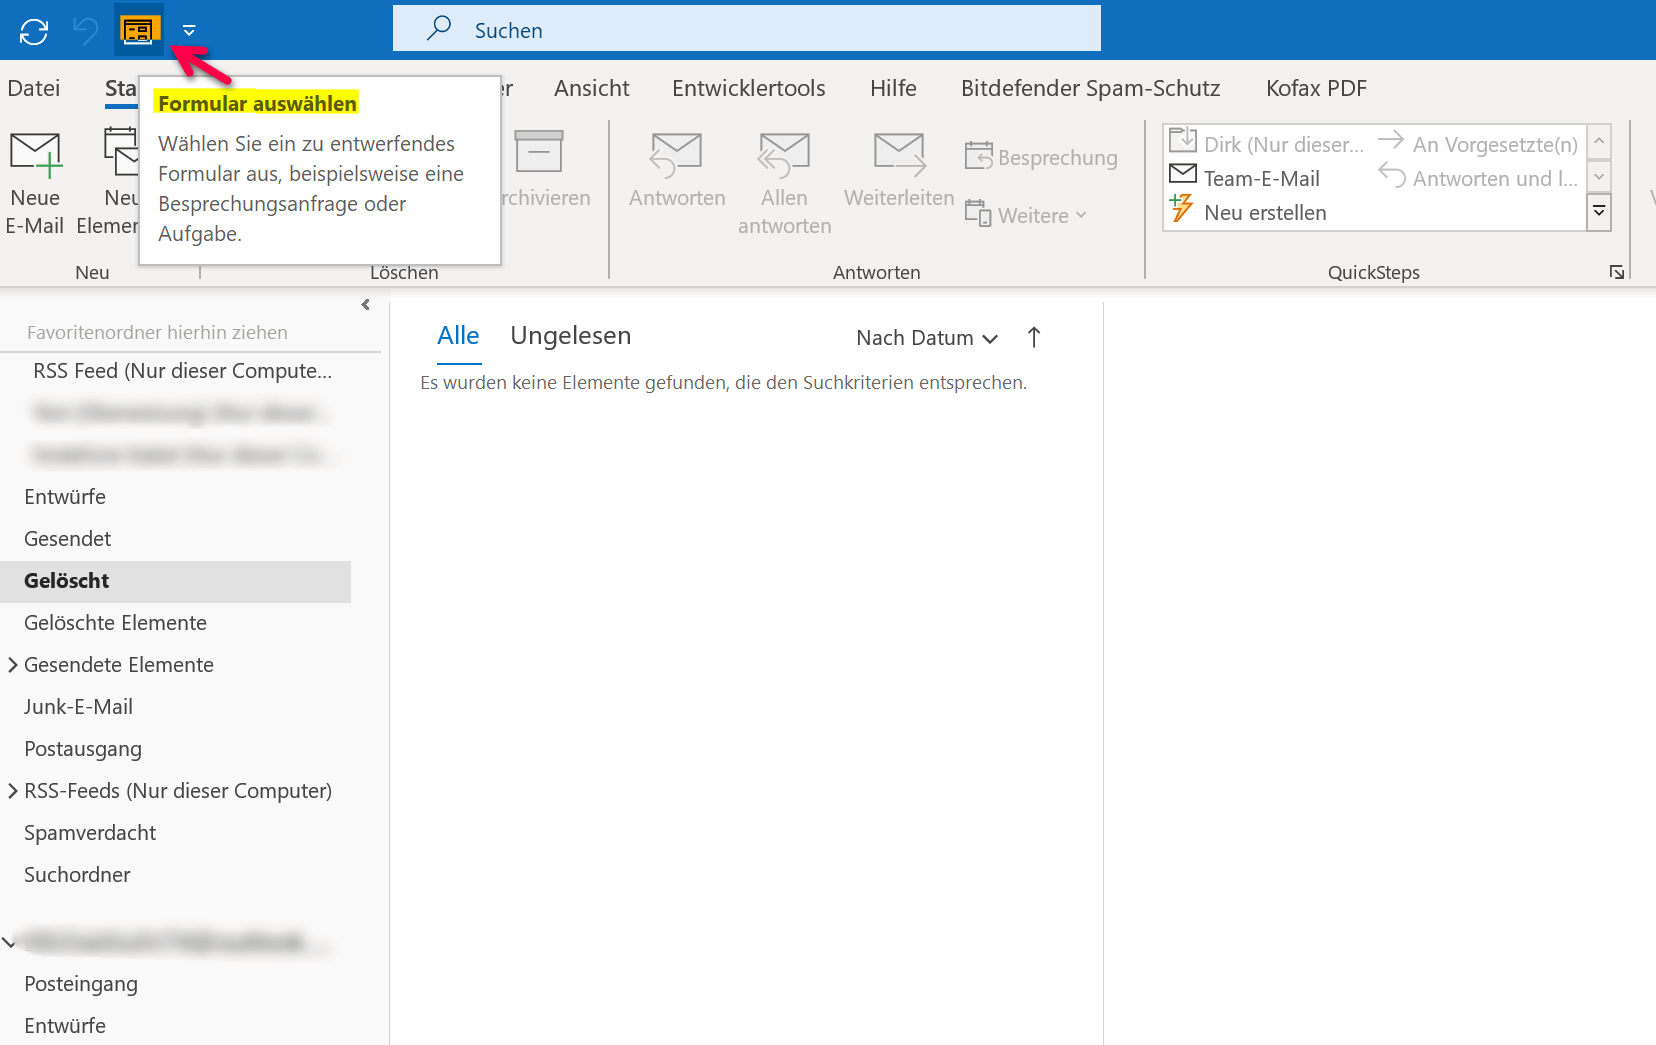
In the picture below we have chosen the content of our business letter template and simply saved it as an Outlook template. Once you have created a template, open it in Outlook as follows:
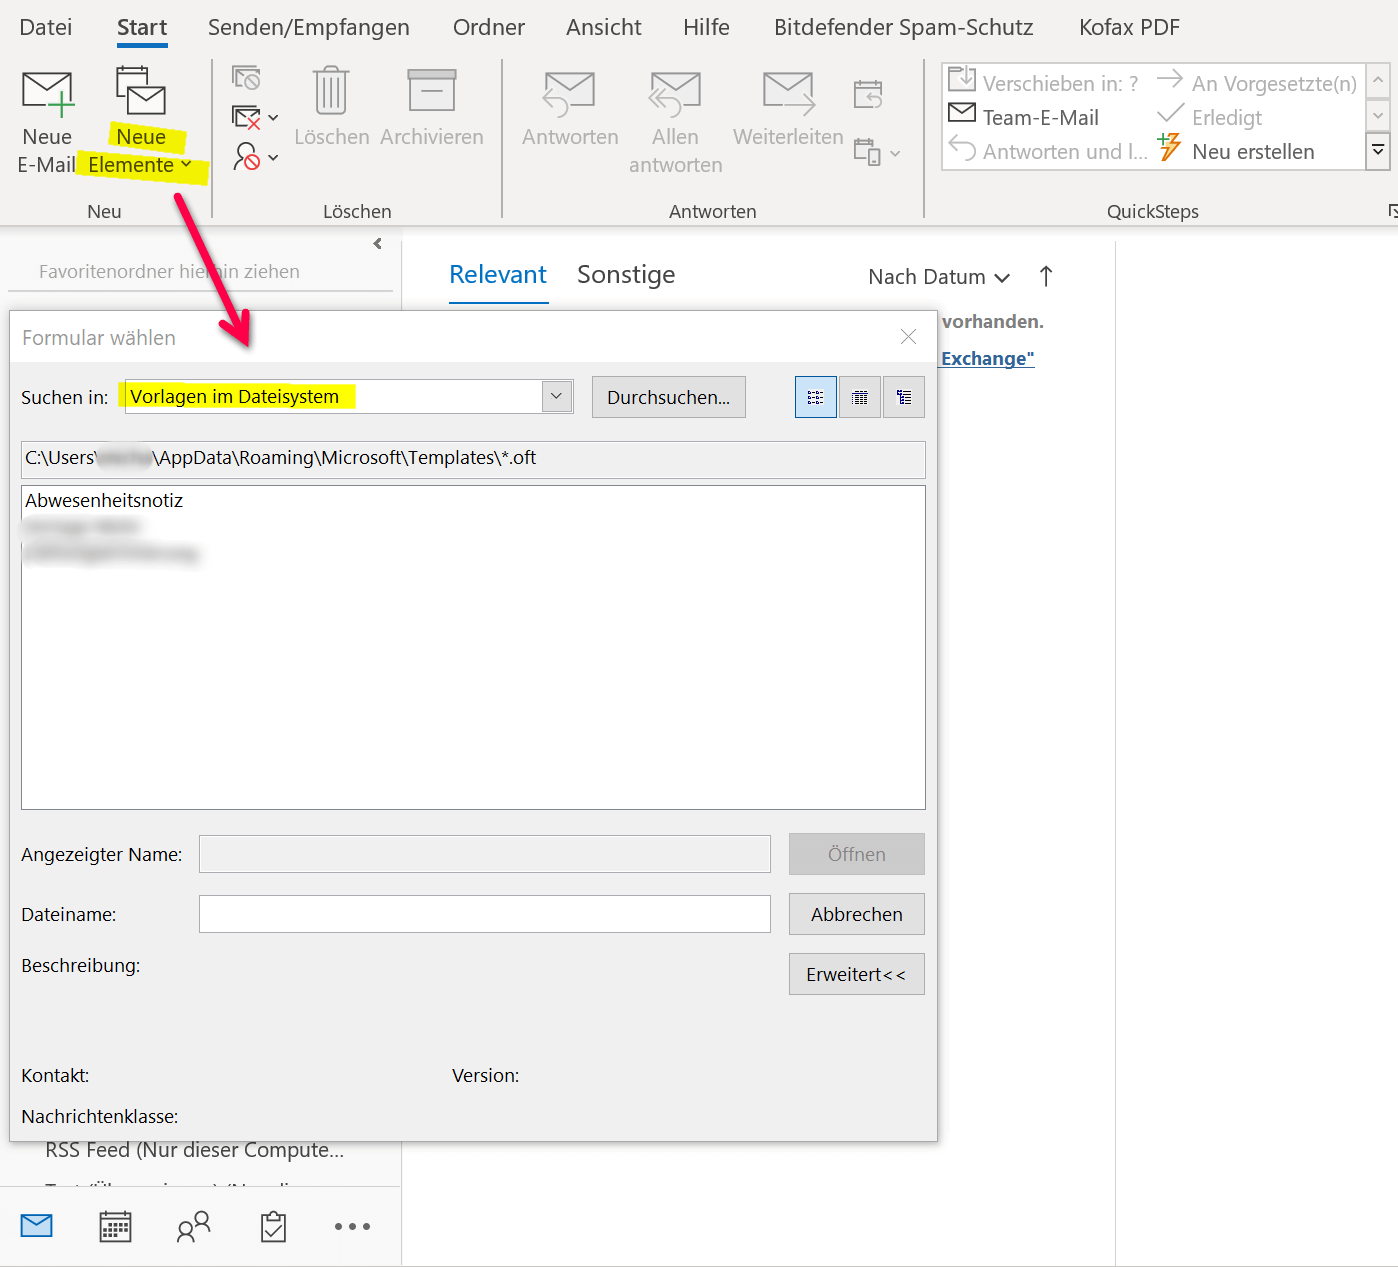
Start tab – New items – Other items – Select form
In the next dialog box, select: Templates in the file system. This is where your templates are stored.
See fig. (click to enlarge)

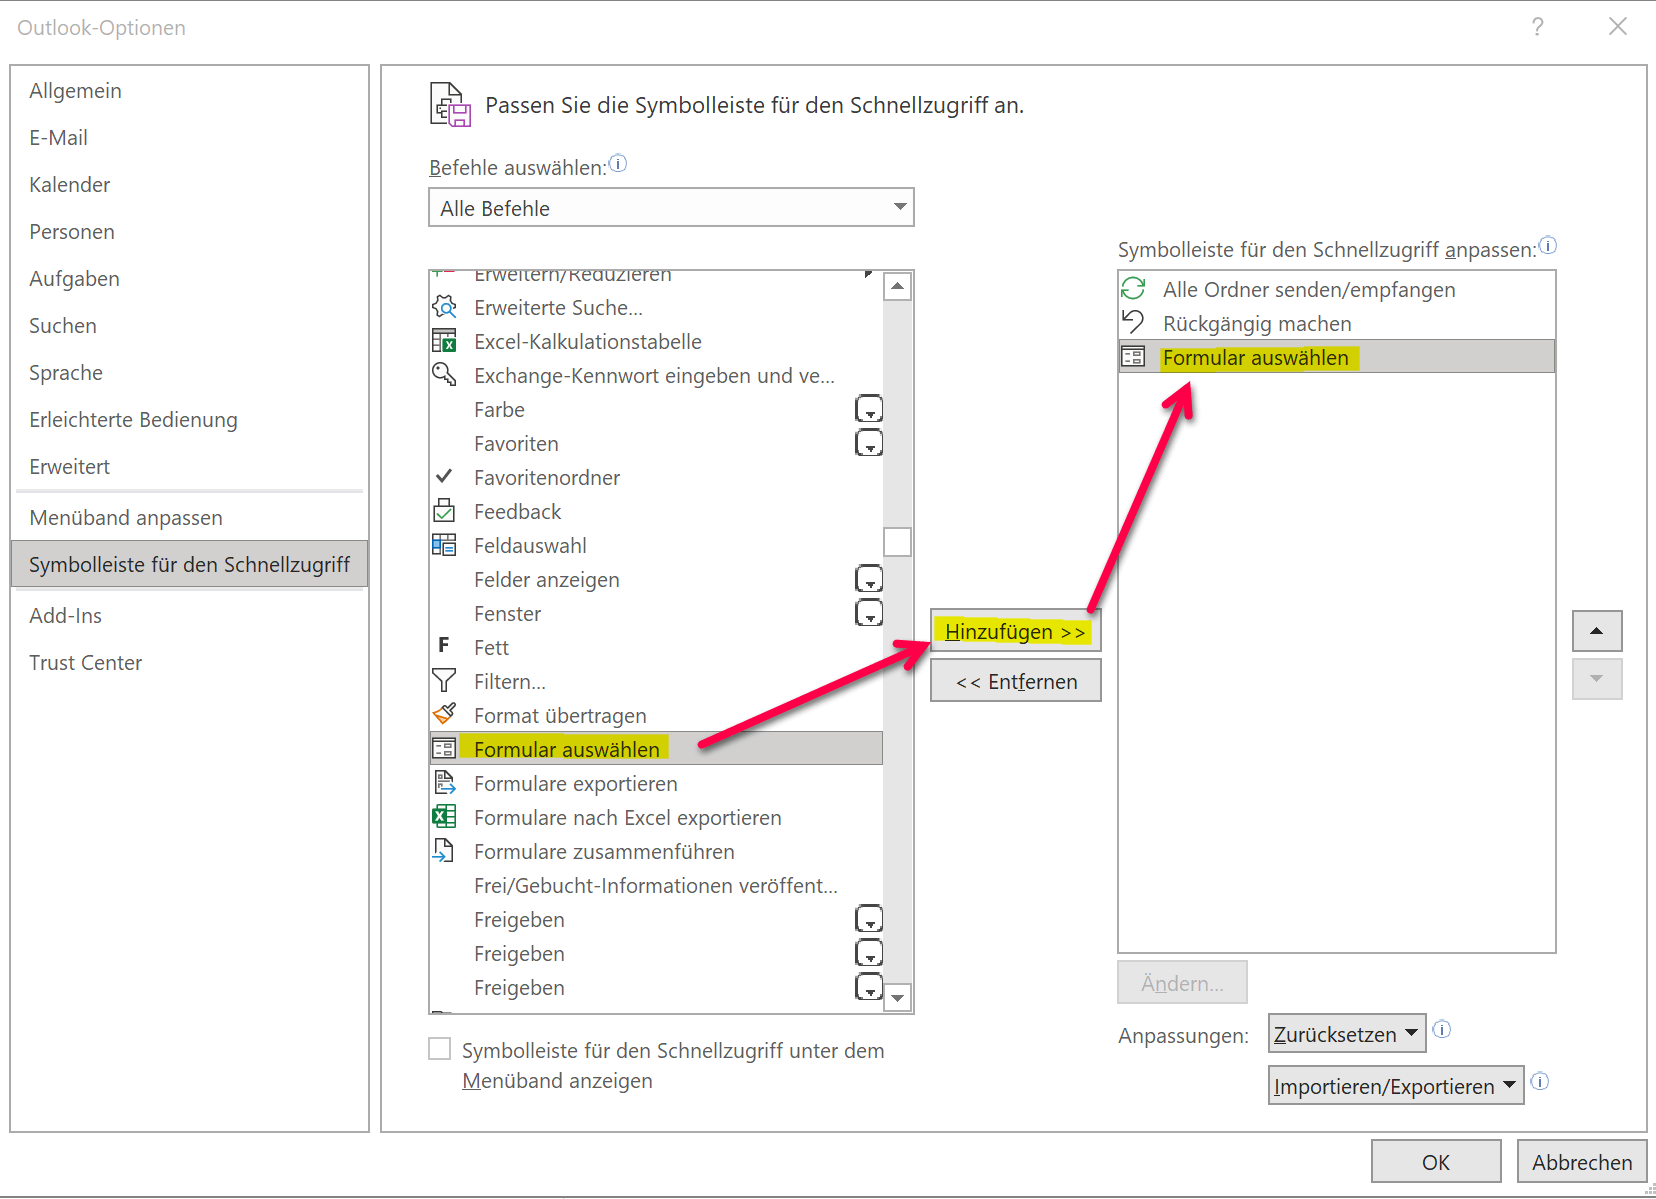
You can also make access to the templates you have created a little easier by customizing your quick launch bar in Outlook.
To do this, go to the File – Options – Quick Access Toolbar tab, select the Select form item and add it to your quick launch bar.
See fig. (click to enlarge)
As you have seen, the whole thing is actually not that difficult and can make daily work with frequently recurring e-mails much easier.
1. Create, save and open simple email templates
Creating standard e-mail templates in Outlook is basically very easy.
- First compose your e-mail as you would like to use it later as a template.
- Then go to the menu: File – Save as
- Select the file format: Outlook template and save your template
As soon as you select the Outlook template file format, you will be directed to the default storage location. All the templates you have created are saved there. The default location for email templates in Outlook is: C:\Users\YOURNAME\AppData\Roaming\Microsoft\Templates
See fig. (click to enlarge)
You can also make templates a little more professional, for example by copying the content of a letter template created in Word with form fields and pasting it into your Outlook template. The form fields remain completely intact, and your mail then creates the impression of a real letter.
In the picture below we have chosen the content of our business letter template and simply saved it as an Outlook template. Once you have created a template, open it in Outlook as follows:
Start tab – New items – Other items – Select form
In the next dialog box, select: Templates in the file system. This is where your templates are stored.
See fig. (click to enlarge)
You can also make access to the templates you have created a little easier by customizing your quick launch bar in Outlook.
To do this, go to the File – Options – Quick Access Toolbar tab, select the Select form item and add it to your quick launch bar.
See fig. (click to enlarge)
As you have seen, the whole thing is actually not that difficult and can make daily work with frequently recurring e-mails much easier.
Popular Posts:

Create vacation planner in Excel
We explain how you can create your own vacation planner 2022 in Microsoft Excel. And of course with a display of public holidays and weekends.
Create annual calendar 2022 in Excel
In our tutorial we describe how you can create an annual calendar for 2022 with a display of the calendar week and public holidays in Excel, and use it anew every year.

Create individual charts in Excel
Charts are created quickly in Microsoft Excel. We explain how you can customize them, and also swap (transpose) the axes.

Create professional letter templates in Word
How to create a professional letter template with form fields in Microsoft Word, and only have to fill in text fields.

Edit Windows context menu – remove entries – add entries
The Windows context menu is extremely useful for quickly performing tasks related to the current selection. But on the other hand, it can quickly become confusing.

Create a digital signature in Outlook and Word
Create a digital signature in Microsoft Outlook and Word for more security.
Offers 2024: Word & Excel Templates


Popular Posts:
Create vacation planner in Excel
We explain how you can create your own vacation planner 2022 in Microsoft Excel. And of course with a display of public holidays and weekends.
Create annual calendar 2022 in Excel
In our tutorial we describe how you can create an annual calendar for 2022 with a display of the calendar week and public holidays in Excel, and use it anew every year.
Create individual charts in Excel
Charts are created quickly in Microsoft Excel. We explain how you can customize them, and also swap (transpose) the axes.
Create professional letter templates in Word
How to create a professional letter template with form fields in Microsoft Word, and only have to fill in text fields.
Edit Windows context menu – remove entries – add entries
The Windows context menu is extremely useful for quickly performing tasks related to the current selection. But on the other hand, it can quickly become confusing.
Create a digital signature in Outlook and Word
Create a digital signature in Microsoft Outlook and Word for more security.
Offers 2024: Word & Excel Templates