More fonts in Word through Google Fonts
As long as you are limited to writing texts when working with Word, you will probably never have thought that it would be convenient to have more fonts in your luggage. But as soon as you start to use the potential of Word really, and thus also create flyers and business cards, invitations and the like, there is more of a desire to expand the portfolio.
You can find out how to expand the font selection in Word with just a few steps and above all free in our article
1. Go to Google Fonts
1. Go to Google Fonts
First, go to https://fonts.google.com
Here you will first find a large selection of available fonts, which of course can be filtered according to either specific criteria, or (if you already know the name of a desired font) can be searched directly.
You can add them to your download list via the small + symbol to the right of each font.
See picture: (click to enlarge)

First, go to https://fonts.google.com
Here you will first find a large selection of available fonts, which of course can be filtered according to either specific criteria, or (if you already know the name of a desired font) can be searched directly.
You can add them to your download list via the small + symbol to the right of each font.
See picture:
2. Customize and download font
2. Customize and download font
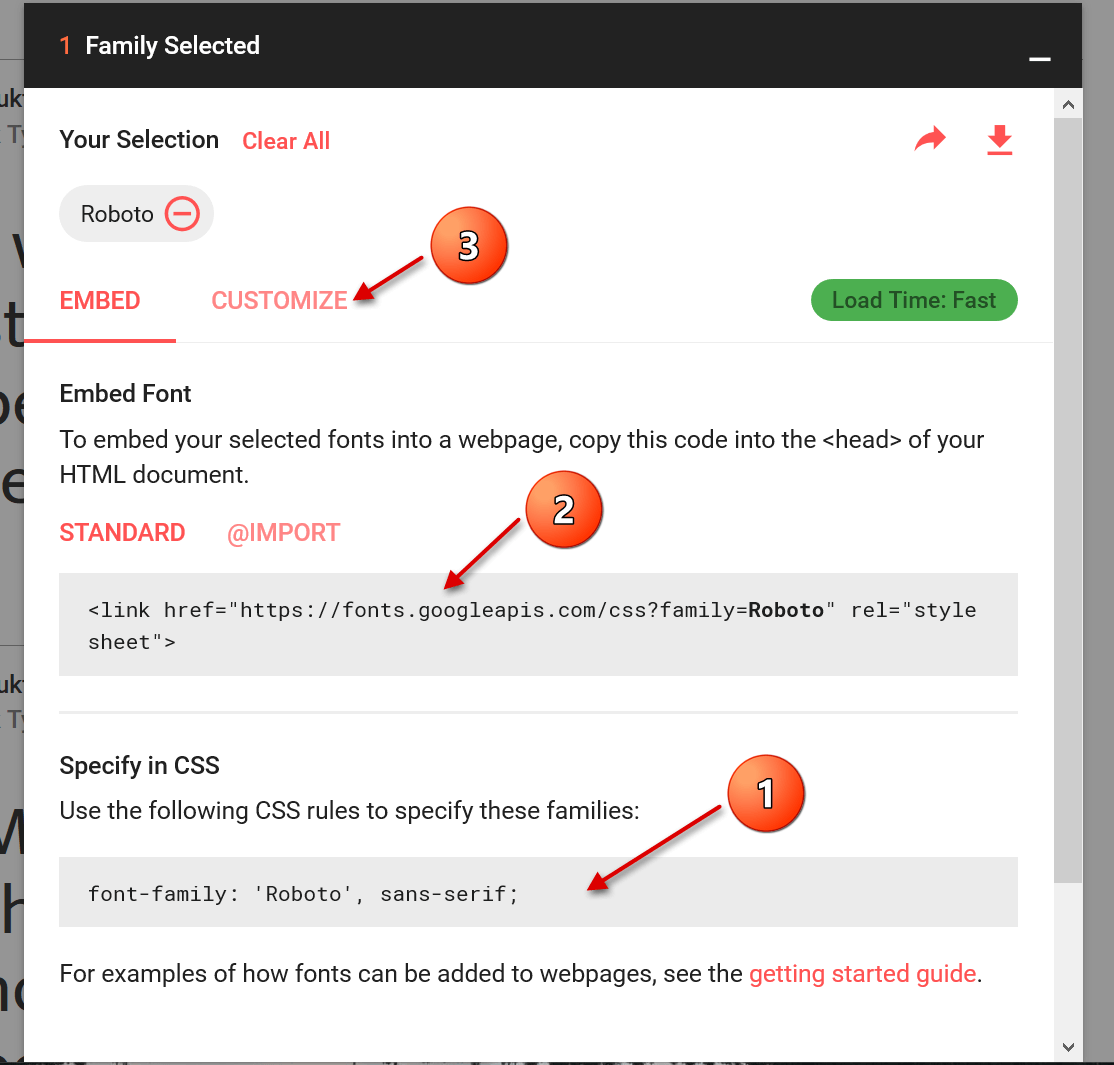
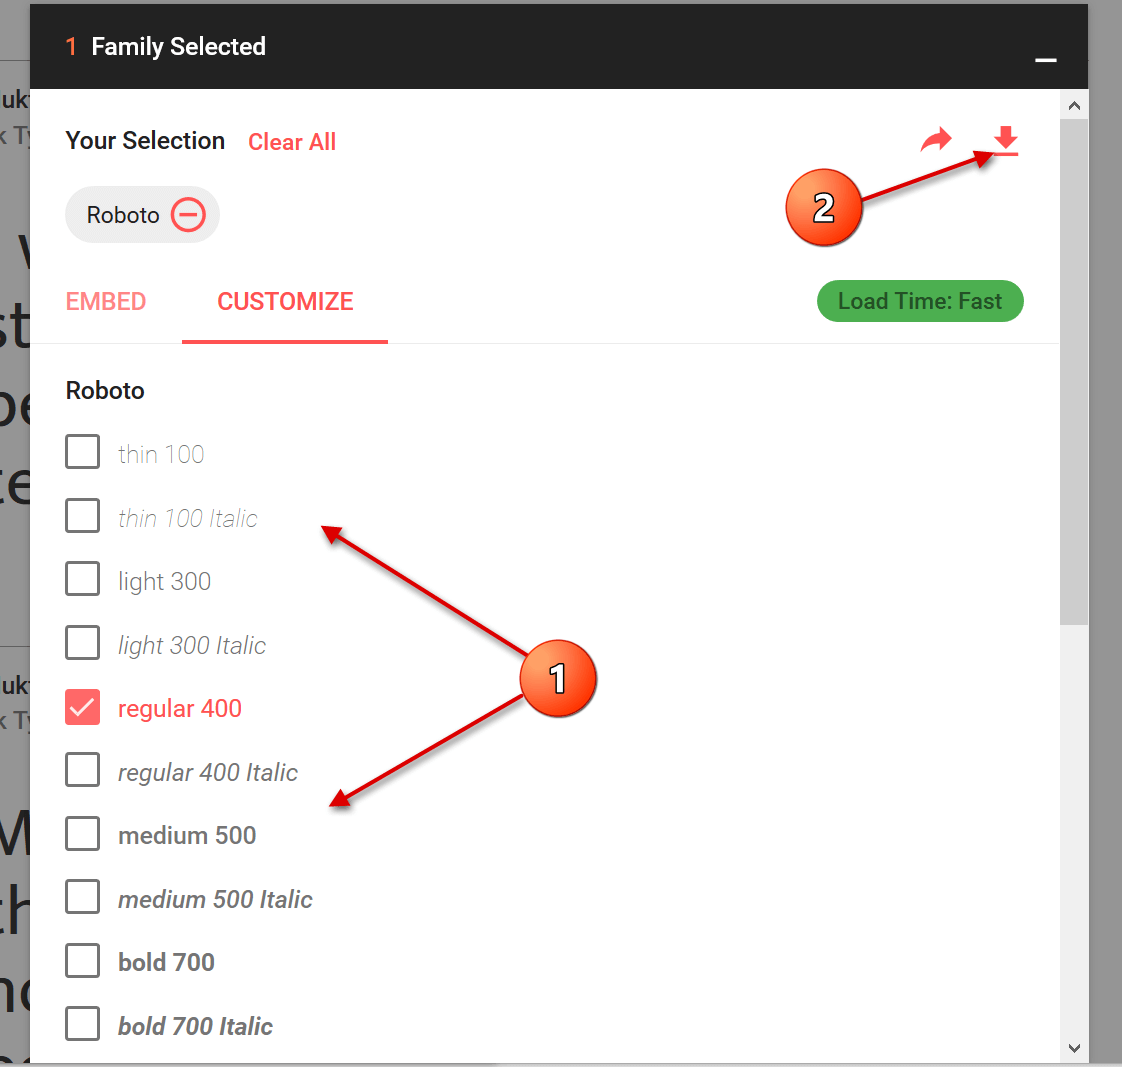
In the next step, you can directly copy out the HTML or CSS shortcodes in order to insert them on a web page, for example.
For the implementation in Word you do not need this, but you can go straight to the tab “Customize”, where you can select the desired font size and download it directly.
See picture: (click to enlarge)


3. Install font
3. Install font
The last step we need to take now is the simplest of them all.
After you have downloaded the zip file, it is best unpacked in a folder specially created for the respective font.
Here all font sizes are displayed, and can be easily installed by right-clicking on the appropriate file.
See picture: (click to enlarge)
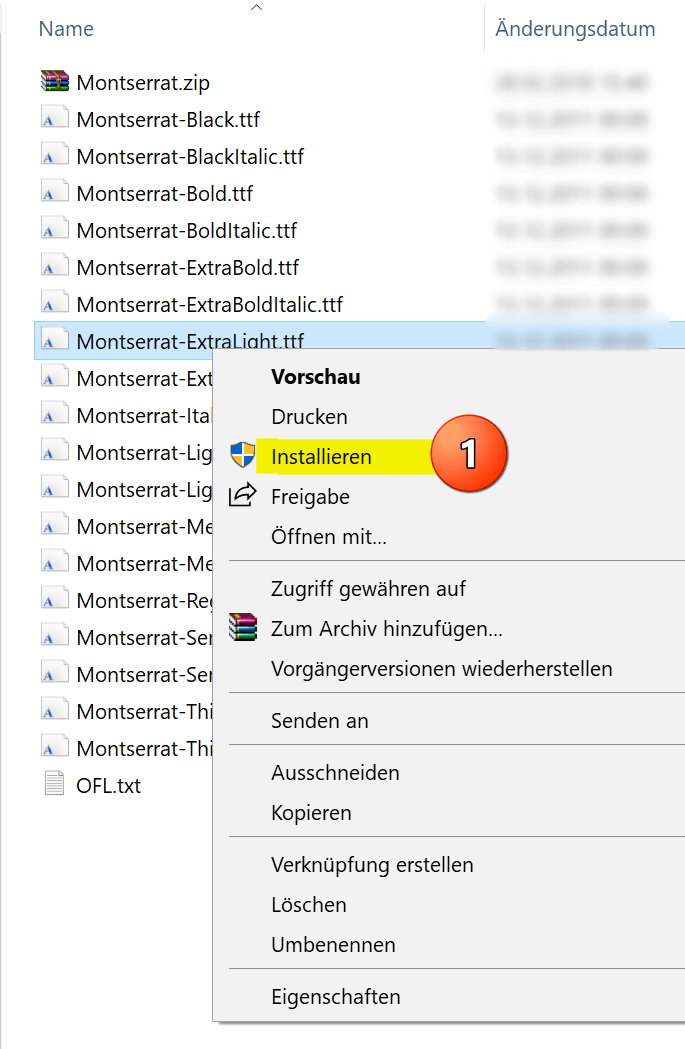

The big advantage of this type of installation is that you have not only expanded the font selection in Word, but in all Microsoft Office applications.
What does this mean the fonts are also available in: Outlook, Excel, Powerpoint, etc.
The last step we need to take now is the simplest of them all.
After you have downloaded the zip file, it is best unpacked in a folder specially created for the respective font.
Here all font sizes are displayed, and can be easily installed by right-clicking on the appropriate file.
See picture:

The big advantage of this type of installation is that you have not only expanded the font selection in Word, but in all Microsoft Office applications.
What does this mean the fonts are also available in: Outlook, Excel, Powerpoint, etc.
Popular Posts:

Data Queries in Excel – Works with Power Query
So erstellen Sie aktive Datenabfragen durch Power Query aus verschiedensten Quellen in Excel, führen Daten aus verschiedenen Dateien und Tabellen zusammen.

Encrypt emails in Outlook – How it’s done
Standard e-mails are like postcards that everyone can theoretically read. But there are solutions for more security.

Incognito Mode Chrome and Firefox – How secure is it?
With this command in Windows 10 you can display the browser history despite incognito mode.

Environmentally friendly printing for more Climate protection
Climate protection starts small. And so not only can costs be saved through environmentally friendly and conscious printing in the office, but the climate can also be protected.

Create a Word letter template with form fields
Create a professional DIN 5008 letter template with form fields and drop-down lists in Microsoft Word, and write letters as easily as you would fill out a form.

Protect Word documents from editing
Protect your documents in Microsoft Word from unauthorized editing or block access completely.
Offers 2024: Word & Excel Templates


Popular Posts:
Data Queries in Excel – Works with Power Query
So erstellen Sie aktive Datenabfragen durch Power Query aus verschiedensten Quellen in Excel, führen Daten aus verschiedenen Dateien und Tabellen zusammen.
Encrypt emails in Outlook – How it’s done
Standard e-mails are like postcards that everyone can theoretically read. But there are solutions for more security.
Incognito Mode Chrome and Firefox – How secure is it?
With this command in Windows 10 you can display the browser history despite incognito mode.
Environmentally friendly printing for more Climate protection
Climate protection starts small. And so not only can costs be saved through environmentally friendly and conscious printing in the office, but the climate can also be protected.
Create a Word letter template with form fields
Create a professional DIN 5008 letter template with form fields and drop-down lists in Microsoft Word, and write letters as easily as you would fill out a form.
Protect Word documents from editing
Protect your documents in Microsoft Word from unauthorized editing or block access completely.
Offers 2024: Word & Excel Templates