Create a Table of Contents in Word
If at some point you are faced with the task of writing a longer essay on a specific topic, then you can not really get around a table of contents.
In addition, of course, this table of contents should not only map the content, but also be a navigation with it, and may contain sub-items.
You will find out how to create a dynamic table of contents in Word in our article.
1. Create page for table of contents
1. Create page for table of contents
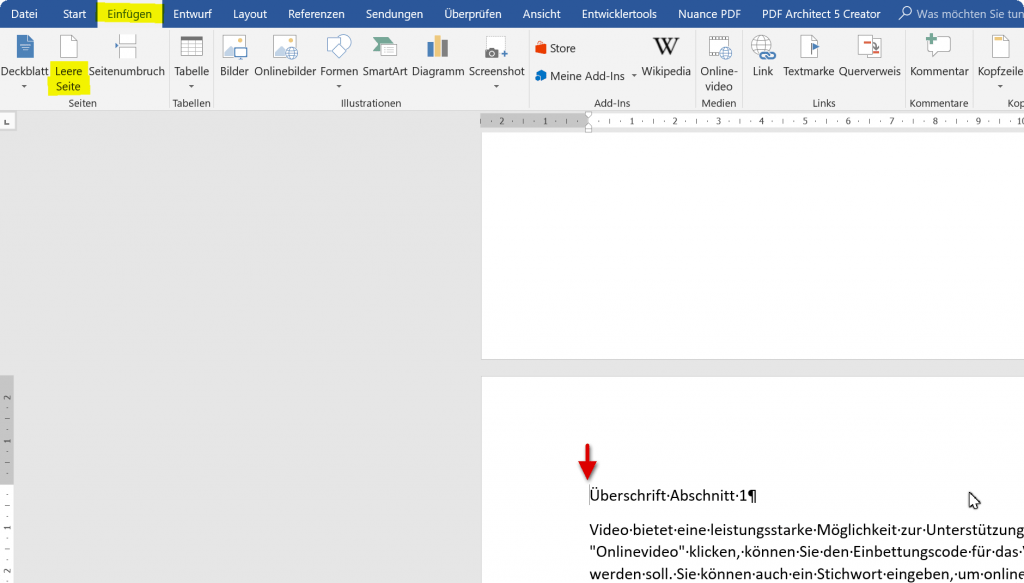
Before we begin to create our headings, I recommend first as a preparatory step, a blank page for the later table of contents einzufpfllegen. Because experience shows that once the headings are formatted as such are always fiddly, and no one needs that.
- Let’s first place our cursor in front of the first word on the first page of our document
- Then go to the tab “Paste” and there to “Empty page”
This simply creates a page break, and we have a blank page that we can later use for the table of contents.
Please also read our article: How to move pages in Word
See picture: (click to enlarge)

2. Create headings with one level in Word
2. Create headings with one level in Word
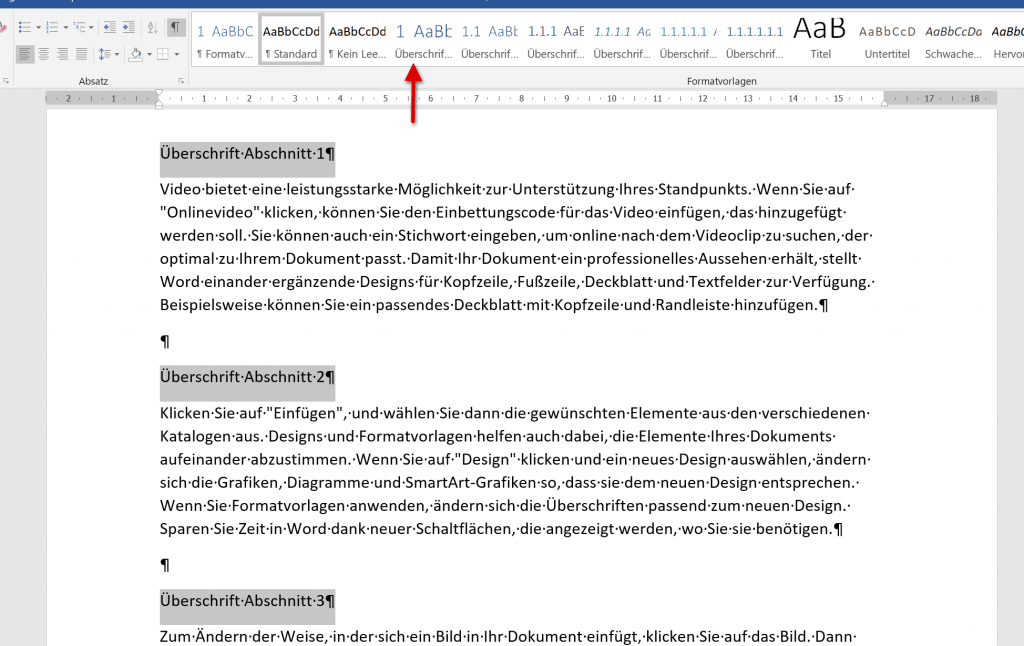
So that your table of contents works later as it should, and is accordingly dynamic, the headings of the individual sections must first be formatted correctly.
In the first example, we will start with just one level first.
- To do this, first mark all headings of the corresponding sections.
- Then click on “Heading 1” under the “Start” tab in the style sheets.
Then you can immediately see that Word has automatically numbered here.
See picture: (click to enlarge)

The formatting of the text which should serve as a headline is an elementary step so that Word knows later that it is a heading. It is not enough to simply put numbers in front of the desired headlines by hand, and then underline them for your sake and fat or similar. display.
So that your table of contents works later as it should, and is accordingly dynamic, the headings of the individual sections must first be formatted correctly.
In the first example, we will start with just one level first.
- To do this, first mark all headings of the corresponding sections.
- Then click on “Heading 1” under the “Start” tab in the style sheets.
Then you can immediately see that Word has automatically numbered here.
See picture: (click to enlarge)


The formatting of the text which should serve as a headline is an elementary step so that Word knows later that it is a heading. It is not enough to simply put numbers in front of the desired headlines by hand, and then underline them for your sake and fat or similar. display.
3. Create multi-level headings in Word
3. Create multi-level headings in Word
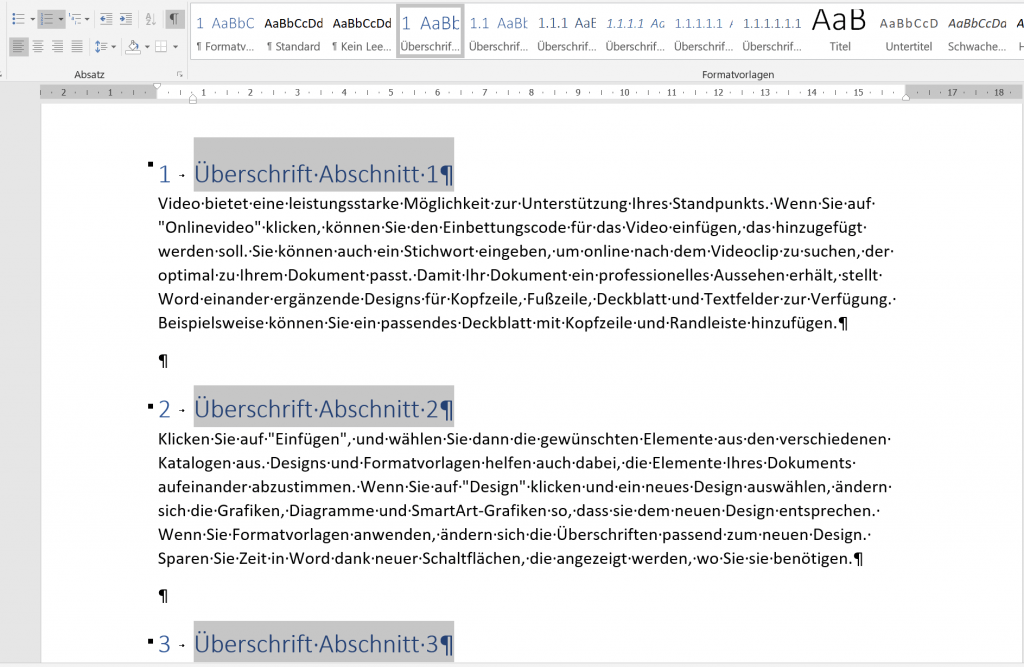
The more extensive your work becomes, the more it may be necessary to re-divide sections into sections that would otherwise become too cluttered. Therefore, in this section, we will focus on creating multi-level headings.
- First mark all headings of the incl. The planned second level
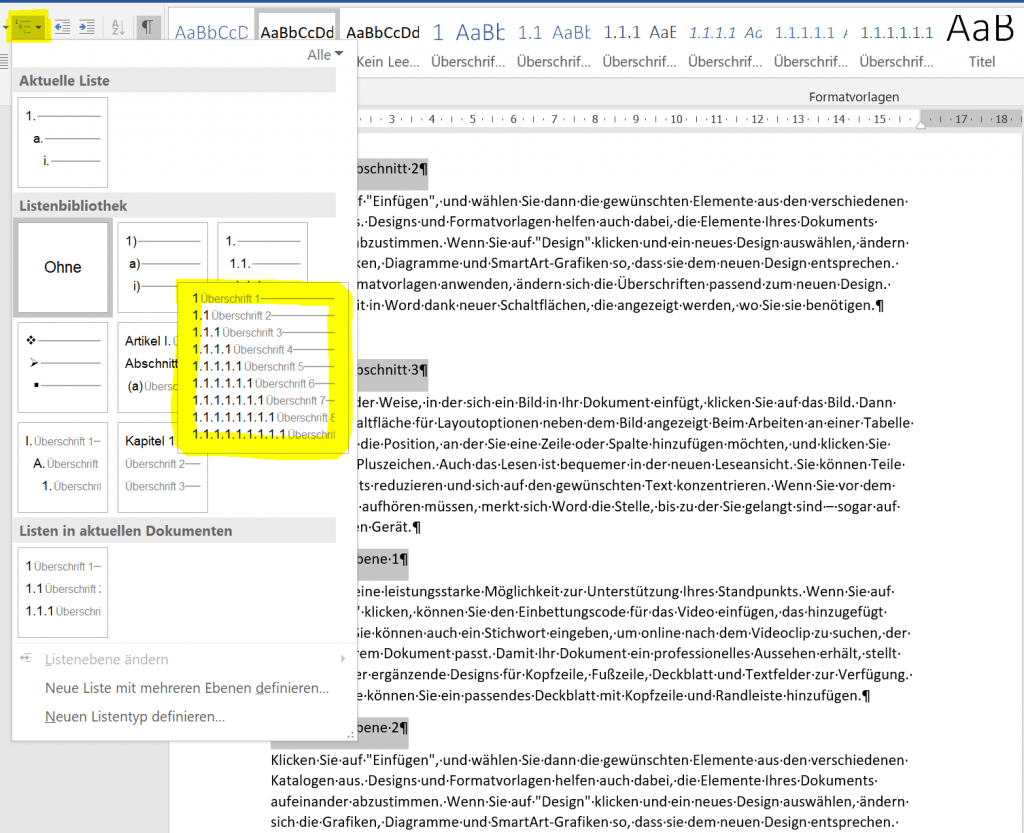
- Then go to the “Start” tab in the “List Library” and there to the item “Title structure”
Now all planned headlines (including those of the second outline level) are marked as a list.
- Now format the highlighted headings with Heading 1 (under Styles)
- Then just mark the desired second level headers
- Now change the list level under “Numbering Library” in the “Start” tab
See picture: (click to enlarge)
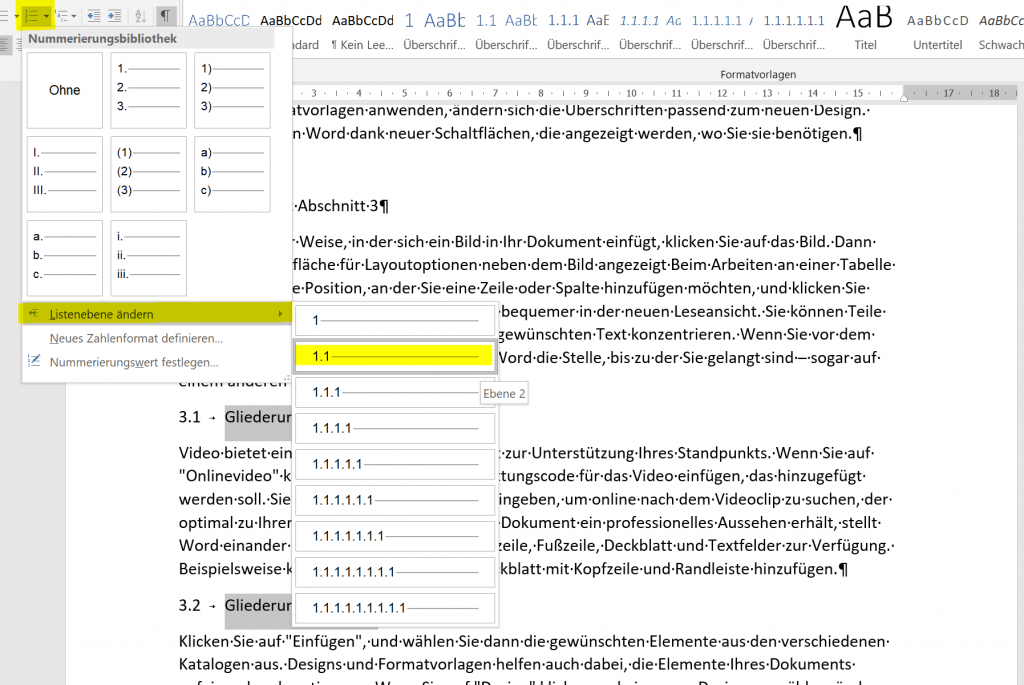
Here, too, we see that Word has formatted the corresponding second level headings with 3.1, 3.2, and so on. These can not be changed manually like this anymore.
The more extensive your work becomes, the more it may be necessary to re-divide sections into sections that would otherwise become too cluttered. Therefore, in this section, we will focus on creating multi-level headings.
- First mark all headings of the incl. The planned second level
- Then go to the “Start” tab in the “List Library” and there to the item “Title structure”
Now all planned headlines (including those of the second outline level) are marked as a list.
- Now format the highlighted headings with Heading 1 (under Styles)
- Then just mark the desired second level headers
- Now change the list level under “Numbering Library” in the “Start” tab
See picture: (click to enlarge)


Here, too, we see that Word has formatted the corresponding second level headings with 3.1, 3.2, and so on. These can not be changed manually like this anymore.
4. Indent second level headings
4. Indent second level headings
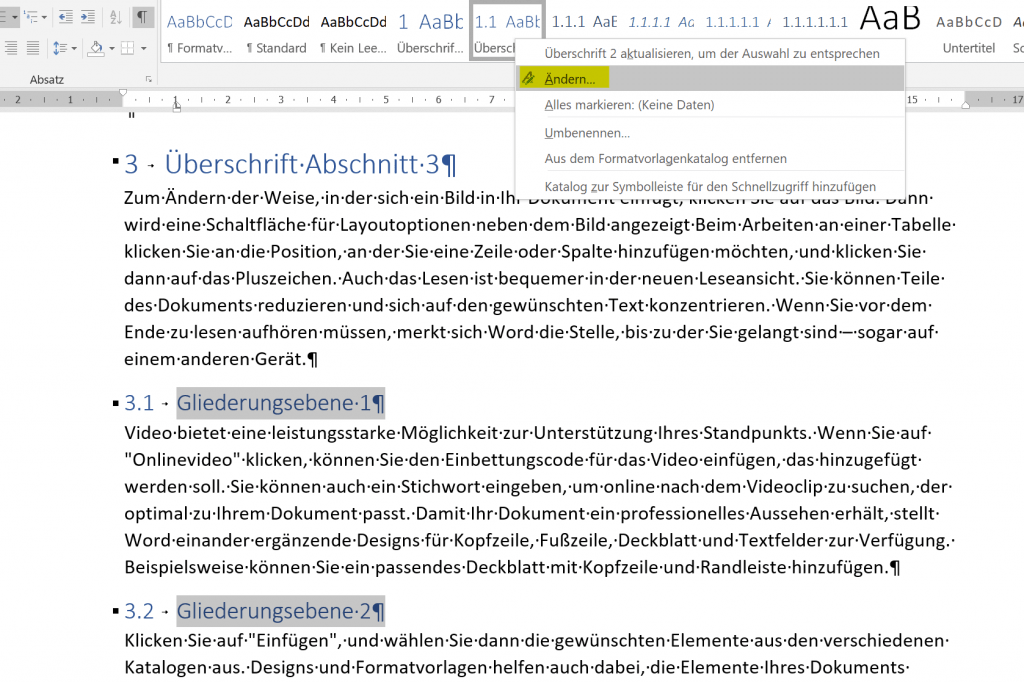
Often it is also the case that you would like to indent the headings of the second level in order to visually distinguish them from the rest.
This can be arranged in the headings by changing the heading 2 style, and the texts below can then be easily accessed by enlarging the indentation.
Step 1:
Select the headings of the 2nd level and click on “Change” in the context menu.
See picture: (click to enlarge)
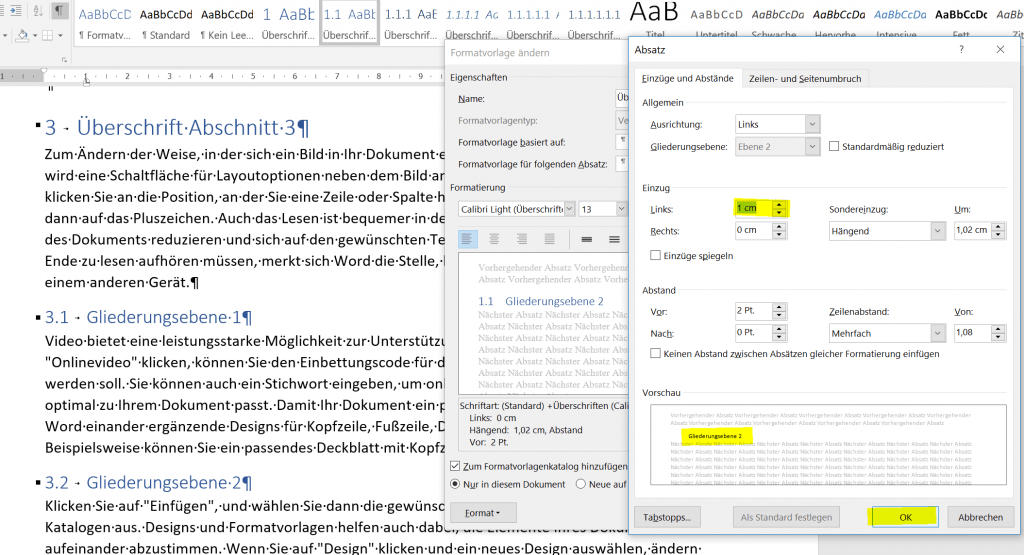
Step 2:
In the dialog box for the changes, click on “Format” and then on “Paragraph”
See picture: (click to enlarge)

Step 3:
Change the feeder on the left to the desired value (here 1cm in the example)
See picture: (click to enlarge)
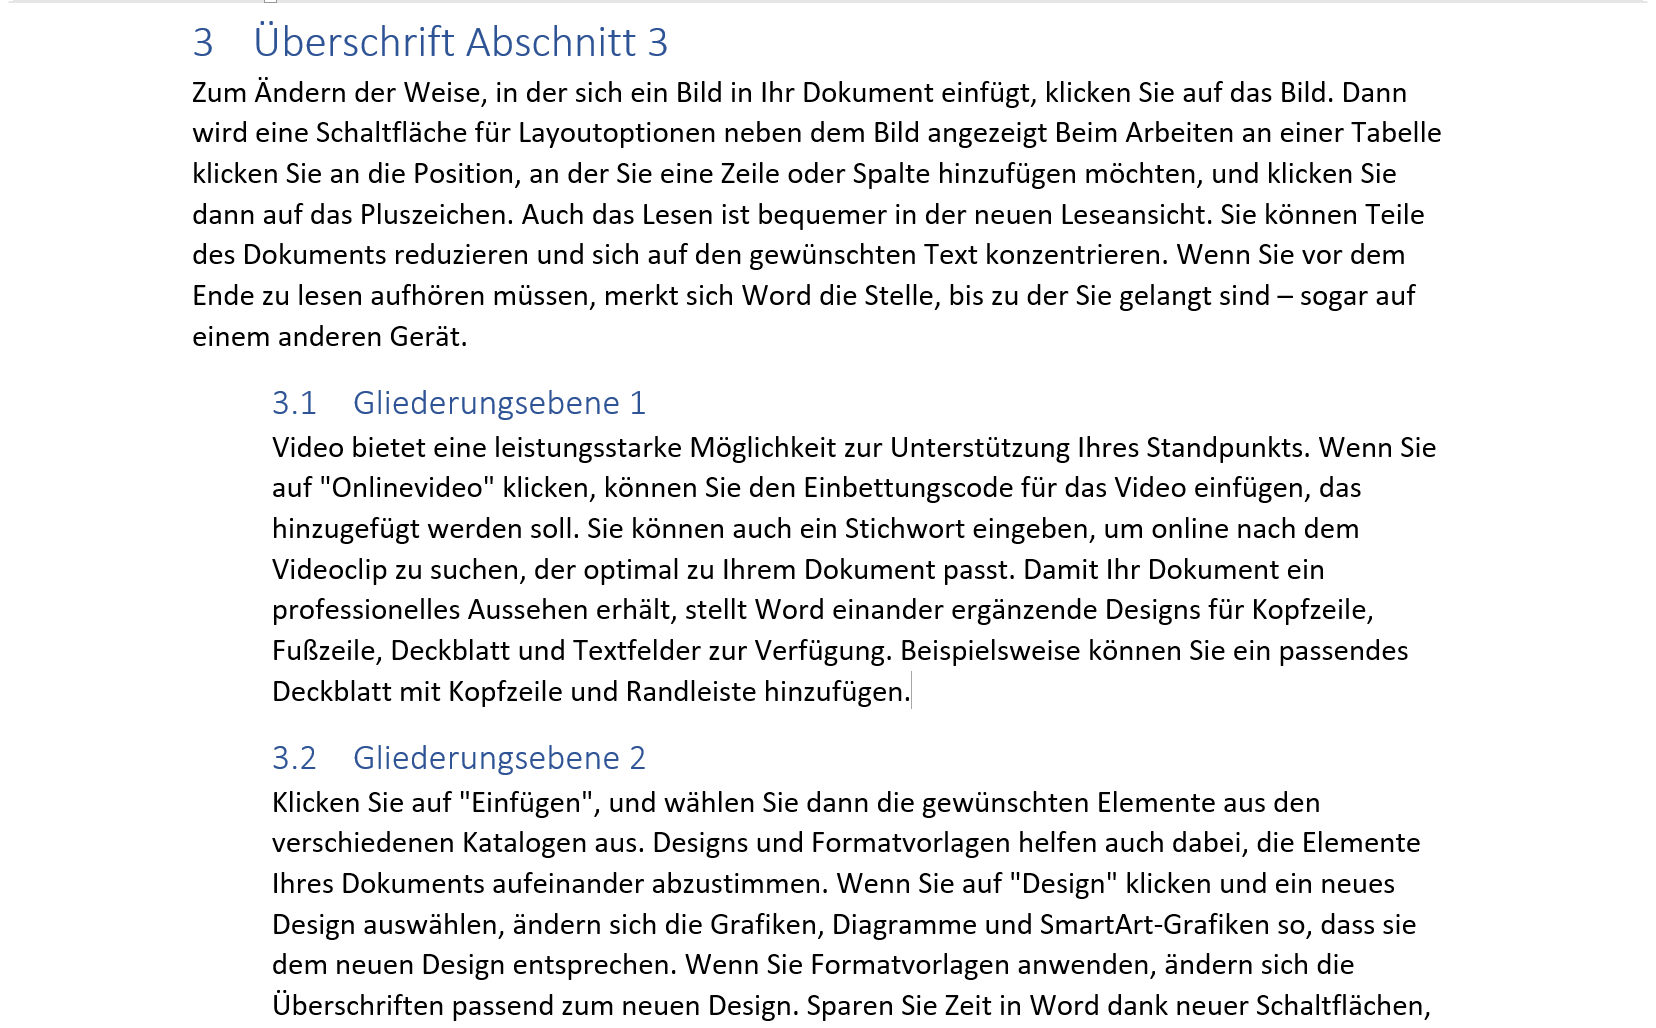
Step 4:
Select the text paragraphs under the second level headings and enlarge the left indent
See picture: (click to enlarge)

Certainly in Word (as in all Office programs) there are many ways to Rome, but this is just one way to do it all. Incidentally, you can change all the possible parameters (color, font, etc.) under the styles we have just changed, or create completely your own and save them either only for the current document or in general.
In the end, the whole thing should look like this:
See picture: (click to enlarge)
Often it is also the case that you would like to indent the headings of the second level in order to visually distinguish them from the rest.
This can be arranged in the headings by changing the heading 2 style, and the texts below can then be easily accessed by enlarging the indentation.
Step 1:
Select the headings of the 2nd level and click on “Change” in the context menu.
See picture:

Step 2:
In the dialog box for the changes, click on “Format” and then on “Paragraph”
See picture:

Step 3:
Change the feeder on the left to the desired value (here 1cm in the example)
See picture:
Step 4:
Select the text paragraphs under the second level headings and enlarge the left indent
See picture:

Certainly in Word (as in all Office programs) there are many ways to Rome, but this is just one way to do it all. Incidentally, you can change all the possible parameters (color, font, etc.) under the styles we have just changed, or create completely your own and save them either only for the current document or in general.
In the end, the whole thing should look like this:
See picture:

5. Insert table of contents in Word
5. Insert table of contents in Word
Now that we have completed the headings of the first and second levels, we can build into the very first empty page created at the beginning.
- For this we simply place the cursor on top of the first page
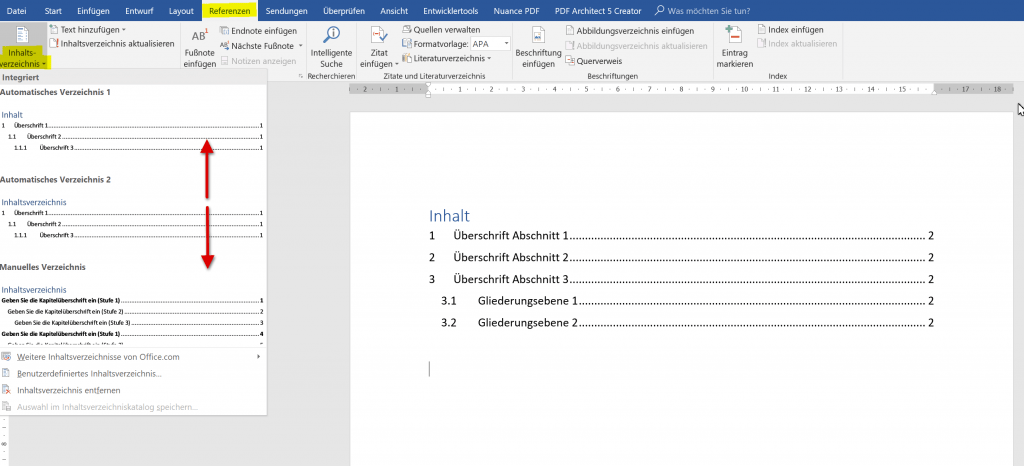
- Then click on “Table of Contents” in the “References” tab
Here you can now select an existing style sheet (usually enough), or you can create a completely new template according to your own ideas.
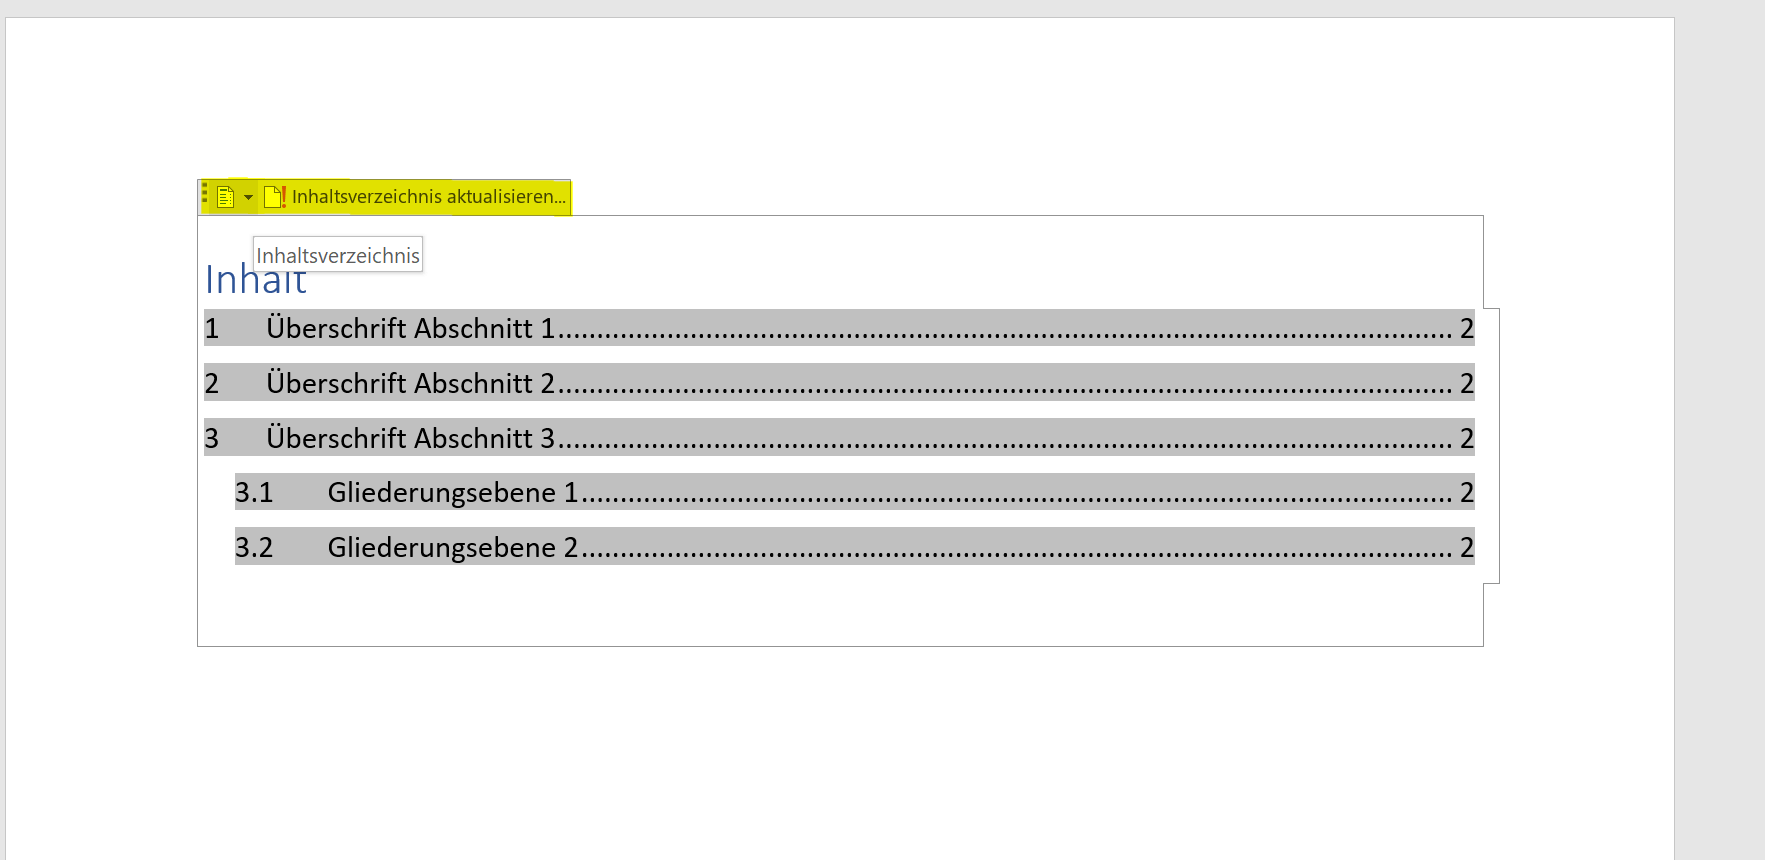
Of course, if you later make changes to the document, you can easily update it by going to the table of contents and clicking Update Table of Contents
See picture: (click to enlarge)
Insert table of contents:
Change table of contents:
Now that we have completed the headings of the first and second levels, we can build into the very first empty page created at the beginning.
- For this we simply place the cursor on top of the first page
- Then click on “Table of Contents” in the “References” tab
Here you can now select an existing style sheet (usually enough), or you can create a completely new template according to your own ideas.
Of course, if you later make changes to the document, you can easily update it by going to the table of contents and clicking Update Table of Contents
See picture: (click to enlarge)
Insert table of contents:

Change table of contents:

Popular Posts:

How AI fuels cyberattacks – and how it protects us from them
Cybercriminals are using AI for deepfakes and automated attacks. Defenses are also relying on AI: through behavioral analysis (UEBA) and automated responses (SOAR). Learn how this arms race works and how modern security strategies can protect your business.

Information overload: Protection & tips against digital stress
Constantly online, overwhelmed by news, emails & social media? Digital information overload leads to stress and concentration problems. Learn the best strategies and practical tips to effectively protect yourself, manage the chaos, and regain your focus.

Put an end to password chaos: Why a password manager is important
Passwords are constantly being stolen through data leaks. A password manager is your digital vault. It creates and stores strong, unique passwords for every service. This effectively protects you against identity theft through "credential stuffing".

Stop procrastinating: How distraction blockers can help you regain focus
Constant digital distractions kill your productivity. Distraction blockers like Forest or Freedom help you regain focus. They specifically block distractions on your PC and mobile phone and use techniques like the Pomodoro Technique. This helps you stop procrastinating.
Wer ist wo? Microsoft Teams schafft Klarheit im Hybrid-Büro
Die neue Arbeitsstandort-Funktion in Microsoft Teams zeigt, wer im Büro oder remote arbeitet. Verbessern Sie Ihre Meeting-Planung in Outlook und die Team-Koordination. Wir erklären die Vorteile, die Admin-Steuerung und die tiefe Anbindung an Microsoft Viva.

Excel Tutorial: How to quickly and safely remove duplicates
Duplicate entries in your Excel lists? This distorts your data. Our tutorial shows you, using a practical example, how to clean up your data in seconds with the "Remove Duplicates" function – whether you want to delete identical rows or just values in a column.
Offers 2024: Word & Excel Templates


Popular Posts:
How AI fuels cyberattacks – and how it protects us from them
Cybercriminals are using AI for deepfakes and automated attacks. Defenses are also relying on AI: through behavioral analysis (UEBA) and automated responses (SOAR). Learn how this arms race works and how modern security strategies can protect your business.
Information overload: Protection & tips against digital stress
Constantly online, overwhelmed by news, emails & social media? Digital information overload leads to stress and concentration problems. Learn the best strategies and practical tips to effectively protect yourself, manage the chaos, and regain your focus.
Put an end to password chaos: Why a password manager is important
Passwords are constantly being stolen through data leaks. A password manager is your digital vault. It creates and stores strong, unique passwords for every service. This effectively protects you against identity theft through "credential stuffing".
Stop procrastinating: How distraction blockers can help you regain focus
Constant digital distractions kill your productivity. Distraction blockers like Forest or Freedom help you regain focus. They specifically block distractions on your PC and mobile phone and use techniques like the Pomodoro Technique. This helps you stop procrastinating.
Wer ist wo? Microsoft Teams schafft Klarheit im Hybrid-Büro
Die neue Arbeitsstandort-Funktion in Microsoft Teams zeigt, wer im Büro oder remote arbeitet. Verbessern Sie Ihre Meeting-Planung in Outlook und die Team-Koordination. Wir erklären die Vorteile, die Admin-Steuerung und die tiefe Anbindung an Microsoft Viva.
Excel Tutorial: How to quickly and safely remove duplicates
Duplicate entries in your Excel lists? This distorts your data. Our tutorial shows you, using a practical example, how to clean up your data in seconds with the "Remove Duplicates" function – whether you want to delete identical rows or just values in a column.
Offers 2024: Word & Excel Templates