How to expand the fonts in WordPress
With WordPress you can create your own blog relatively comfortably and quickly. And even more so, the popular open source software has evolved into a solid content management system (CMS) in recent years that is finding more and more followers.
But of course, with the proliferation, the demands of users on such software grow.
The number of available fonts, and above all their customization options are a bit meager in our view, and so surely some people here wish for a little more choice.
The solution is as usual in WordPress in the appropriate plugin.
1. Install Easy Google fonts
1. Install Easy Google fonts
First we install the plugin Easy Google Fonts.
You can do this either in our description via the interface in WordPress, or you can download the plugin separately here and then install it externally.
Go to the backend of your page in the left menu bar to the point: Plugins – Install
See picture: (click to enlarge)
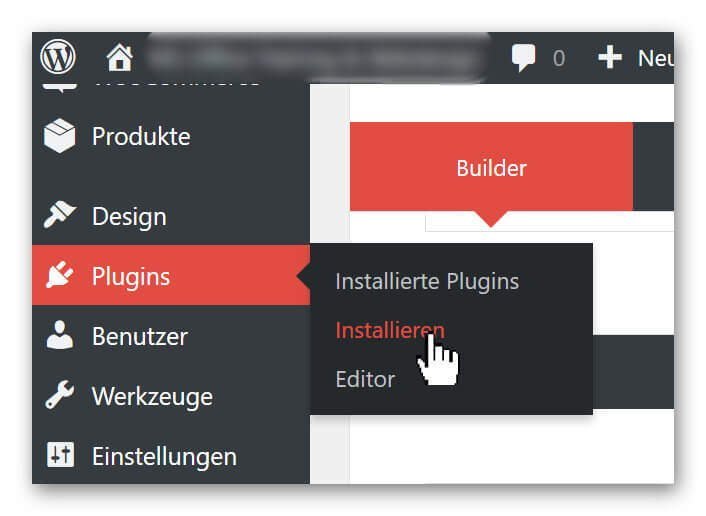
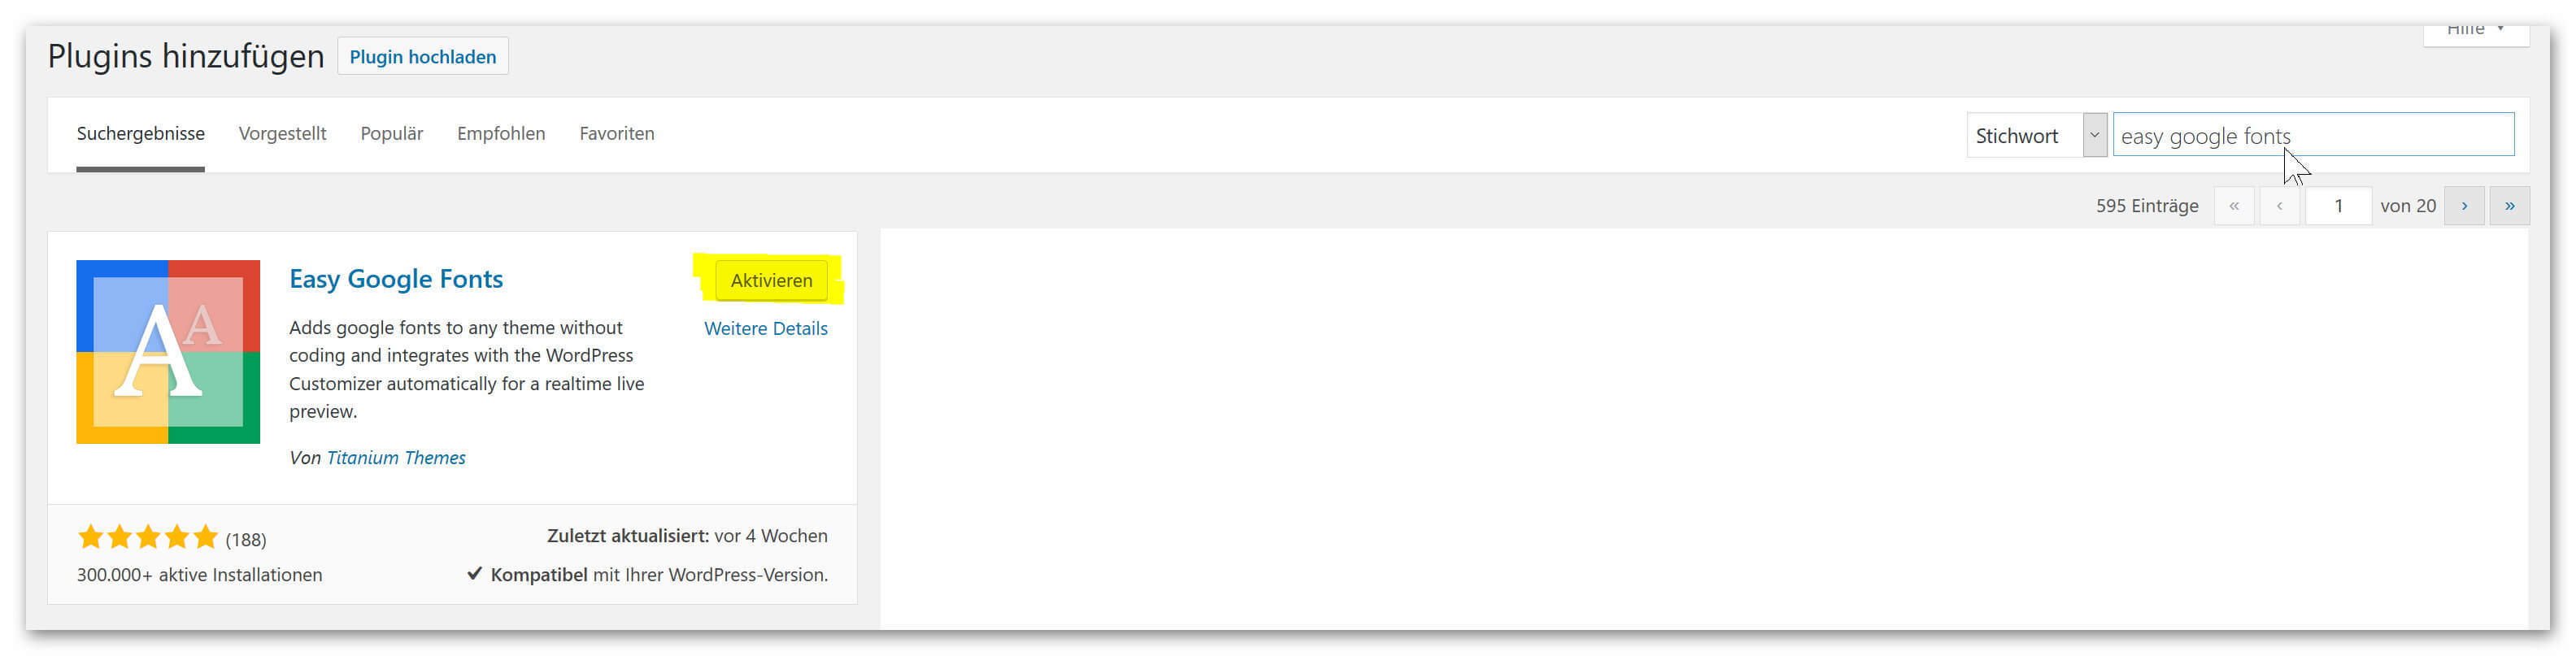
Here you have the option of either uploading plugins that can not be found via the search directly from your hard disk, or simply using the search function to simply search for the plugin.
Simply enter: Easy Google Fonts in the search field, and the desired plug-in will appear in the selection, where you can then simply install it via the corresponding button and finally activate it.
See picture: (click to enlarge)

First we install the plugin Easy Google Fonts.
You can do this either in our description via the interface in WordPress, or you can download the plugin separately here and then install it externally.
Go to the backend of your page in the left menu bar to the point: Plugins – Install
See picture:

Here you have the option of either uploading plugins that can not be found via the search directly from your hard disk, or simply using the search function to simply search for the plugin.
Simply enter: Easy Google Fonts in the search field, and the desired plug-in will appear in the selection, where you can then simply install it via the corresponding button and finally activate it.
See picture:

2. Set Font Control Name
2. Set Font Control Name
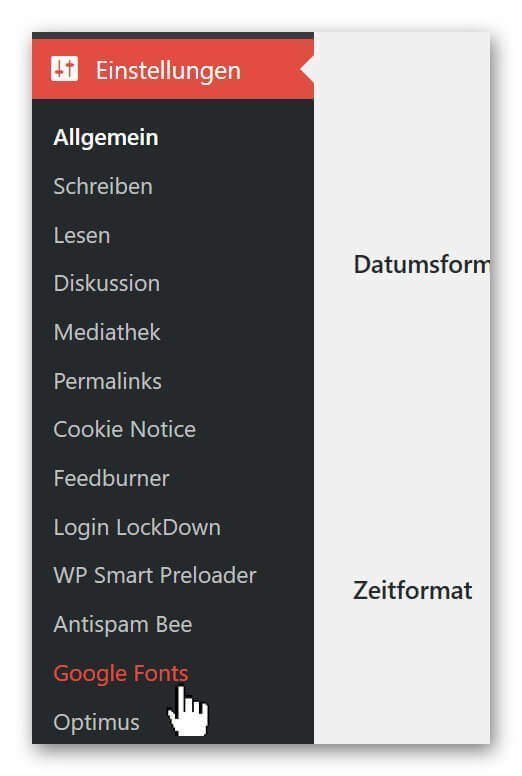
Since you have the possibility to create several font groups with Easy Google fonts, we first have to define a group and name it after the installation.
To do this, go to the back of your page again in the menu bar on the left: Settings – Google Fonts
See picture: (click to enlarge)
And assign a name under the tab: Edit Font Controls of the font group.
See picture: (click to enlarge)

Now we have created the basis to edit our font group freely.
Since you have the possibility to create several font groups with Easy Google fonts, we first have to define a group and name it after the installation.
To do this, go to the back of your page again in the menu bar on the left: Settings – Google Fonts
See picture:
And assign a name under the tab: Edit Font Controls of the font group.
See picture:

3. Edit and assign fonts
3. Edit and assign fonts
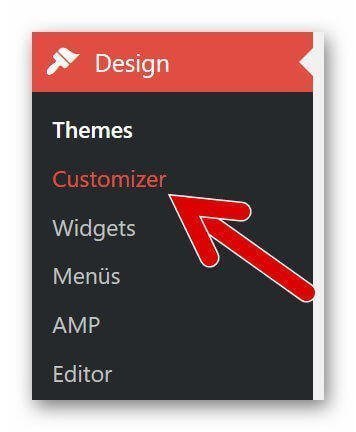
In order to be able to assign and edit our fonts to the individual types of headings (H1 – H6) as well as to the paragraphs, we have to select again in the backend of our page in the left menu bar under: Design – Customizer.
See picture: (click to enlarge)
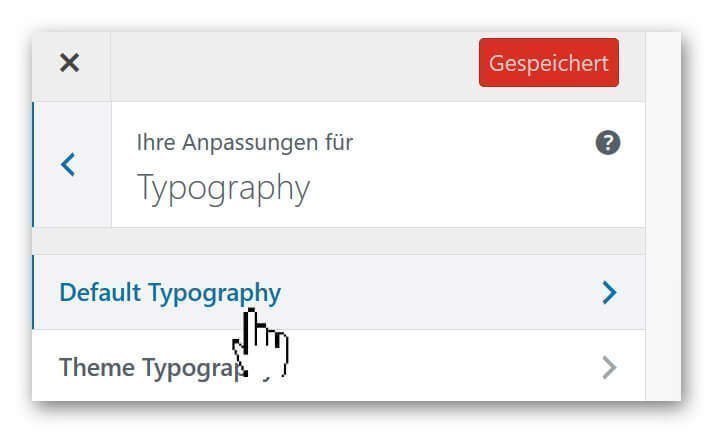
There you go under: Typography on Default Typography
See picture (click to enlarge)

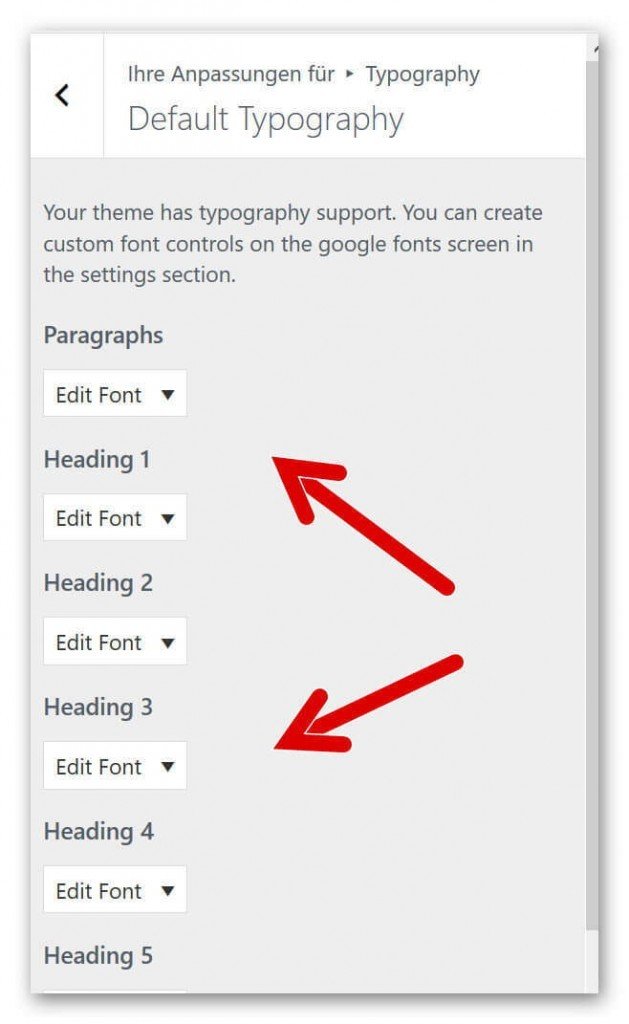
and then you are right in the settings area of Easy Google Fonts where all available header types and other fonts are displayed.
See picture (click to enlarge)
In order to be able to assign and edit our fonts to the individual types of headings (H1 – H6) as well as to the paragraphs, we have to select again in the backend of our page in the left menu bar under: Design – Customizer.
See picture:
There you go under: Typography on Default Typography
See picture:


and then you are right in the settings area of Easy Google Fonts where all available header types and other fonts are displayed.
See picture:

4. Adjust size, colors and distances
4. Adjust size, colors and distances
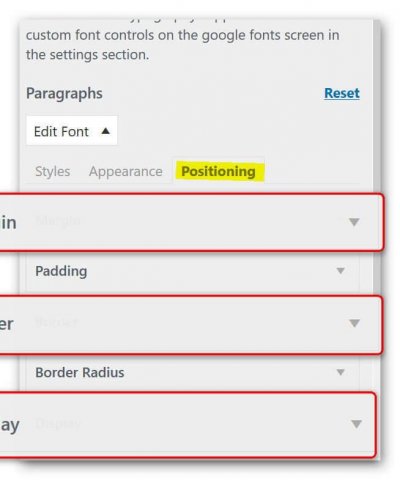
There are hardly any options that you will miss with this really fantastic plugin.
Not only do we have the ability to customize the font (for example, Times New Roman, Antic Slab, etc.), but we can also set the color, spacing, height, positioning, and more for each type of font.
See picture: (click to enlarge)
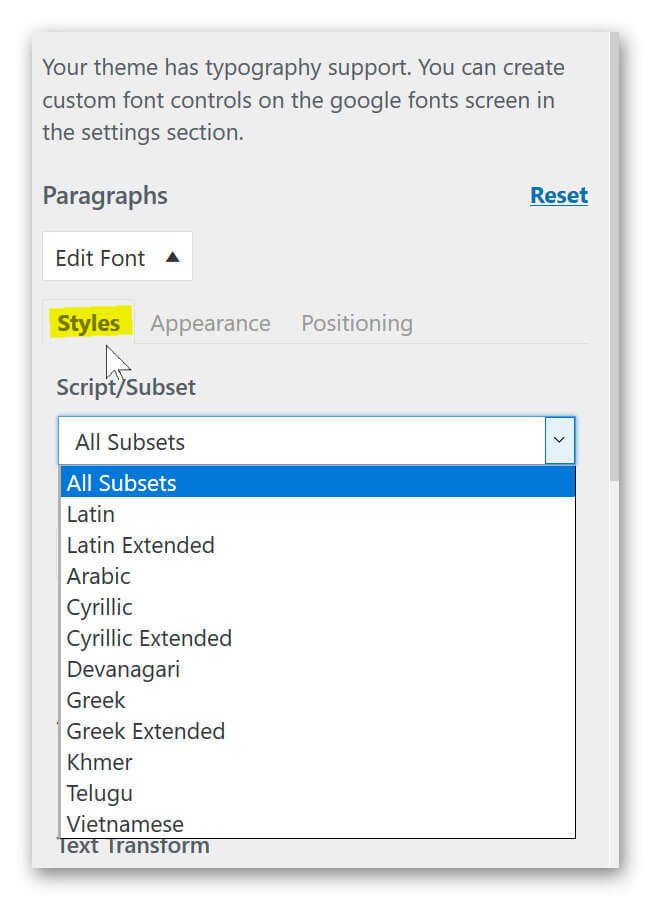
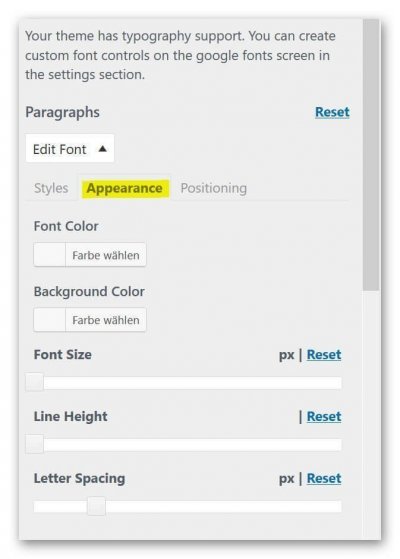
There are hardly any options that you will miss with this really fantastic plugin.
Not only do we have the ability to customize the font (for example, Times New Roman, Antic Slab, etc.), but we can also set the color, spacing, height, positioning, and more for each type of font.
See picture:


Popular Posts:

Dynamic ranges in Excel: OFFSET function
The OFFSET function in Excel creates a flexible reference. Instead of fixing =SUM(B5:B7), the function finds the range itself, e.g., for the "last 3 months". Ideal for dynamic charts or dashboards that grow automatically.

Mastering the INDIRECT function in Excel
The INDIRECT function in Excel converts text into a real reference. Instead of manually typing =January!E10, use =INDIRECT(A2 & "!E10"), where A2 contains 'January'. This allows you to easily create dynamic summaries for multiple worksheets.

From assistant to agent: Microsoft’s Copilot
Copilot is growing up: Microsoft's AI is no longer an assistant, but a proactive agent. With "Vision," it sees your Windows desktop; in M365, it analyzes data as a "Researcher"; and in GitHub, it autonomously corrects code. The biggest update yet.

Windows 12: Where is it? The current status in October 2025
Everyone was waiting for Windows 12 in October 2025, but it didn't arrive. Instead, Microsoft is focusing on Windows 11 25H2 and "Copilot+ PC" features. We'll explain: Is Windows 12 canceled, postponed, or is it already available as an AI update for Windows 11?

Blocking websites on Windows using the hosts file
Want to block unwanted websites in Windows? You can do it without extra software using the hosts file. We'll show you how to edit the file as an administrator and redirect domains like example.de to 127.0.0.1. This will block them immediately in all browsers.

The “Zero Inbox” method with Outlook: How to permanently get your mailbox under control.
Caught red-handed? Your Outlook inbox has 1000+ emails? That's pure stress. Stop the email deluge with the "Zero Inbox" method. We'll show you how to clean up your inbox and regain control using Quick Steps and rules.
Offers 2024: Word & Excel Templates


Popular Posts:
Dynamic ranges in Excel: OFFSET function
The OFFSET function in Excel creates a flexible reference. Instead of fixing =SUM(B5:B7), the function finds the range itself, e.g., for the "last 3 months". Ideal for dynamic charts or dashboards that grow automatically.
Mastering the INDIRECT function in Excel
The INDIRECT function in Excel converts text into a real reference. Instead of manually typing =January!E10, use =INDIRECT(A2 & "!E10"), where A2 contains 'January'. This allows you to easily create dynamic summaries for multiple worksheets.
From assistant to agent: Microsoft’s Copilot
Copilot is growing up: Microsoft's AI is no longer an assistant, but a proactive agent. With "Vision," it sees your Windows desktop; in M365, it analyzes data as a "Researcher"; and in GitHub, it autonomously corrects code. The biggest update yet.
Windows 12: Where is it? The current status in October 2025
Everyone was waiting for Windows 12 in October 2025, but it didn't arrive. Instead, Microsoft is focusing on Windows 11 25H2 and "Copilot+ PC" features. We'll explain: Is Windows 12 canceled, postponed, or is it already available as an AI update for Windows 11?
Blocking websites on Windows using the hosts file
Want to block unwanted websites in Windows? You can do it without extra software using the hosts file. We'll show you how to edit the file as an administrator and redirect domains like example.de to 127.0.0.1. This will block them immediately in all browsers.
The “Zero Inbox” method with Outlook: How to permanently get your mailbox under control.
Caught red-handed? Your Outlook inbox has 1000+ emails? That's pure stress. Stop the email deluge with the "Zero Inbox" method. We'll show you how to clean up your inbox and regain control using Quick Steps and rules.
Offers 2024: Word & Excel Templates