Excel Tutorial: How to quickly and safely remove duplicates
Anyone who works with lists knows the problem: email distribution lists, customer lists, or order data are often “polluted” and contain duplicate entries. These duplicates distort analyses and create chaos.
Fortunately, Excel has a built-in function that solves this problem in seconds.

A practical example: An order list
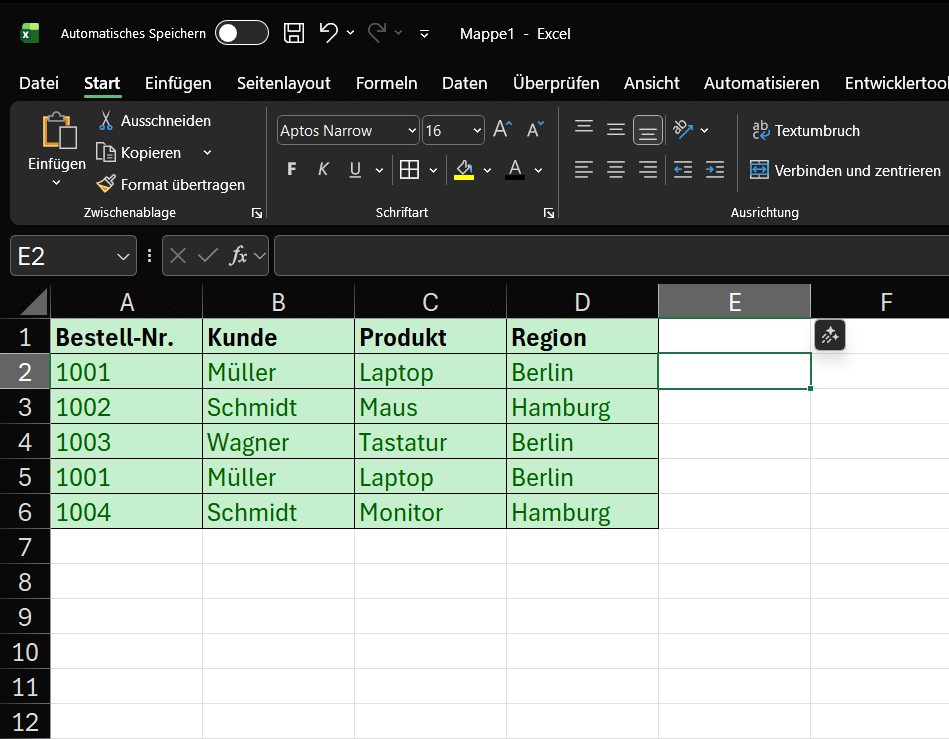
Imagine we have the following table with order data. We immediately see that some entries are repeated.
Our example data (range A1:D6):
Goals:
- Goal A: We want to remove exactly identical rows (row 5 is a duplicate of row 2).
- Goal B: We want to obtain a unique list of all customers (Müller, Schmidt, Wagner).
Step-by-step instructions: How to remove duplicates
The “Remove Duplicates” function permanently deletes data.
⚠️ Important Security Note: Before you begin, always copy your worksheet or create a backup of your file. This way, if you make a mistake, you can revert to the original.
Step 1: Select the Data Range
- Click in your data table. Excel usually detects the contiguous range automatically. However, the safest method is to manually select the entire range (in our example, A1:D6) with your mouse.
Step 2: Finding the Function
- Go to the “Data” tab in the ribbon.
- Find the “Data Tools” group.
- Click the “Remove Duplicates” icon.
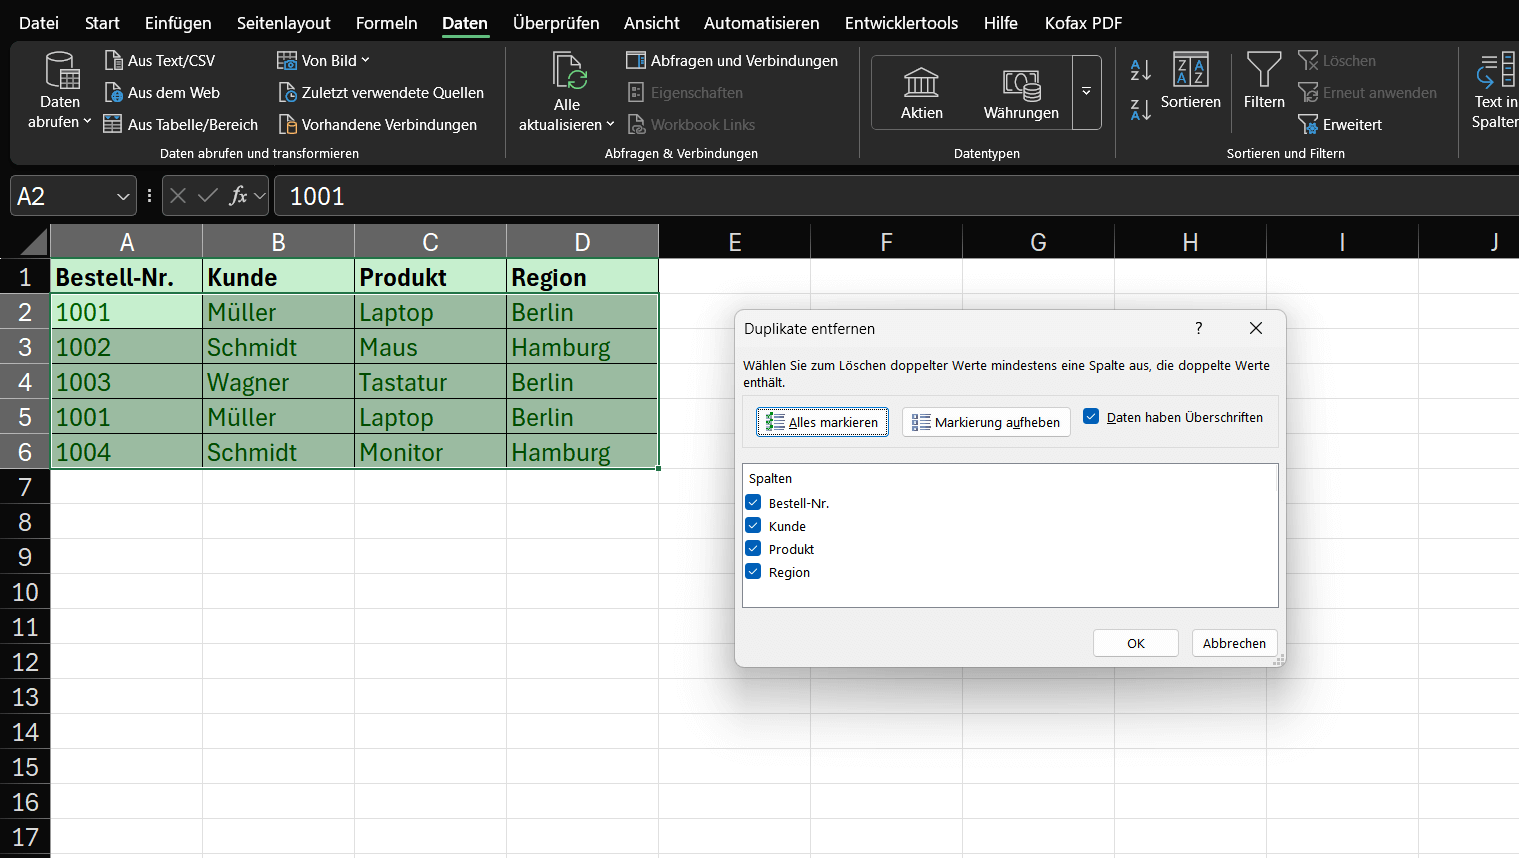
Step 3: The Dialog Box (The Most Important Step)
- A small window will open. This is the control center for the deletion process.
- “Data has headers”: Since our table has headers in row 1 (Order No., Customer, etc.), be sure to leave this checkbox selected. Excel will then ignore this row when deleting.
- Columns: Here, Excel lists all the columns from your selection.
… This is where Excel decides what it considers a “duplicate”.
The two scenarios (Goal A vs. Goal B)
Scenario A: Deleting Exactly Identical Rows
Goal: We want to delete only row 5, as it is identical to row 2 in every column.
- Open “Remove Duplicates” (as described in steps 1 & 2).
- In the dialog box (step 3), ensure that ALL columns (Order No., Customer, Product, Region) are checked.
- Click “OK”.
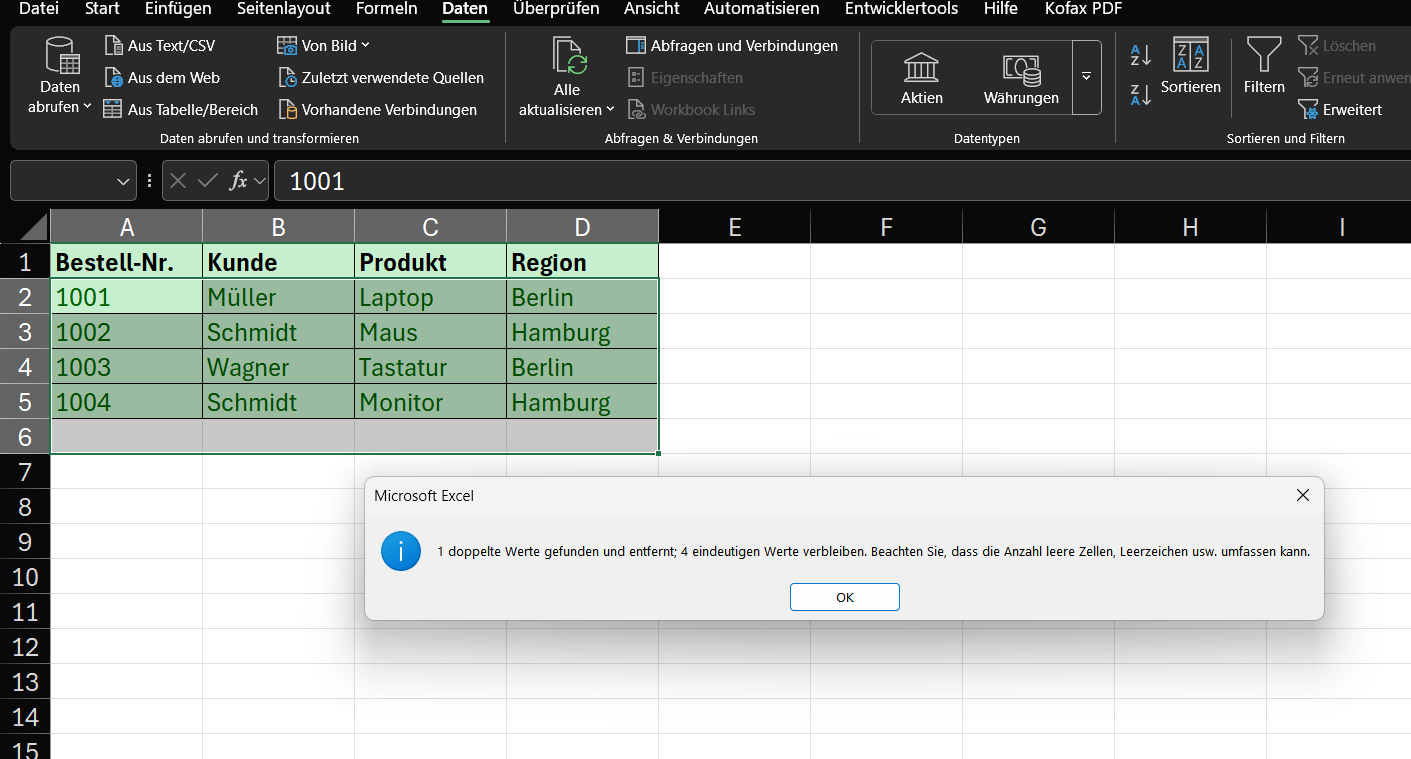
Result: Excel compares entire rows. Since only row 5 is an exact match for row 2, it is deleted. Excel reports: “1 duplicate found and removed; 4 unique values remain.”
Note: Row 6 (Schmidt, Monitor) is NOT deleted, as it differs (in the product field) from row 3 (Schmidt, Mouse).
Scenario B: Creating a unique list based on ONE column
Goal: We are not interested in the entire table. We only want a unique list of all customers (Müller, Schmidt, Wagner).
- Open “Remove Duplicates”.
- In the dialog box, first click “Deselect” to remove all checkmarks.
- Check only the column you want to check for uniqueness – in our case, “Customer”.
- Click “OK”.
Result: Excel only looks in column B.
- Row 2 “Müller” is kept.
- Row 3 “Schmidt” is kept.
- Row 4 “Wagner” is kept.
- Row 5 “Müller” (duplicate!) is deleted.
- Row 6 “Schmidt” (duplicate!) is deleted.
- Excel reports: “2 duplicates Found and removed; 3 unique values remain.
💡What happens: Excel always keeps the first entry it finds in the list and deletes all subsequent duplicates (based on the selected columns).
Summary (Pro tips)
Make a backup: Always copy the worksheet first!
- All columns = Deletes only rows that are completely identical.
- One column = Creates a unique list based on this one column (e.g., listing all customers only once).
Caution: This function deletes the entire row. If you select only “Customer” in Scenario B, the associated order data (laptop, mouse, etc.) will also be deleted. If you don’t want this, copy the customer column to a separate area first and apply the function only there.
Beliebte Beiträge
Funding for Balcony Power Plants per Federal State
Since January 1st, 2023, 19% VAT has been waived in Germany for the purchase of balcony solar systems. There is also federal funding. We have listed how much funding you can receive for each federal state.
NetzDG becomes the Digital Services Act
The Digital Services Act (DSA) must be gradually implemented by February 17, 2024 and will replace the NetzDG, which has been in force since October 1, 2017.
Import Stock Quotes into Excel – Tutorial
Importing stock quotes into Excel is not that difficult. And you can do a lot with it. We show you how to do it directly without Office 365.
Create Excel Budget Book – with Statistics – Tutorial
Create your own Excel budget book with a graphical dashboard, statistics, trends and data cut-off. A lot is possible with pivot tables and pivot charts.
Excel random number generator – With Analysis function
You can create random numbers in Excel using a function. But there are more possibilities with the analysis function in Excel.
Excel Database with Input Form and Search Function
So erstellen Sie eine Datenbank mit Eingabemaske und Suchfunktion OHNE VBA KENNTNISSE in Excel ganz einfach. Durch eine gut versteckte Funktion in Excel geht es recht einfach.

