Insert controls and form fields in Word
With Microsoft Word you can not only comfortably create letters, lists and articles with tables of contents, but also go one step further, and Set up your own forms using controls.
But where are these controls, and how can you put them into your document?
Unfortunately, they are hidden by default and need to be unlocked first.
You can read in our article how to use controls in Word 2016 without frustration.

1. Enable controls in Word
1. Enable controls in Word
In the default installation of Word 2016, you will not initially have access to the controls, so we’ll need to enable their visibility first.
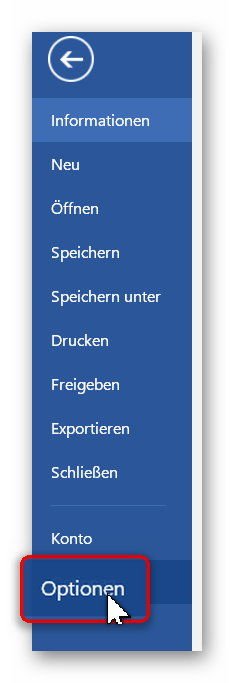
To do this, click on the tab in an open Word document:
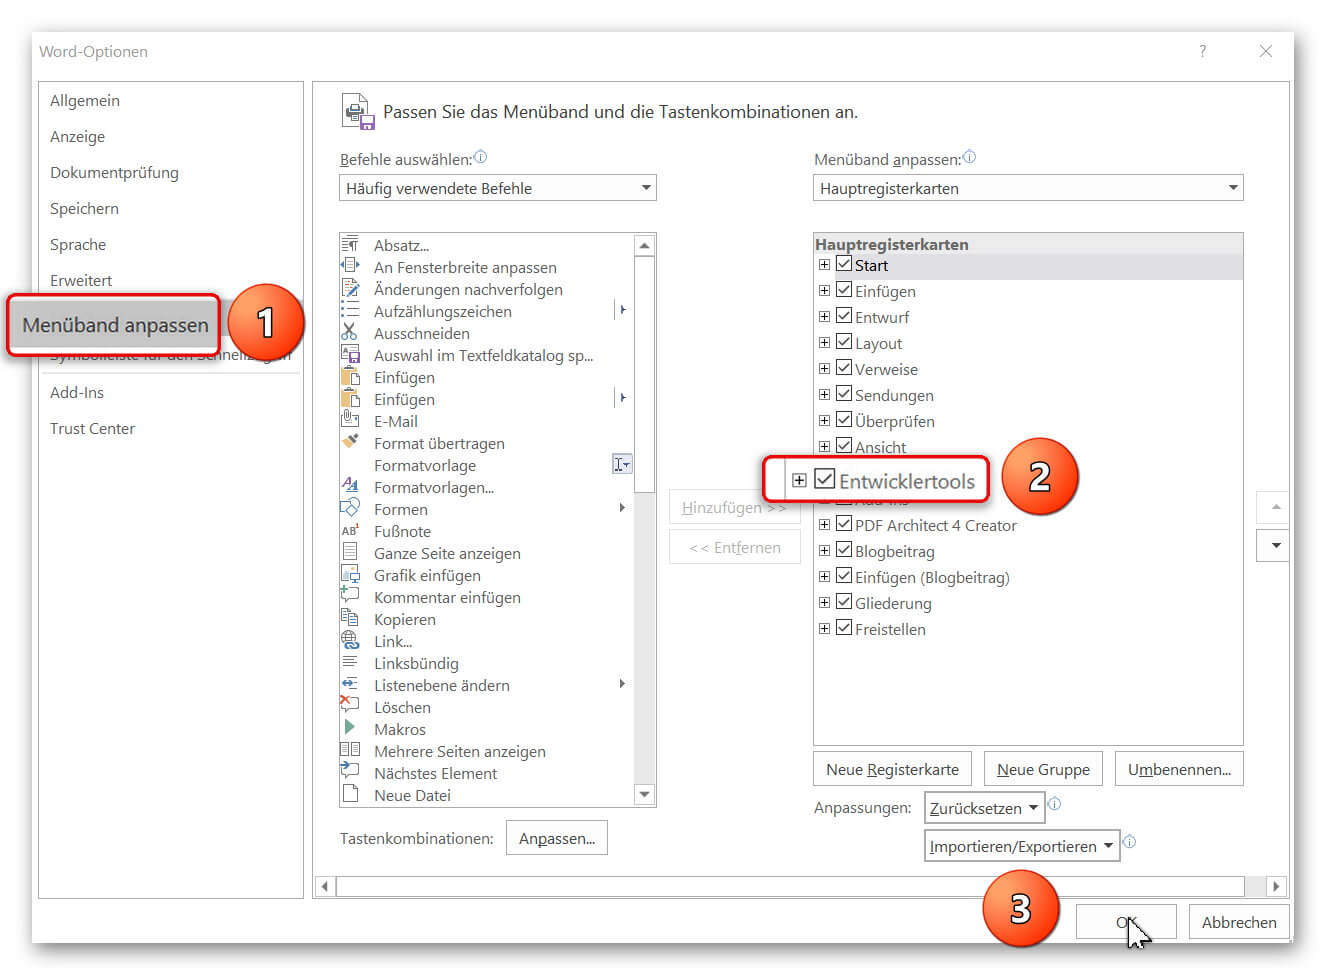
- “File” – “Options” – “Tap Ribbon”.
- And put the hook there in “developer tools”.
See picture (click to enlarge)
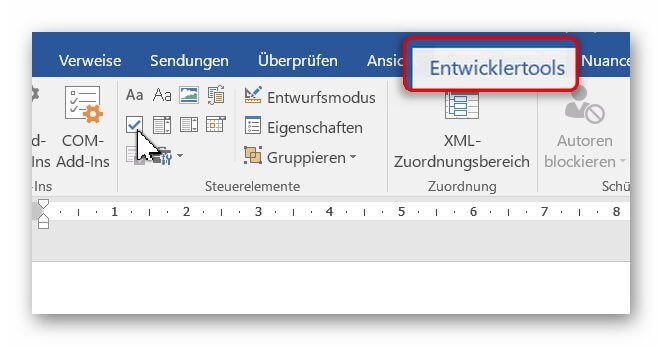
From now on, every Word document has the new Developer Tools tab, which gives you access to various controls.
2. Add control check box in Word
2. Add control check box in Word
In our first example we would like to insert the classic “checkbox” in our document to create a form.
To do this, we first position the cursor at the desired position in the document, and then select the check box in the Developer tab.
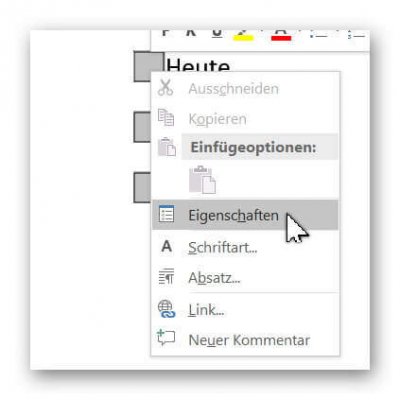
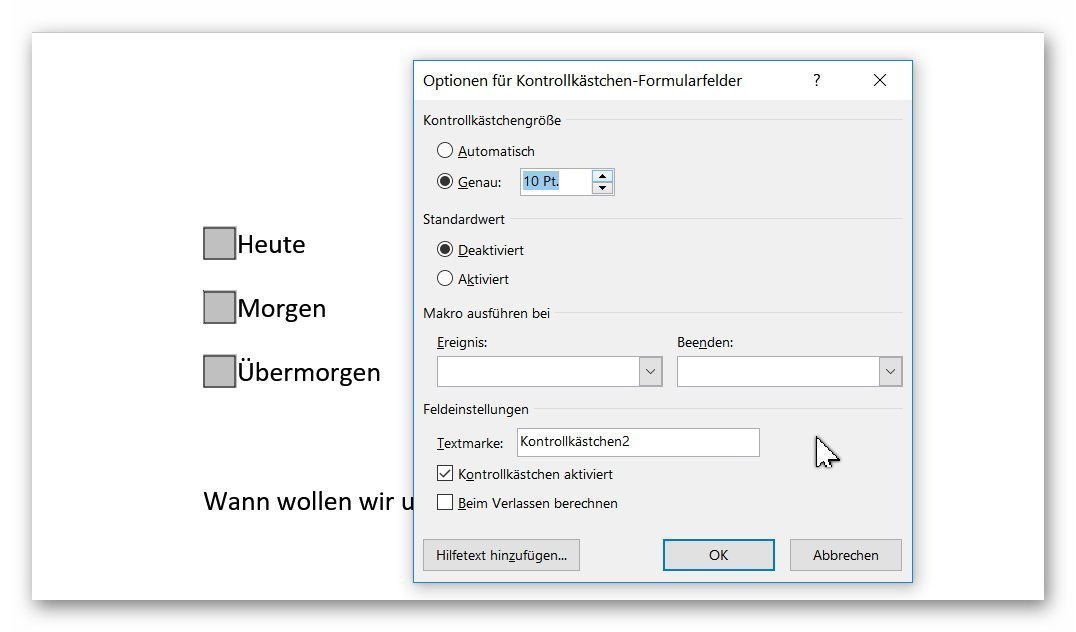
After we have positioned our check boxes, we can also adjust them a bit by clicking the right mouse button over the checkbox in the context menu on “Properties”, and there can make various settings, such as:
“activated by default”, “the size”, or even a “help text”,
which is automatically displayed as a completion help to the future user when pressing F1.
See picture (click to enlarge)
3. Insert dropdown box in Word
3. Insert dropdown box in Word
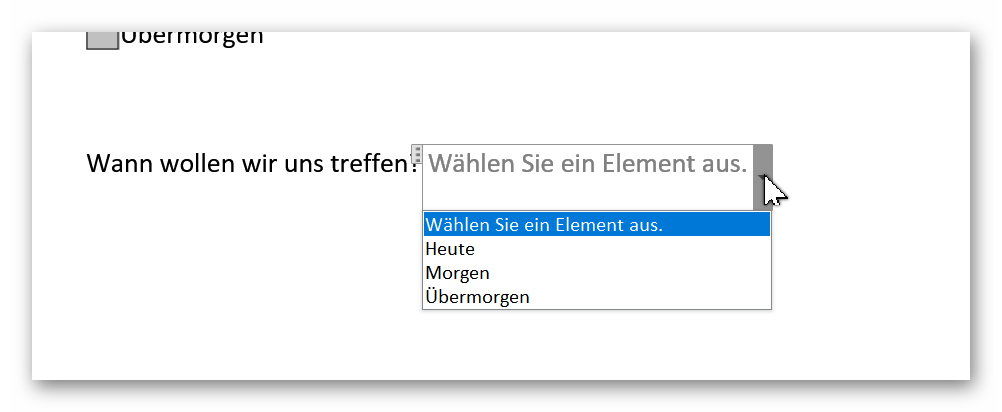
In our 2nd example we make it even more comfortable for the later user and offer a drop-down list to choose from.
This is especially useful when there are many selection points available, and you do not want to obstruct your document with check boxes.
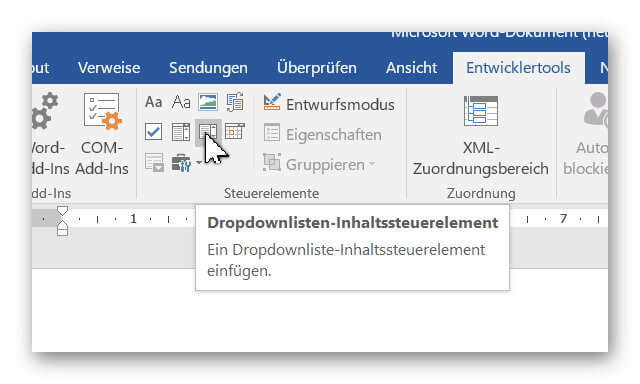
To do this, reposition the cursor at the desired position and select the “Drop-down list control” under the Developer tools.
See picture (click to enlarge)
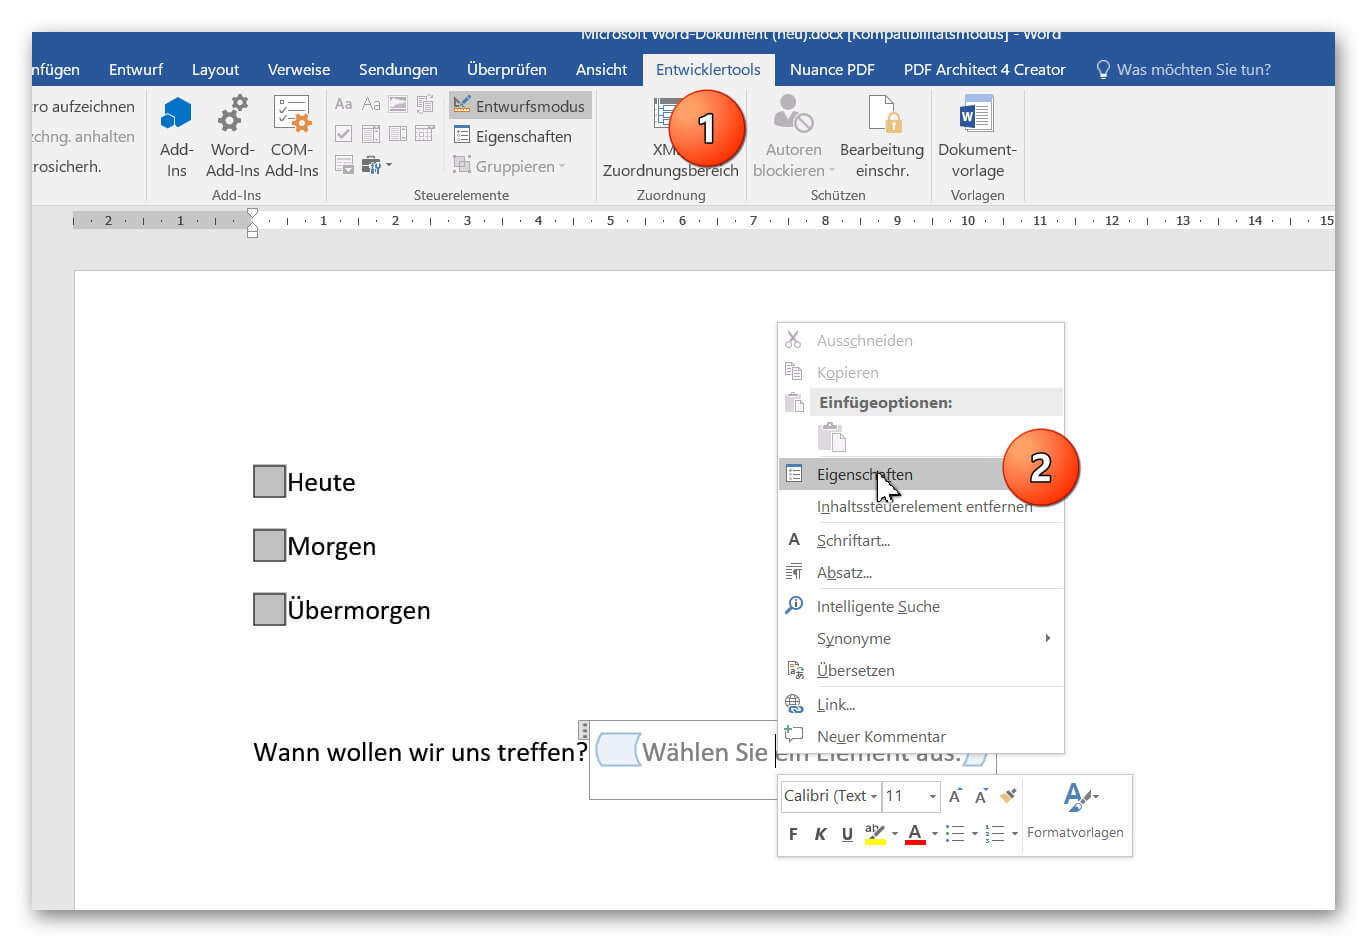
In order to populate our dropdown list with content from which to later select a user, we have to switch to “Design Mode”, and then right-click over the element in the context menu “Properties”.
See picture: (click to enlarge)
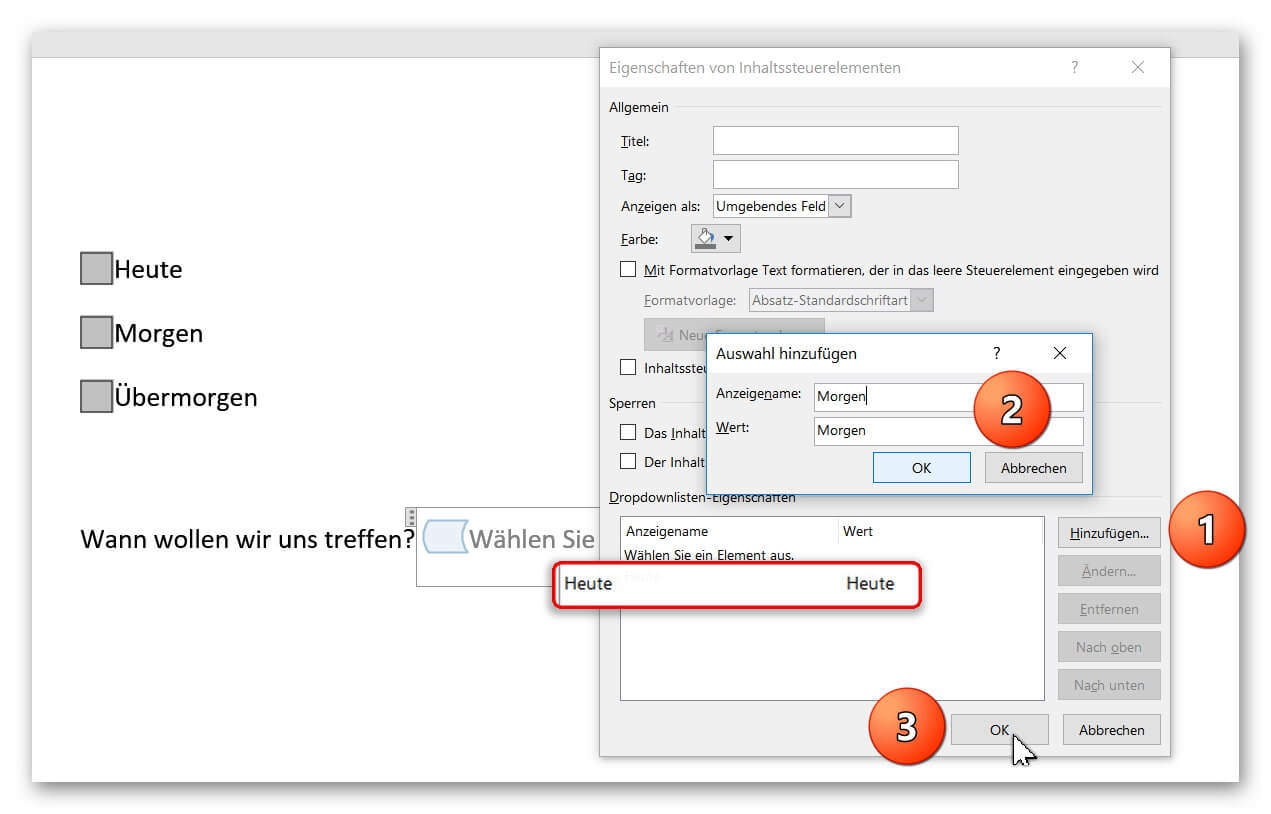
Here we can customize our dropdown box, and provide various choices as you wish.
Simply click on “Add” in the properties and enter the options you want to include later.
Finally, all you have to do is confirm with “Ok” and quit “Draft mode”.
See picture: (click to enlarge)
4. Activate Word processing protection
4. Activate Word processing protection
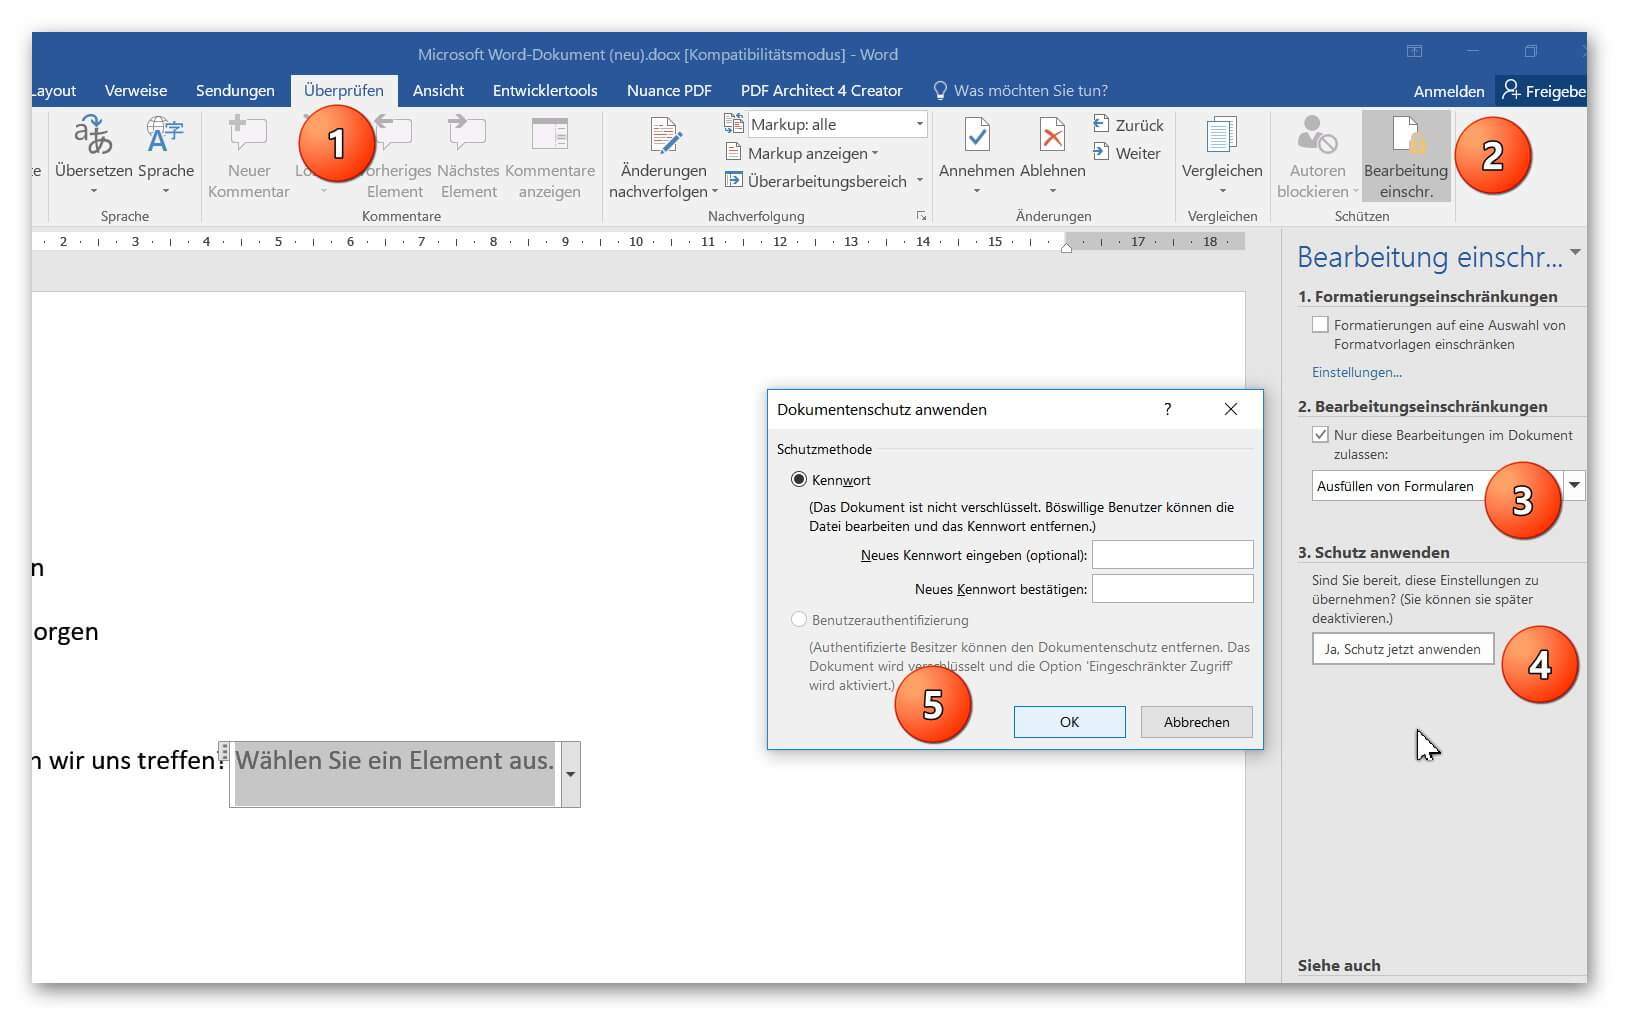
In order to finally receive a document in which our controls can take over their function (for example as a form), we have to activate processing protection as the final step.
Click on the tab:
- “Review” – “Restrict Editing”
- And there on “Processing restrictions (filling in forms)” – Apply protection now.
Note:
It is best to assign a password to prevent unauthorized editing of the form.
See picture:
Then simply save the document as a normal Word file (docx).
When opening the file later, you can only fill in the form fields that you have set up for it.
Popular Posts:
Integrate and use ChatGPT in Excel – is that possible?
ChatGPT is more than just a simple chatbot. Learn how it can revolutionize how you work with Excel by translating formulas, creating VBA macros, and even promising future integration with Office.
Create Out of Office Notice in Outlook
To create an Out of Office message in Microsoft Outlook - Office 365, and start relaxing on vacation
The best backup solutions for your data
Keep your data safe and secure! Discover our best backup solutions for your valuable information now. Because safety is the be-all and end-all - and we have the perfect tips.
Internet Addiction – A serious look at a growing problem
Internet addiction is just as serious an illness as alcohol or drug addiction. Just that this is a mental illness. In this article we want to go into the phenomenon in more detail and provide assistance.
Main keyboard shortcuts in Windows 10/11
Entdecken Sie die wichtigsten Shortcuts in Windows 11, um Ihre Produktivität zu steigern. Von allgemeinen Befehlen bis hin zu spezifischen Fenster-Management- und System-Shortcuts, lernen Sie, wie Sie mit diesen Tastenkombinationen effizienter arbeiten können.
Encrypt USB stick – These options are available
Protecting sensitive data is essential. Encrypting USB sticks provides an extra layer of security. Whether it's built-in software, operating system features, third-party software, or hardware encryption, there are numerous options.

