Connect the laptop with desktop PC in the home network
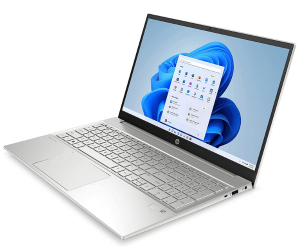
Working on a project on different devices has long since become a matter of course. And with the increase in the home office, this flexible way of working has even increased significantly. However, sooner or later users will face a really annoying problem. For example, you are working on a project on your desktop PC, but want or need to continue this work later on the laptop while you are out and about.
So you first have to copy the necessary files to a USB stick or an external hard drive, and then to the laptop, and later copy the updated file back to the desktop so that both files are the same. As a rule, apart from the actual project, you also do other work on the devices, so that it becomes more and more confusing where the current data is now.
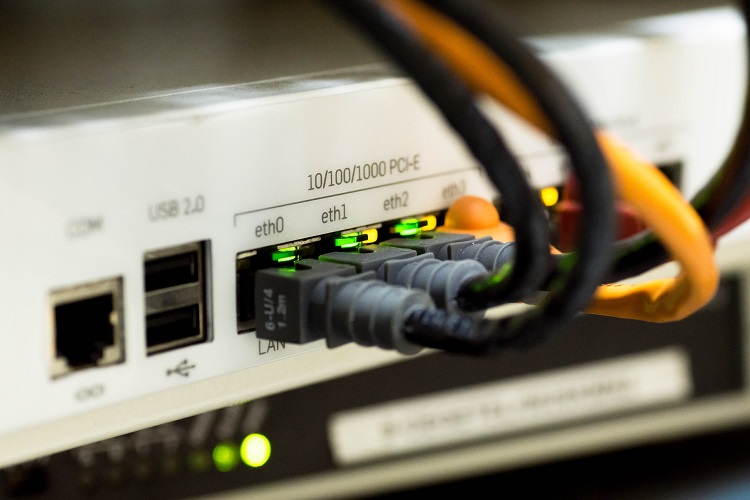
One solution to the problem is of course to use cloud storage such as Google Drive via Backup and Sync, or Microsoft One Drive. The prerequisite for the whole thing to work smoothly is of course a stable internet connection, which may not always be available in the mobile area.
We would like to explain how you can first connect your laptop to your desktop PC in the home network, and how you can always keep the data on both devices up to date.
Connect the laptop with desktop PC in the home network
Working on a project on different devices has long since become a matter of course. And with the increase in the home office, this flexible way of working has even increased significantly. However, sooner or later users will face a really annoying problem. For example, you are working on a project on your desktop PC, but want or need to continue this work later on the laptop while you are out and about.
So you first have to copy the necessary files to a USB stick or an external hard drive, and then to the laptop, and later copy the updated file back to the desktop so that both files are the same. As a rule, apart from the actual project, you also do other work on the devices, so that it becomes more and more confusing where the current data is now.

One solution to the problem is of course to use cloud storage such as Google Drive via Backup and Sync, or Microsoft One Drive. The prerequisite for the whole thing to work smoothly is of course a stable internet connection, which may not always be available in the mobile area.
We would like to explain how you can first connect your laptop to your desktop PC in the home network, and how you can always keep the data on both devices up to date.
1. Microsoft network share
1. Microsoft network share
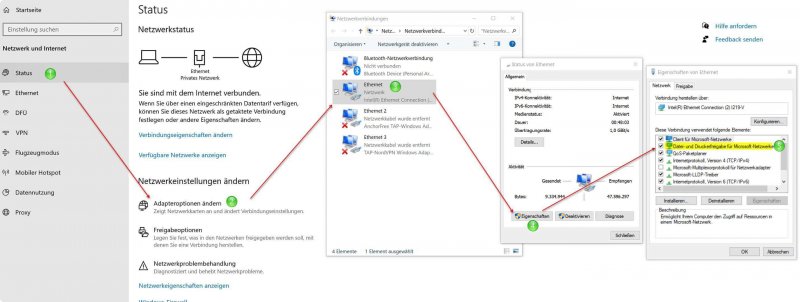
First, activate file and printer sharing for Microsoft networks on both devices (desktop PC & laptop). To do this, proceed as follows:
- In the Windows 10 settings menu, click on “Network and Internet“
- Then change to adapter options
- Next, double click on your active network
- In the Window “Status of Ethernet“ auf “Properties“
- Check the Box next to “File and printer sharing for Microsoft networks“
See fig. (Click to enlarge)
With this, we have basically created the necessary basis to enable a network connection between our devices in the home network.
2. Edit workgroups in Windows 10
2. Edit workgroups in Windows 10
In the next step we assign a workgroup name. To do this, proceed as follows:
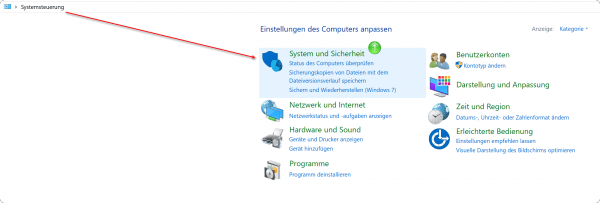
- In the Windows 10 Control Panel click on “System and Security“
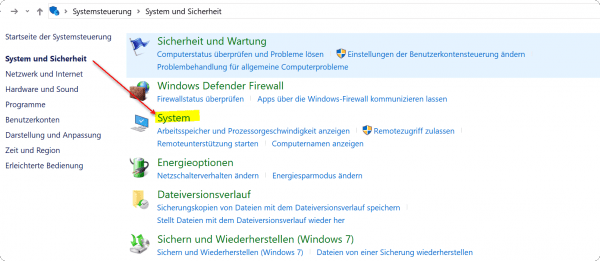
- Then go to the point “System“
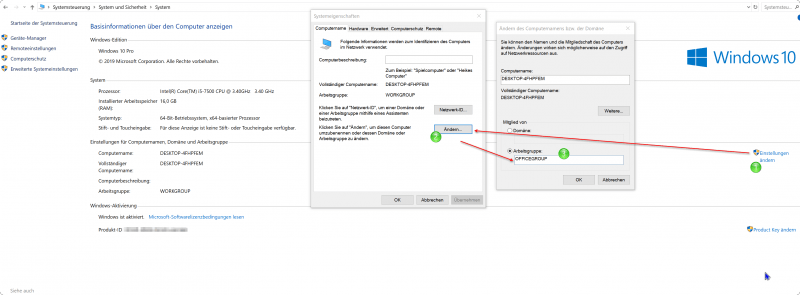
- In the following window you will see the basic information about your computer, and there click on “Change settings“
- In the “System Properties“ window go to “Change“ and assign a workgroup name
- After changing the workgroup name, you will be prompted to restart, which you should also do so that the changes take effect.
Note:
So that everything works in the end, the workgroup names must be the same on both devices (laptop and desktop PC).
See fig. (Click to enlarge)
3. Setup Windows 10 network sharing
3. Setup Windows 10 network sharing
In the last step, we now have to check the Windows 10 network sharing settings and adjust them if necessary. To do this, proceed as follows:
- Select the Network and Sharing Center in the Control Panel again
- Go to “Change advanced sharing settings“
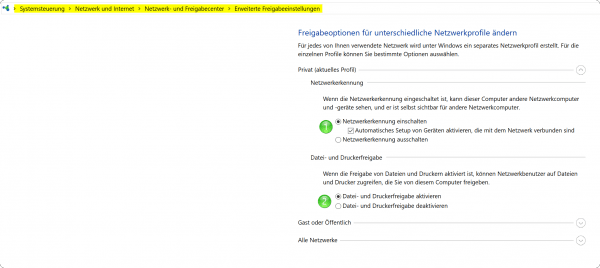
- Turn on network discovery there and enable file and printer sharing
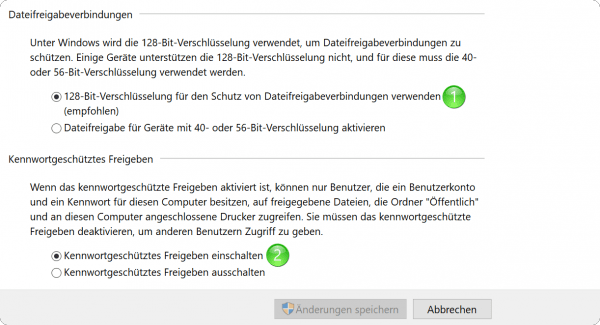
- Enable password-protected sharing
See fig. (Click to enlarge)
If you now go to “Network“ in Windows Explorer, you should see your network PC / laptop and be able to exchange files accordingly.
Note:
Problems can still arise when accessing the files of the respective network device. Please make sure to check the settings in your antivirus program.
See fig. (Click to enlarge)
4. Software solution for file synchronization
4. Software solution for file synchronization
What we did in the previous steps was basically necessary first to be able to access the files of a network computer under Windows 10. But we are still faced with the challenge of automatically keeping the files up to date on both devices.
Because as already mentioned at the beginning, it all becomes very confusing at some point on which network computer the latest data is. Fortunately, there are also free software solutions with which you can also make incremental backups. What does that mean that the software checks the folders to be synchronized on both devices and only accepts the latest version there. The files and folders that have not been changed do not need to be synchronized. This of course saves a lot of time, depending on the number of folders to be synchronized.
Software solutions for file synchronization:
Popular Posts:
Integrate and use ChatGPT in Excel – is that possible?
ChatGPT is more than just a simple chatbot. Learn how it can revolutionize how you work with Excel by translating formulas, creating VBA macros, and even promising future integration with Office.
Create Out of Office Notice in Outlook
To create an Out of Office message in Microsoft Outlook - Office 365, and start relaxing on vacation
The best backup solutions for your data
Keep your data safe and secure! Discover our best backup solutions for your valuable information now. Because safety is the be-all and end-all - and we have the perfect tips.
Internet Addiction – A serious look at a growing problem
Internet addiction is just as serious an illness as alcohol or drug addiction. Just that this is a mental illness. In this article we want to go into the phenomenon in more detail and provide assistance.
Main keyboard shortcuts in Windows 10/11
Entdecken Sie die wichtigsten Shortcuts in Windows 11, um Ihre Produktivität zu steigern. Von allgemeinen Befehlen bis hin zu spezifischen Fenster-Management- und System-Shortcuts, lernen Sie, wie Sie mit diesen Tastenkombinationen effizienter arbeiten können.
Encrypt USB stick – These options are available
Protecting sensitive data is essential. Encrypting USB sticks provides an extra layer of security. Whether it's built-in software, operating system features, third-party software, or hardware encryption, there are numerous options.

